Plumbing / Toilets Urinals
Installation guide for Geberit Shower Channel CleanLine
Comprehensive installation and maintenance guide for the Geberit Shower Channel CleanLine. Includes detailed steps for three installation scenarios (A, B, and C) and instructions for cleaning the channel.
Table of contents
Manual images
Click an image to enlargeQuick guide from the manual
This document provides installation instructions for the Geberit Shower Channel CleanLine. The installation process is divided into three distinct scenarios (A, B, and C) depending on your specific drainage configuration. Please identify the correct scenario for your setup before beginning the installation.
Installation scenarios
The manual outlines three primary installation methods:
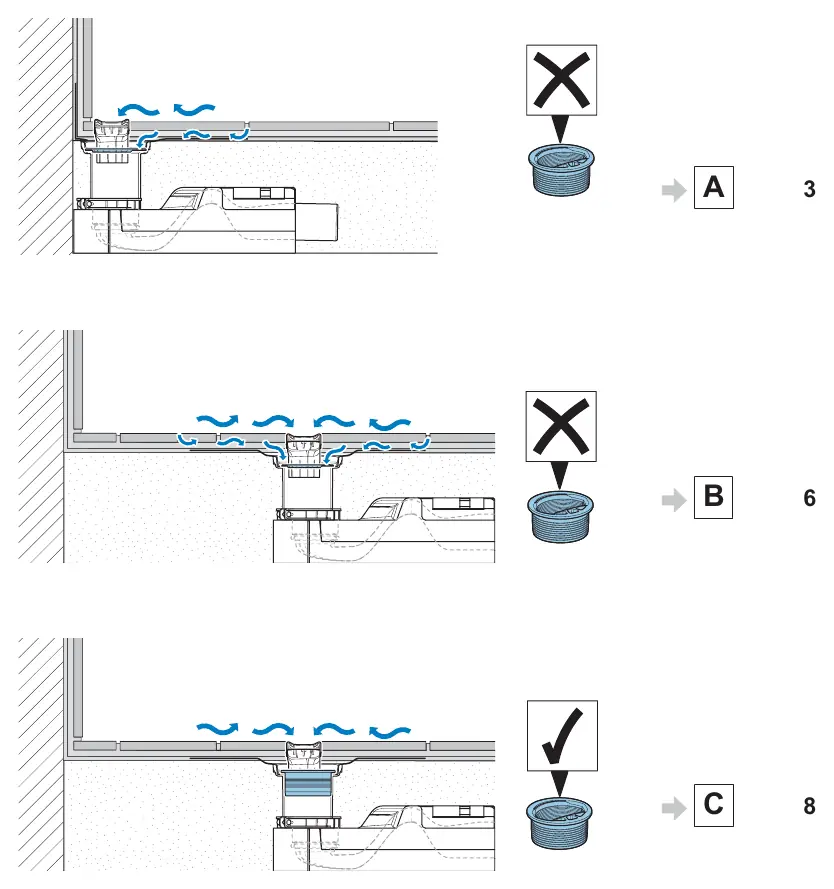
- Scenario A: Standard installation configuration.
- Scenario B: Alternative drainage setup.
- Scenario C: Specific connection configuration.
Refer to the corresponding section in the manual for the specific steps required for your chosen scenario.
Installation process
The installation generally involves the following steps:
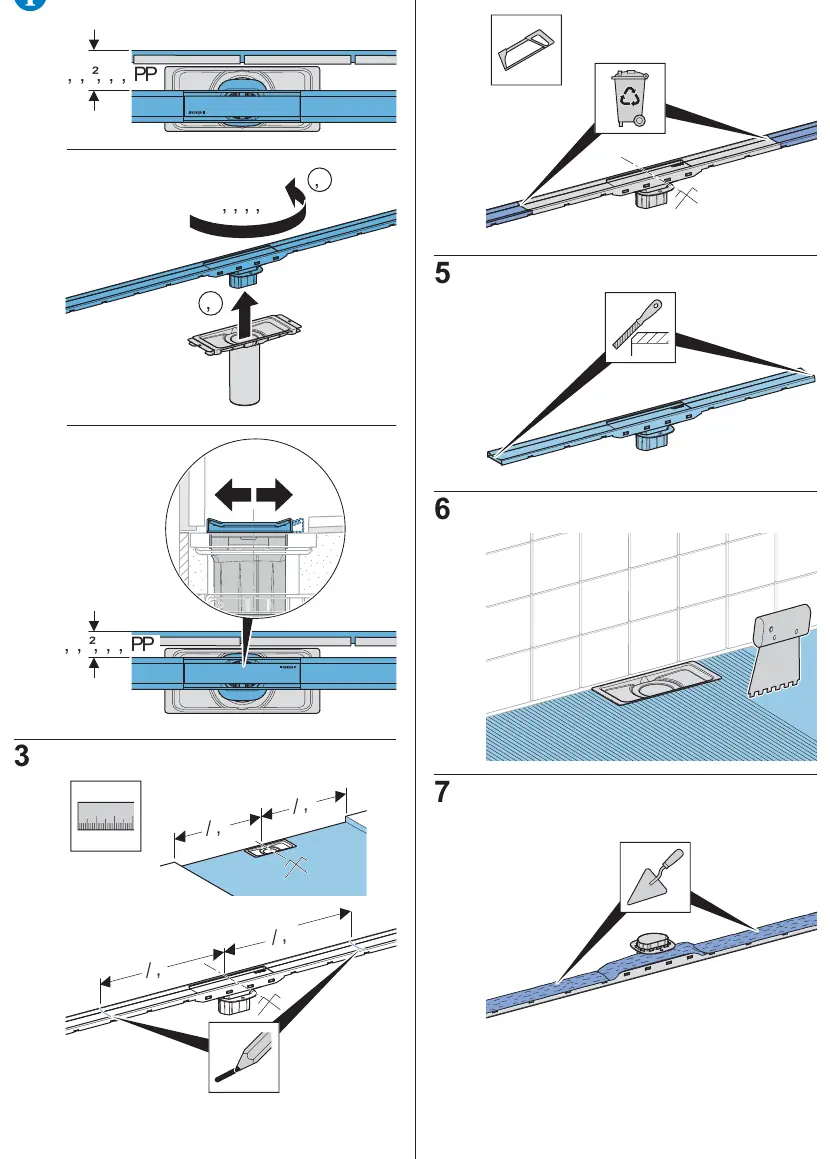
- Prepare the installation area and ensure the drainage connection is ready.
- Apply sealing materials as indicated in the diagrams to ensure waterproofing.
- Position the shower channel and align it with the floor tiles.
- Apply tile adhesive and grout around the channel, ensuring the correct slope for water drainage.
- Complete the tiling process, ensuring the channel cover is accessible.
Maintenance and cleaning
To maintain the shower channel:

- The cover can be removed for cleaning.
- Lift the cover carefully from the channel.
- Clean the channel and the cover to remove debris and buildup.
- Replace the cover securely after cleaning.
Manufacturer information
Geberit Group
Practical help
Common problems
Water not draining properly
Ensure the channel is installed with the correct slope towards the drain as indicated in the diagrams.
Cover difficult to remove
Use the designated edge to lift the cover; do not force it.
Before use
- Verify the installation scenario (A, B, or C) matches your specific drainage setup.
- Ensure all sealing components are correctly positioned.
- Check that the channel is level with the floor tiles.
- Confirm the drain connection is secure and watertight.
- Ensure the slope is sufficient for proper water flow.
Images and diagrams
- Scenario A: Standard installation setup.
- Scenario B: Alternative drainage configuration.
- Scenario C: Specific connection setup.
- Maintenance: Steps for removing and replacing the cover.
Model compatibility
- Compatible with various floor types; ensure proper waterproofing is applied during installation.

Manual page author
David Miller
Documentation analyst
Organizes user manual content into clear summaries, with attention to model details, product context, and everyday usability.