Tools / Laser Engraving Accessories
User Manual for Genmitsu 5.5W Laser Fixed Focus Module Kit
Quick guide for the Genmitsu 5.5W Laser Fixed Focus Module Kit. Includes installation steps for PROVerXL 4030 and 3018-PRO, LaserGRBL software setup, and laser focusing instructions.
Table of contents
Manual images
Click an image to enlargeQuick Guide
This manual provides instructions for the Genmitsu 5.5W Laser Fixed Focus Module. Key operations include mounting the laser to your CNC machine, connecting the control module, and configuring the LaserGRBL software. Always wear safety goggles when operating the laser. Ensure the spindle motor is disconnected before installing the laser module.
Safety Instructions
- You must be at least 13 years old to operate the laser engraver.
- Direct exposure to the laser beam can cause severe burns and eye damage. Always wear proper laser safety goggles.
- Focus the laser only on the lowest power setting.
- Keep a fire extinguisher nearby.
- Never leave an operating laser unattended.
- Ensure the room is well-ventilated to extract fumes and smoke.
- The cutting area under the laser must be metal or non-flammable.
- Disconnect power when cleaning, maintaining, or servicing the equipment.
- Do not stare at the bright light during the engraving process.
What is in the box
- Laser Head and Control Module
- Safety Goggles (green)
- Connecting Cables (for PROVerXL 4030 and 3018-PRO)
- Laser Alignment Spacer (20mm)
- T-Nuts and M3/M5 screws
Description of the individual components
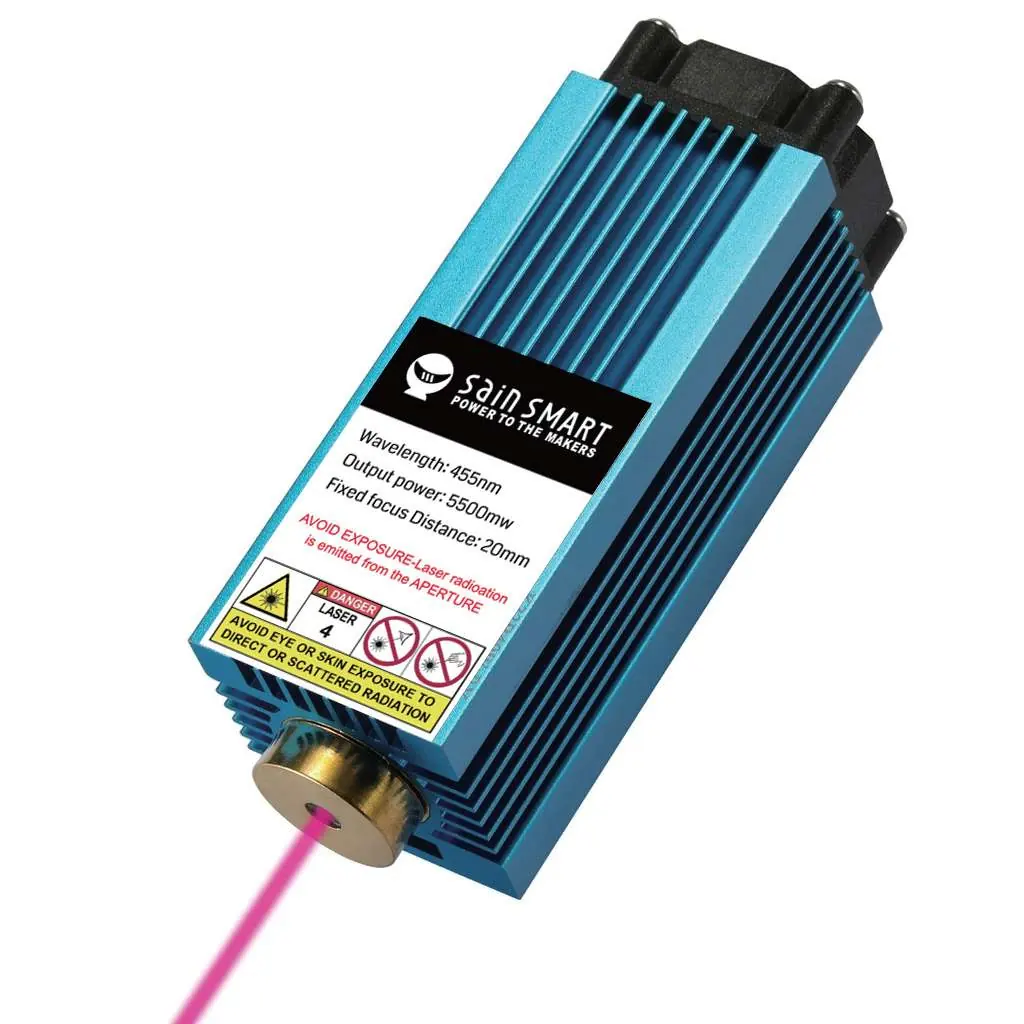
The 5.5W blue diode laser (445nm) is mounted in a heat sink with a cooling fan. It features a fixed focus with a focal length of 20mm. The Laser Control Module acts as an interface between the laser and your CNC, processing PWM signals to control laser power.
Mounting the laser to a PROVerXL 4030
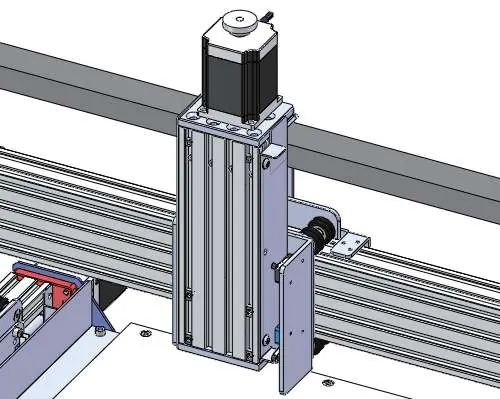

- Preparation: Disconnect the spindle motor from the router main board and remove it from the motor mount. Remove the four M5 screws from the motor mount.
- Step 1: Slide two additional M3 x 10mm T-nuts into the profile above the existing M5 T-nuts.
- Step 2: Align the holes on the Laser Controller Module with the holes on the profiles and fix it using two M3 x 6mm Socket Cap Screws.
- Step 3: Fix the laser head to the bracket using four M3 x 8mm Socket Cap Screws.
- Step 4: Align the laser head holder with the existing M5 T-nuts and secure it with four M5 x 10mm screws.
Connecting to a PROVerXL 4030
Connect the Laser Control Module to the PROVerXL 4030 using the 3-pin cable. The cable connects to the middle socket on the router main board marked PWM.
Installing LaserGRBL
Download LaserGRBL from the official website. After installation, configure the software:
- Enable Z-axis Jog: Go to Grbl -> Settings -> Jog Control and tick 'Click'n Jog'.
- Add Custom Buttons: Download 'CustomButtons.gz' from the SainSmart WIKI, right-click in the Buttons pane, and select 'Import Custom buttons'.
Setting the laser height and focus
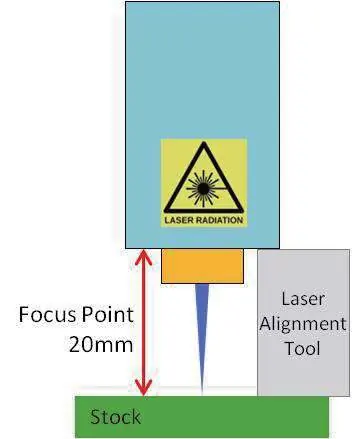
- Place the Laser Alignment tool on top of the stock at the side of the laser.
- Use Z-axis jog buttons to move the laser until the alignment tool just slides underneath the heatsink.
- Set the zero point at this position.
- To test focus, place a non-flammable object of known thickness on the stock, jog up by that thickness, and turn the laser on at low power to check the dot size.
Connecting to a 3018-PRO
Disconnect the spindle motor. Slide the laser head into the motor mount with the cooling fan pointing upwards. Position the laser head so the lower edge of the heat sink is about 60mm above the work piece. Connect the cables to the laser control module and the CNC controller board as described in the manual.
Official resources from the manual
Practical help
Common problems
Laser not cutting or engraving
Ensure Laser Mode is enabled ($32=1) and the laser is focused correctly.
Unwanted lines during movement
Enable Laser Mode ($32=1) so the laser turns off during positional moves.
Laser not turning on
Check power supply, cable connections, and ensure the Fire/PWM button is set to off (for PWM control).
Before use
- Wear laser safety goggles.
- Ensure the work area is ventilated.
- Disconnect the spindle motor before installing the laser.
- Verify all cable connections are secure.
- Ensure the laser module is mounted securely.
Specs in practice
- Output power
- 5.5W (5500mW).
- Fixed focus distance
- 20mm.
Images and diagrams
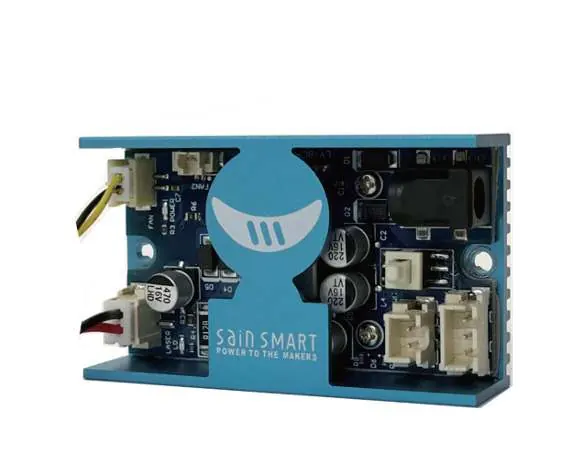
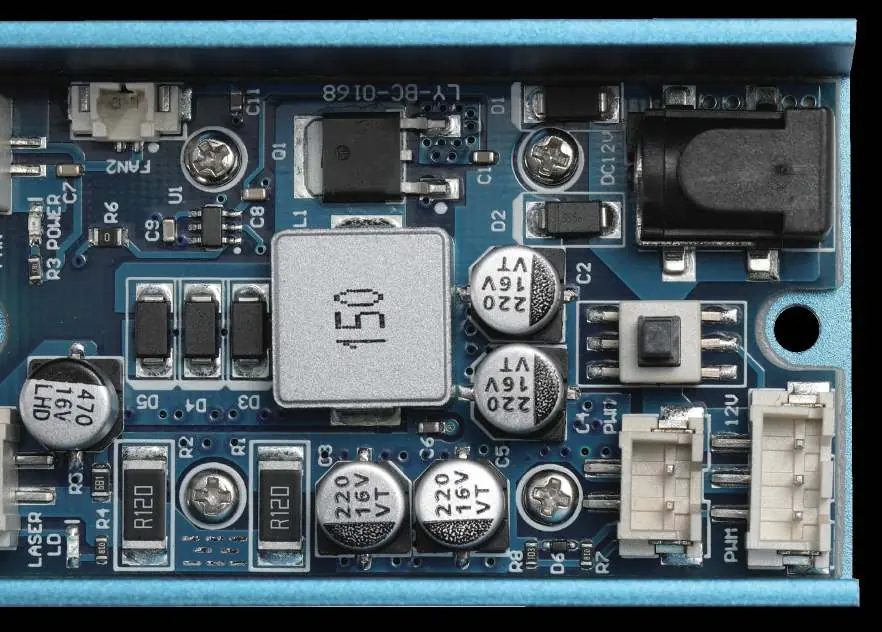
- Laser Control Module: Shows the 12V power input, Fire/PWM button, and PWM control connectors.
- Mounting: Step-by-step diagrams for attaching the laser head and control module to the CNC profile.
Model compatibility
- Designed for Genmitsu PROVerXL 4030 and 3018-PRO.
- Compatible with other Grbl-based CNC machines.

Manual page author
Emily Carter
User documentation editor
Prepares concise manual descriptions and highlights the most useful setup, operation, and maintenance information for readers.