Tools / Welding Equipment
User Manual for GYS PROGYS 200A PFC Welding Machine
Comprehensive user guide for the GYS PROGYS 200A PFC welding machine. Includes setup, MMA and TIG welding instructions, safety rules, maintenance, and troubleshooting.
Quick answers from the manual
Quick answer
- The PROGYS 200A PFC is an inverter welding machine for MMA and TIG Lift welding. It requires a 230V single-phase power supply and is protected for use with electric generators. p. 6, 13
Key actions
- Select MMA or TIG mode p. 6, 13
- Adjust welding current p. 6, 13
First start
- Connect to a 230V single-phase power supply. p. 6, 13
- Press the power button to start. p. 6, 13
Problems and fixes
Thermal protection active
Wait for cooling (approx. 2 min).
p. 8, 15Maintenance and reset
- Annual maintenance is recommended. Regularly clean the interior with compressed air. p. 6, 12
Technical specifications
| Parameter | Value | Meaning | Pages |
|---|---|---|---|
| Power Supply | 230V +/- 15% | Required input voltage | p. 62 |
| Duty Cycle (40°C) | 20% @ 120A (MMA) | Welding capacity at 40°C | p. 62 |
Where to find it in the PDF
- Safety Rules p. 9, 10, 11
- Installation and Operation p. 13, 14
- Troubleshooting p. 15
- Technical Specifications p. 62
Table of contents
Manual images
Click an image to enlargeQuick guide from the manual
The GYS PROGYS 200A PFC is a portable, fan-cooled inverter welding machine designed for MMA (coated electrode) and TIG Lift welding. It is compatible with 230V single-phase power supplies and can be used with electric generators. Always ensure the machine is unplugged before performing any installation or maintenance.
Safety Rules
- Electrical Safety: The machine must be connected to an earthed electrical supply. Never touch live parts inside or outside the machine. Disconnect from the mains and wait 2 minutes before opening the device to allow capacitors to discharge.
- Welding Fumes and Gas: Ensure adequate ventilation. Welding in small areas requires supervision. Degrease workpieces before welding.
- Fire and Explosion Risks: Keep flammable materials at least 11 meters away. Do not weld near grease or paint.
- Electromagnetic Fields: Minimize exposure by keeping welding cables together, keeping your head and torso as far as possible from the welding circuit, and never wrapping cables around your body.
Installation and Setup
Only qualified personnel should perform the installation. Ensure the machine is placed on a floor with a maximum incline of 10° and has sufficient ventilation. The machine has an IP21 protection rating, meaning it is protected against solid objects >12.5mm and vertically falling water drops.
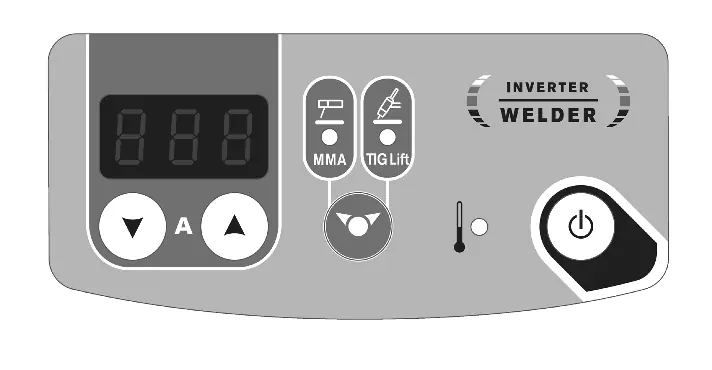
MMA Welding (Electrode)
- Connect the electrode holder and earth clamp to the connectors.
- Select the MMA position (2) using the selector (5). Press for 3 seconds to switch modes if necessary.
- Adjust the desired current using the keys (4).
- The machine features Hot Start (easier arc ignition), Arc Force (prevents sticking), and Anti-Sticking (allows easy electrode removal).
TIG Welding (TIG Lift)
- Connect the earth clamp to the positive pole (+) and the valve torch to the negative pole (-).
- Connect the gas hose to the gas cylinder regulator.
- Select the TIG position (3) using the selector (5).
- Adjust the current and set the gas flow on the regulator.
- To start, touch the electrode to the workpiece.
- At the end of welding, lift the arc twice (up-down-up-down) within 4 seconds to trigger the automatic arc slope (if enabled).
Maintenance
- Annual maintenance is recommended.
- Regularly remove the casing (2-3 times a year) to remove dust with compressed air.
- Check the condition of the power supply cable regularly.
- Keep ventilation holes clear for proper air circulation.
Troubleshooting
If the thermal protection indicator (6) lights up, wait for the cooling period (approx. 2 minutes) until it turns off. If the display is on but no current is delivered, check the connections of the earth clamp and electrode holder. If the machine is not welding correctly, check the polarity.
Manufacturer information
GYS
Practical help
Common problems
Thermal protection indicator (6) is on
Wait for the cooling period (approx. 2 minutes) until the indicator turns off.
Device is on but does not deliver current
Check that the earth clamp or electrode holder is properly connected to the welder.
Tingling sensation when touching the body
Check the plug and the earth connection of your electrical installation.
Instable TIG arc
Use a tungsten electrode of the correct size, ensure it is well-prepared, or reduce the gas flow rate.
Before use
- Ensure the power supply is 230V single-phase with earth.
- Check that the welding cables are properly connected.
- Ensure the work area is well-ventilated.
- Verify that the electrode is appropriate for the material.
- Check that the gas cylinder is secure and the regulator is set correctly (for TIG).
Specs in practice
- Anti-Sticking
- Cuts off current if the electrode sticks, allowing easy removal.
Images and diagrams
- The control panel allows mode selection (MMA/TIG) and current adjustment.
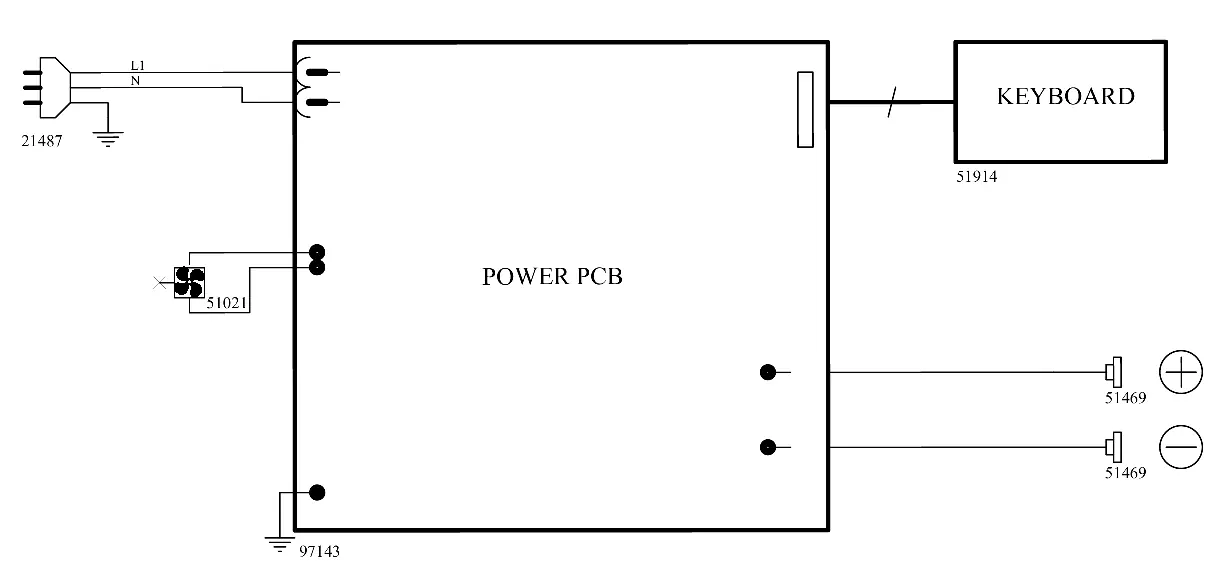
- The wiring diagram shows the connection of the power PCB, keyboard, and connectors.
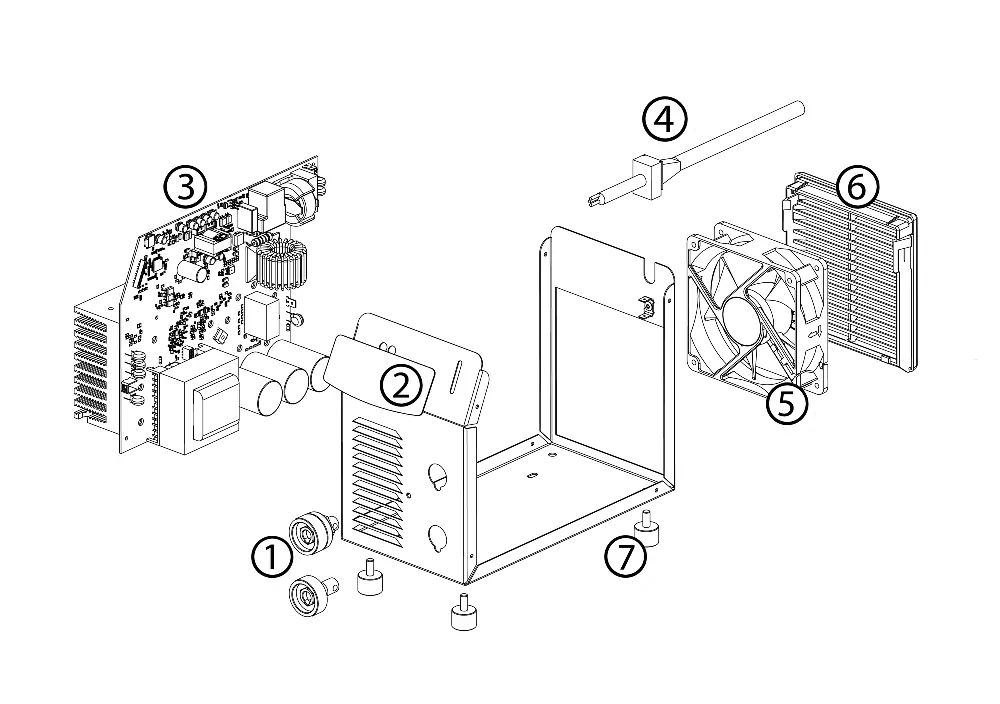
- The exploded view shows the internal components including the fan and power board.
Model compatibility
- Compatible with rutile, basic, and stainless steel electrodes in MMA.
- TIG mode is suitable for most metals except aluminum and its alloys.
- Compatible with electric generators (230V AC).

Manual page author
Michael Turner
Technical manual editor
Reviews PDF manuals for structure, safety notes, and practical product details so readers can find the right information quickly.