Lighting / Outdoor Landscape
User Manual for Harbor Breeze 10842 LED Path Light
Quick guide for the Harbor Breeze 10842 LED Path Light. Includes assembly instructions, battery maintenance, troubleshooting, and installation tips.
Table of contents
Manual images
Click an image to enlargeQuick guide from the manual
The Harbor Breeze 10842 LED Path Light is designed for easy assembly without tools. The estimated assembly time is 3-5 minutes. For optimal performance, ensure the solar panel receives full, direct sunlight and is kept free of snow, dirt, and debris. Use only AA 700mAh nickel metal hydride (Ni-MH) rechargeable batteries.
Package Contents
Ensure all parts are present before assembly:
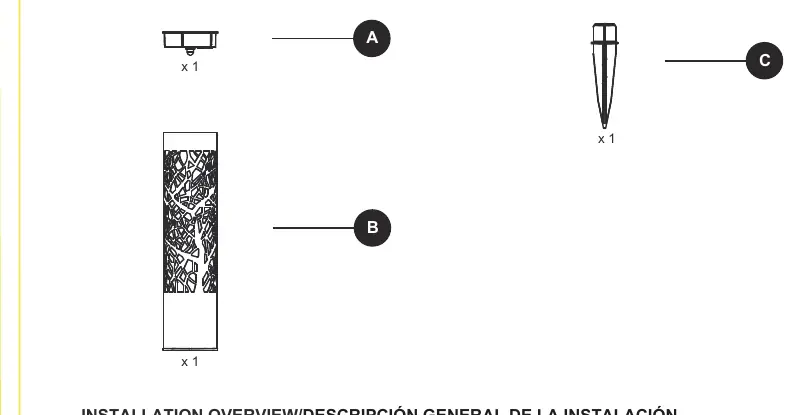
- Solar Top Housing (A)
- Light Housing (B)
- Ground Stake (C)
Installation
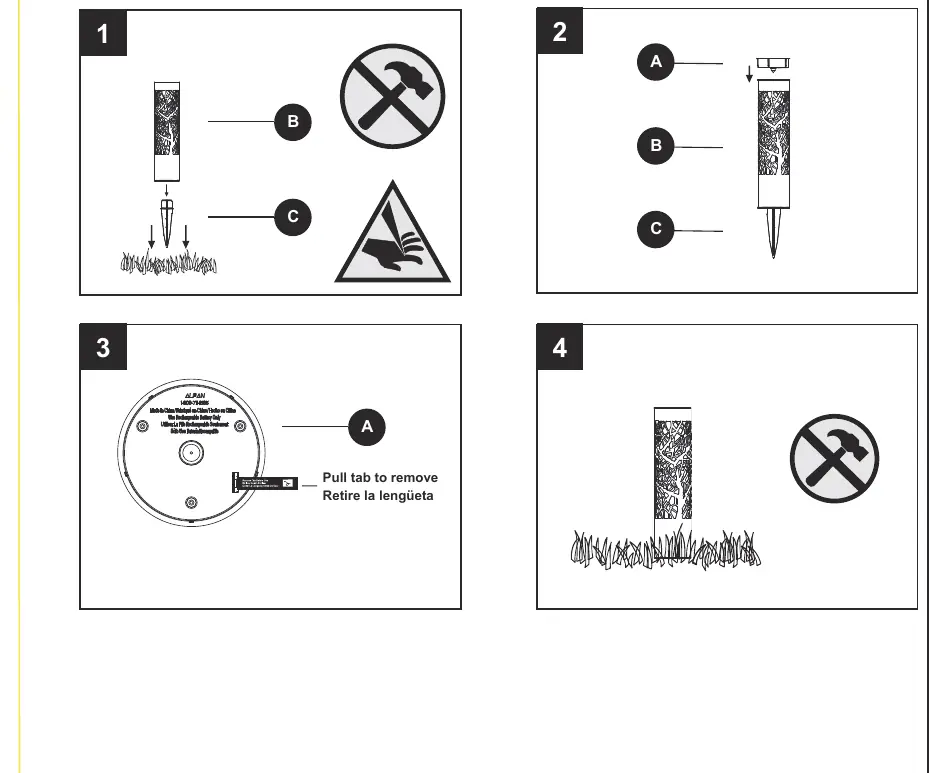
- Assemble the ground stake (C) to the light housing (B).
- Attach the housing assembly to the solar top housing (A).
- Remove the pull tab from the battery compartment to activate the light.
- Insert the assembled light into the ground. Note: The ground stake has a pointed edge; handle with care to avoid injury.
Choosing the Right Location
Select a location with full, direct sunlight. Shady areas will prevent the battery from charging fully, which reduces the operating time at night. Ensure the light is not placed near other nighttime light sources, such as street or porch lights, as this may prevent the light from turning on automatically.
Care and Maintenance
Clean the solar panel periodically with a damp cloth. Do not use chemicals or abrasives. If relocating the light, carefully detach it from the ground. If the light will not be used for an extended period, remove the batteries.
Troubleshooting
If the light stops working or operates for a short duration:
- Ensure the battery is adequately charged by placing the unit in direct sunlight for three sunny days.
- Verify the light is in a location that receives sufficient sunlight.
- Ensure the solar top housing is not under any direct light source when testing, as the light is designed to turn on only when it is dark.
- If the battery is weak or no longer holds a charge, replace it with a new AA 700mAh Ni-MH rechargeable battery.
Safety Information
Do not use alkaline, standard (carbon-zinc), or Ni-Cd batteries. Do not mix battery types. Batteries must be recycled or disposed of properly according to local regulations. Do not open, short circuit, or mutilate batteries.
Practical help
Common problems
Light stops working after a period of time
Place the unit in direct sunlight for three sunny days to charge the battery, or replace the battery if it no longer holds a charge.
Light only operates for a short duration at night
Move the light to a sunnier location or ensure the solar panel is free of debris.
Light does not turn on at night
Ensure the light is not placed near other nighttime light sources (street or porch lights) that may interfere with the automatic sensor.
Before use
- Verify all parts (A, B, C) are present.
- Ensure you have AA 700mAh Ni-MH rechargeable batteries.
- Select a location with full, direct sunlight.
- Remove the battery pull tab before installation.
Specs in practice
- Battery Type
- AA 700mAh nickel metal hydride (Ni-MH) rechargeable battery only.
- Assembly Time
- 3-5 minutes (no tools required).
Images and diagrams
- The installation overview shows the assembly sequence: connecting the stake to the housing, attaching the top housing, removing the battery pull tab, and inserting the unit into the ground.
Model compatibility
- Do not use alkaline, carbon-zinc, or Ni-Cd batteries.
- Do not mix different battery types.

Manual page author
Michael Turner
Technical manual editor
Reviews PDF manuals for structure, safety notes, and practical product details so readers can find the right information quickly.