Garden / Portable Garages
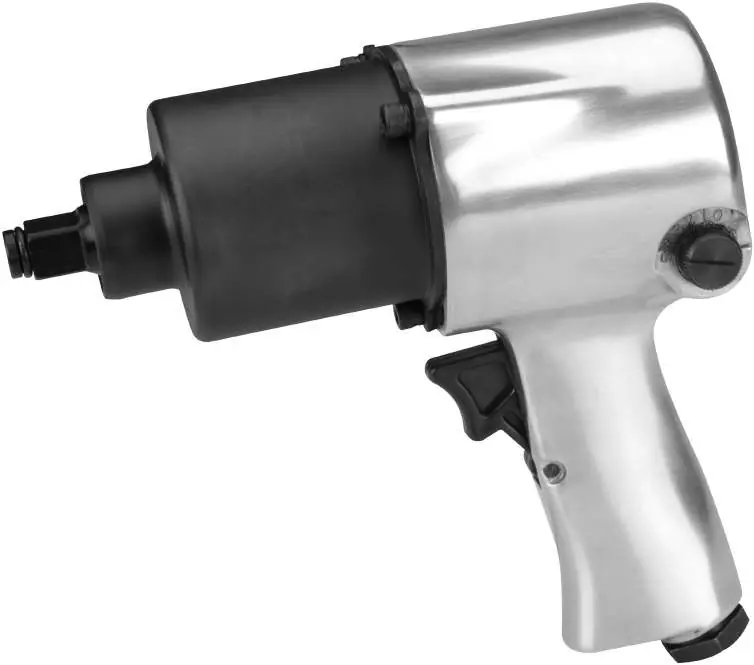
User Manual for Central Pneumatic 1/2-Inch Twin Hammer Air Impact Wrench
Quick guide for the Central Pneumatic 1/2-Inch Twin Hammer Air Impact Wrench (Item 69916). Includes setup, air supply requirements, operation, maintenance, and troubleshooting.
Table of contents
Manual images
Click an image to enlargeQuick Guide
This manual provides essential instructions for the safe operation and maintenance of the Central Pneumatic 1/2-Inch Twin Hammer Air Impact Wrench. Always wear ANSI-approved eye protection and hearing protection when using this tool. Ensure the air supply is clean, dry, and regulated to a maximum of 90 PSI. Lubricate the tool daily using pneumatic tool oil.
Safety Instructions
General Safety: Keep the work area clean and well-lit. Do not operate the tool in explosive atmospheres. Keep bystanders away.
Personal Safety: Stay alert and do not use the tool while tired or under the influence of substances. Wear appropriate safety equipment, including a dust mask, non-skid safety shoes, and a hard hat. Do not wear loose clothing or jewelry.
Air Source Safety: Never connect to an air source capable of exceeding 200 PSI. Never use oxygen, carbon dioxide, or combustible gases as an air source.
Vibration Precautions: Prolonged exposure to vibration can cause injury. Grip the tool as lightly as possible while maintaining control and include vibration-free periods in your work schedule.
Specifications
- Maximum Air Pressure: 90 PSI
- Air Inlet: 1/4" - 18 NPT
- Impact Rate: 900 IPM
- Average Air Consumption: 6 CFM @ 90 PSI
- Anvil: 1/2" square
Setup and Air Supply
To ensure optimal performance and safety, incorporate a filter, regulator, oiler, and in-line shutoff valve into your air supply system. The in-line shutoff ball valve is critical for emergency control. If an automatic oiler is not used, add a few drops of pneumatic tool oil to the air inlet before use and after every hour of continuous operation.

Installation Steps:
- Attach an air hose to the compressor outlet.
- Connect the air hose to the tool's air inlet.
- Ensure all connections are secure and leak-free.
- Adjust the compressor regulator to the tool's rated pressure (max 90 PSI).
Operating Instructions
Tool Setup:
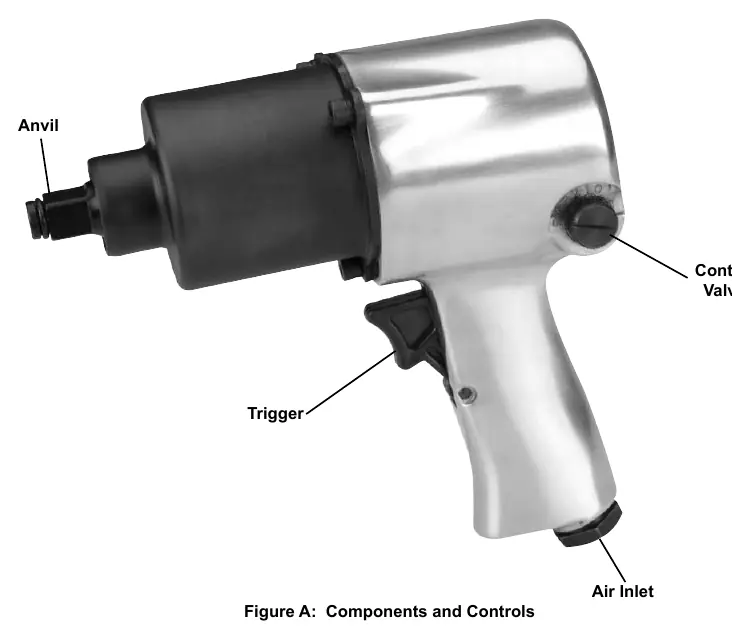
- Forward/Reverse: Push the Control Valve to the left for clockwise (forward) operation, or to the right for counterclockwise (reverse) operation.
- Force Adjustment: Turn the Control Valve to adjust the force setting. The right scale is for clockwise force; the left scale is for counterclockwise force.
- Socket Attachment: Snap the required 1/2" drive impact socket onto the Anvil.
Usage: Grip the wrench firmly with both hands and squeeze the trigger. Note that impact wrenches are not intended for precise torque tightening; use a torque wrench if a specific torque reading is required.
Maintenance
Daily Maintenance: Inspect the tool for loose hardware, misalignment, or cracked parts. Maintain the lubricator oil level and drain the moisture filter regularly.
Quarterly Maintenance: Have the internal mechanism cleaned, inspected, and lubricated by a qualified technician every 3 months. If vanes need replacement, replace them all as a set.
Troubleshooting
If the tool experiences decreased output, check for insufficient air pressure or flow, obstructed trigger, or lack of lubrication. If the housing heats up during use, ensure proper lubrication and have a technician inspect the internal mechanism. For severe air leakage, check for loose housing or damaged valve components.
Manufacturer information
Harbor Freight Tools
Practical help
Common problems
Decreased output
Check air pressure/flow, clean trigger area, lubricate tool, clean air inlet screen, or check for loose housing.
Severe air leakage
Check for cross-threaded housing components, tighten housing, or inspect/replace valve assembly.
Housing heats during use
Lubricate using air tool oil or have a qualified technician inspect internal mechanism.
Before use
- Inspect tool for damaged, loose, or missing parts.
- Ensure air source is clean, dry, and regulated to 90 PSI.
- Install an in-line shutoff valve.
- Add a few drops of pneumatic tool oil to the air inlet.
- Wear ANSI-approved eye protection and hearing protection.
- Ensure the switch is in the off position before connecting air.
Specs in practice
- Maximum Air Pressure (90 PSI)
- The maximum pressure the tool can safely handle; exceeding this can cause damage or injury.
- Impact Rate (900 IPM)
- The number of blows per minute the tool delivers.
- Average Air Consumption (6 CFM)
- The amount of air volume required for the tool to operate efficiently.
Images and diagrams
- Figure A: Identifies the Anvil, Trigger, Control Valve, and Air Inlet.
- Figure B: Shows a typical portable air supply setup including filter, regulator, and lubricator.
- Figure C: Shows a typical stationary air supply setup.
Model compatibility
- Requires 1/2" drive impact sockets.
- Not intended for specific torque tightening; use a torque wrench for precise torque requirements.

Manual page author
Michael Turner
Technical manual editor
Reviews PDF manuals for structure, safety notes, and practical product details so readers can find the right information quickly.