HVAC / Heaters & Fireplaces
Assembly Instructions for Home Decorators Collection Nova 23" Linen Cabinet
Comprehensive assembly and safety guide for the Home Decorators Collection Nova 23" Linen Cabinet. Includes hardware lists, installation steps for tip restraints, maintenance tips, and troubleshooting for leveling.
Quick answers from the manual
Quick answer
- This manual provides assembly instructions for the Nova 23" Linen Cabinet, including safety warnings, hardware lists, and maintenance guidelines. p. 1, 7
Key actions
- Install tip restraint hardware p. 7
First start
- Ensure the cabinet is placed on a level surface or leveled using the included hardware. p. 2
Problems and fixes
Uneven gap between doors and cabinet
Adjust the leg levelers to ensure the linen cabinet is level or adjust the door hinges.
p. 8Maintenance and reset
- Dust frequently with a clean, soft and dry cloth. Wipe away any water or liquid spills immediately. p. 8
Technical specifications
| Parameter | Value | Meaning | Pages |
|---|---|---|---|
| Weight Capacity | 50 lbs | Maximum load capacity for the cabinet. | p. 2 |
Where to find it in the PDF
- Safety Information p. 2
- Assembly Instructions p. 7
Table of contents
Manual images
Click an image to enlargeQuick guide from the manual
This document provides assembly and safety instructions for the Nova 23" Linen Cabinet. The most critical safety requirement is the installation of the tip restraint hardware to prevent the unit from tipping over, which could cause severe injury or death. Ensure the unit is placed on a level surface and do not exceed the weight limit of 50 lbs.
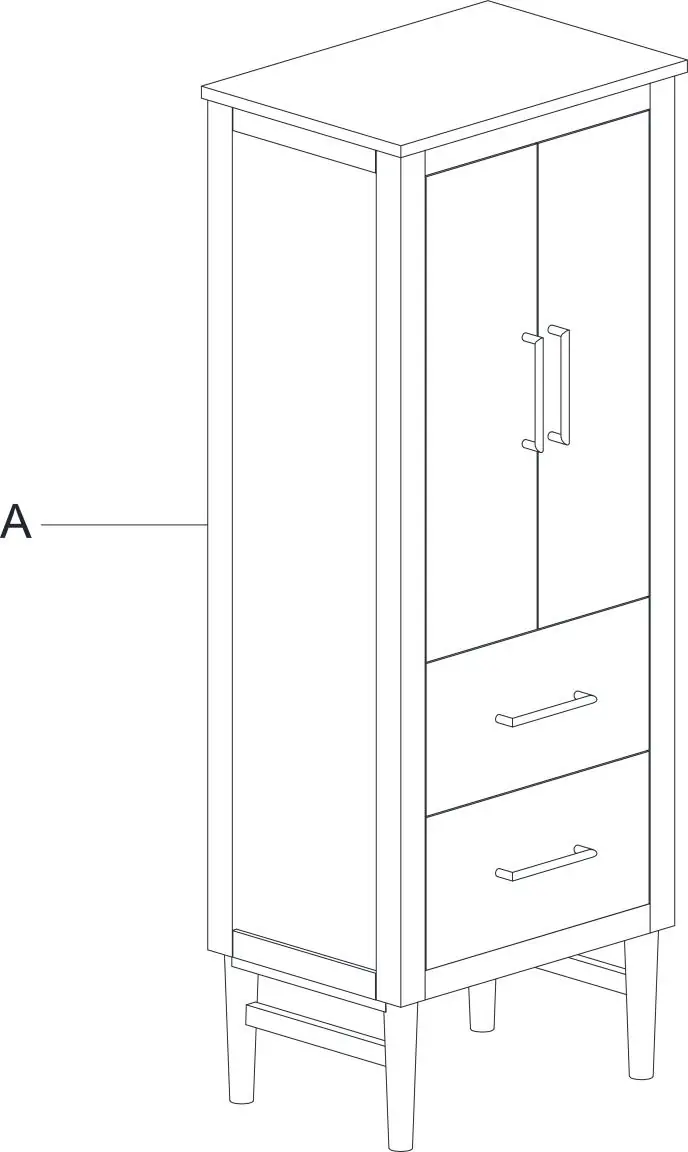
Safety Information
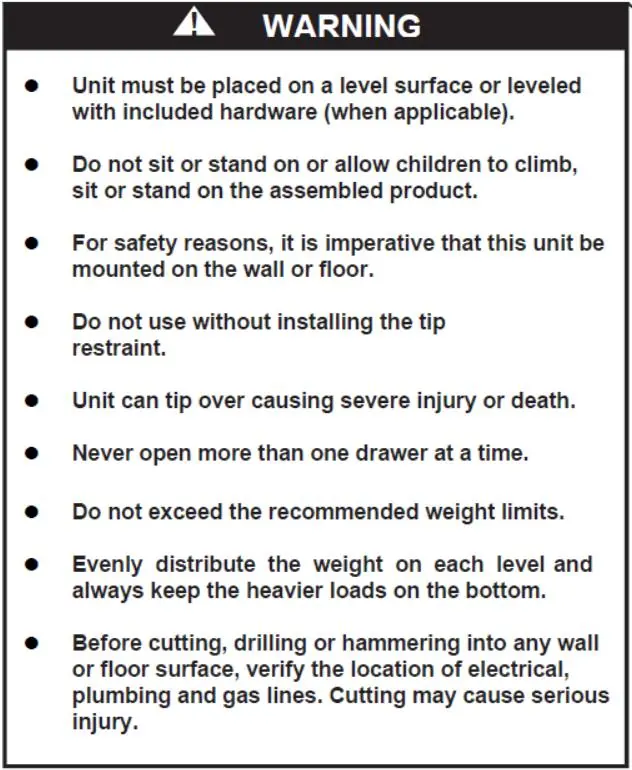
Warning:
- Adult assembly is required.
- Keep small parts away from children during assembly.
- The unit must be placed on a level surface or leveled using the included hardware.
- For safety reasons, it is imperative that this unit be mounted on the wall or floor.
- Do not use the cabinet without installing the tip restraint.
- Never open more than one drawer at a time.
- Do not exceed the recommended weight limit of 50 lbs.
- Evenly distribute weight on each level and keep heavier loads on the bottom.
- Before cutting, drilling, or hammering into any wall or floor surface, verify the location of electrical, plumbing, and gas lines.
Tools and Hardware
Tools Required (Not Included):
- Electric drill with #2 drill bit
- Phillips screwdriver
- Tape measure
- Level
- Safety goggles
Hardware Included:
- Bracket (AA) - 2
- Strap (BB) - 1
- Long screw (CC) - 1
- Short screw (DD) - 1
- Plastic plug (EE) - 2
Assembly
Installing the tip restraint hardware (requires at least 2 people):
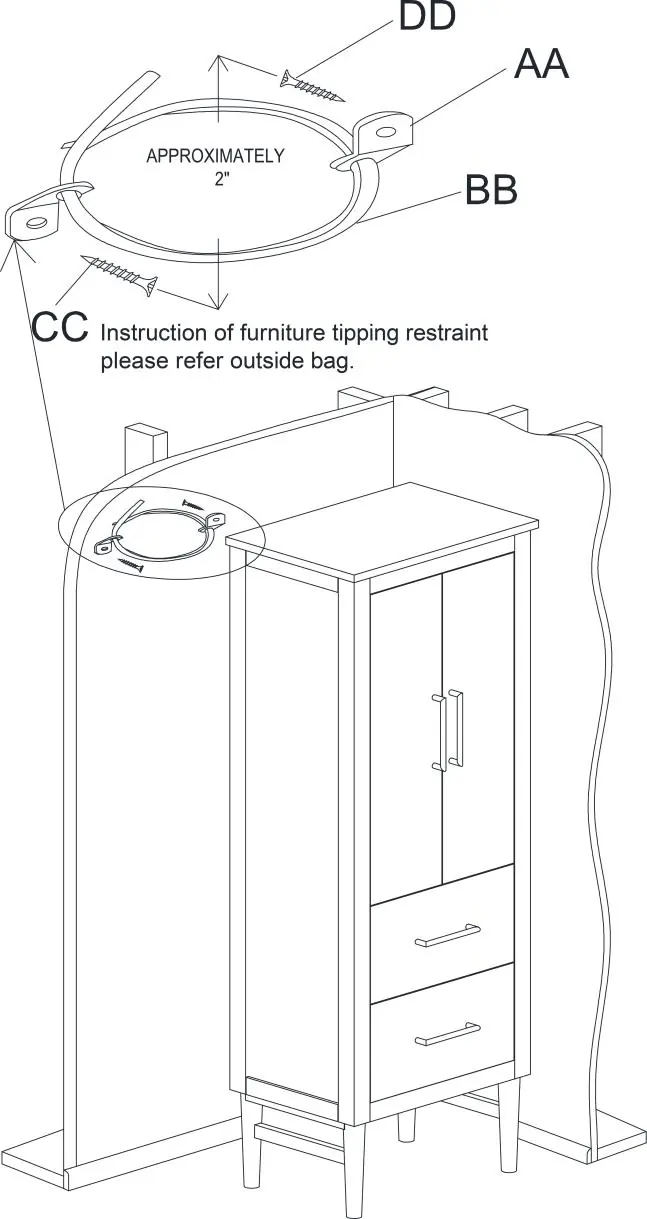
- Drill a hole in the wall in the desired location and insert the plastic plug (EE).
- Attach a bracket (AA) securely to the back top rail of the linen cabinet (A) using the short screw (DD).
- Install the second bracket (AA) on the wall over a wall stud, positioned 2 inches below the mounting bracket secured to the cabinet. Attach it using the plastic plug (EE) and long screw (CC).
- Place the linen cabinet (A) into position so both mounting brackets are vertically aligned.
- Lace the restraint strap (BB) through the larger hole in each mounting bracket (AA).
- Bring both ends of the strap together, slide the flat end through the locking end, and pull until all slack is removed.
- Confirm that the strap is securely laced and locked.
Maintenance and Care
- Dust frequently with a clean, soft, and dry cloth.
- Wipe away water or liquid spills immediately with a clean, soft, and dry cloth.
- Avoid placing the cabinet in direct sunlight.
- Avoid exposing the cabinet to extreme temperatures; install away from heat and air vents.
Troubleshooting
If there is an uneven gap between the doors and the cabinet, the floor is likely not level. To resolve this, adjust the leg levelers to ensure the cabinet is level, or adjust the door hinges.
Manufacturer information
Home Decorators Collection
Practical help
Common problems
Uneven gap between doors and cabinet
Ensure the floor is level. Adjust the leg levelers to ensure the cabinet is level, or adjust the door hinges.
Before use
- Verify all parts are present
- Ensure you have a drill, #2 drill bit, screwdriver, tape measure, and level
- Check floor for unevenness
- Identify wall stud location for tip restraint installation
- Wear safety goggles during assembly
Specs in practice
- Weight Limit
- The cabinet is designed to hold a maximum of 50 lbs. Do not exceed this limit.
Images and diagrams
- The manual provides a specific diagram for installing the tip restraint hardware, showing the connection between the cabinet back rail and the wall stud.
Model compatibility
- Must be mounted on the wall or floor for safety.

Manual page author
Emily Carter
User documentation editor
Prepares concise manual descriptions and highlights the most useful setup, operation, and maintenance information for readers.