Electronics / RFID Barcode Scanners
User Guide for Honeywell Xenon XP 195X Series Scanners
Comprehensive user guide for the Honeywell Xenon XP 195X series area-imaging scanners. Includes setup, connection, programming, cordless operation, maintenance, and troubleshooting.
Table of contents
Manual images
Click an image to enlargeGetting Started
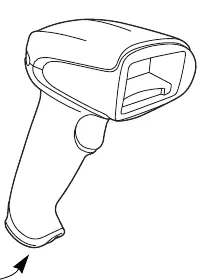
The Xenon XP 195X series includes corded (1950g, 1950h) and cordless (1952g, 1952h, 1952g-BF, 1952h-BF) area-imaging scanners. Upon unpacking, ensure all items match your order and check for shipping damage. Save the shipping container for future storage.

Connecting the Device
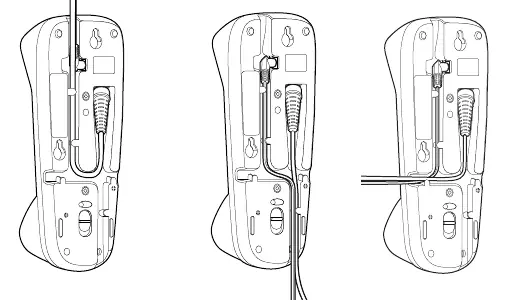
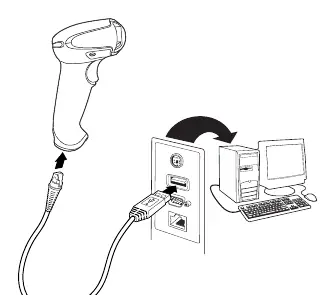
Scanners can be connected via USB, Keyboard Wedge, RS232, or RS485. Note: Power supplies must be ordered separately if needed. For cordless models, ensure cables are secured in the wireways of the base.
Cordless System Operation
Cordless scanners link to a charge base or Access Point. To link, place the scanner in the base. A short chirp indicates a successful link. The page button on the base can be used to locate associated scanners. Battery Info: Charge the battery for at least 4 hours before initial use. Use only Honeywell Li-ion battery packs (model BAT-SCN05).
Programming the Interface
Scanners are factory-programmed for common settings. To change settings, scan the appropriate barcodes in this guide. Plug and Play barcodes are available for instant setup of common interfaces.
Input/Output Settings
Configure beeper volume, pitch, and duration for good reads and errors. Trigger modes include Manual Trigger, Trigger Toggle, and Serial Trigger. Presentation mode uses ambient light and scanner illumination to detect barcodes.
Healthcare Settings
Specialized settings for healthcare environments include quiet operations, such as silent modes with flashing LEDs or very low beepers, to avoid disturbing patients.
Data Editing and Formatting
Use the Data Edit section to add prefixes or suffixes to scanned data. The Data Format Editor allows for more complex output modifications, such as inserting characters or reordering data.
Maintenance and Troubleshooting
Clean the scanner housing and window with a soft cloth dampened with water or a mild detergent. Do not submerge the scanner. If the scanner is not functioning, check cable connections, ensure the battery is charged, and verify that the correct symbologies are enabled.
Manufacturer information
Honeywell International Inc.
Practical help
Common problems
Scanner not linking to base
Place the scanner in the base to establish a link. Ensure the base is powered.
Scanner out of range
Move the scanner closer to the base or Access Point. If using Batch Mode, data will be stored and transmitted when back in range.
Barcode displayed but not entered into application
Program a suffix (e.g., Carriage Return) to automatically enter the data.
Aimer not illuminated
Check that the cable is connected properly and the host system power is on.
Before use
- Check for shipping damage.
- Ensure items in the carton match your order.
- Charge the battery for a minimum of 4 hours before initial use.
- Connect the interface cable to the device first, then to the computer.
- Ensure the base is connected to an appropriate power supply.
Specs in practice
- Voltage Requirements
- 4.4 to 5.5 VDC at input connector.
- Operating Temperature
- 32°F to 122°F (0°C to 50°C).
- Sealant Rating
- IP52 (dust protected, dripping water).
Images and diagrams
- Wiring diagrams for USB, Keyboard Wedge, RS232, and RS485 connections.
- Mounting diagrams for horizontal and vertical base installation.
- Battery replacement steps for cordless models.
- Interface cable replacement steps.
Model compatibility
- Linking to an Access Point is only supported by Xenon XP 1952 models.
- In-Stand Sensor feature does not apply to Xenon XP 1952-BF products.
- A base can only have one Xenon XP 1952-BF scanner linked to it.

Manual page author
Emily Carter
User documentation editor
Prepares concise manual descriptions and highlights the most useful setup, operation, and maintenance information for readers.