Automotive / Parts & Accessories
Installation Guide for Hooke Road 07-13 Tundra Front Bumper
Step-by-step installation guide for the Hooke Road front bumper on 2007-2013 Toyota Tundra. Includes tools required, hardware list, and assembly instructions.
Table of contents
Manual images
Click an image to enlargeQuick guide from the manual
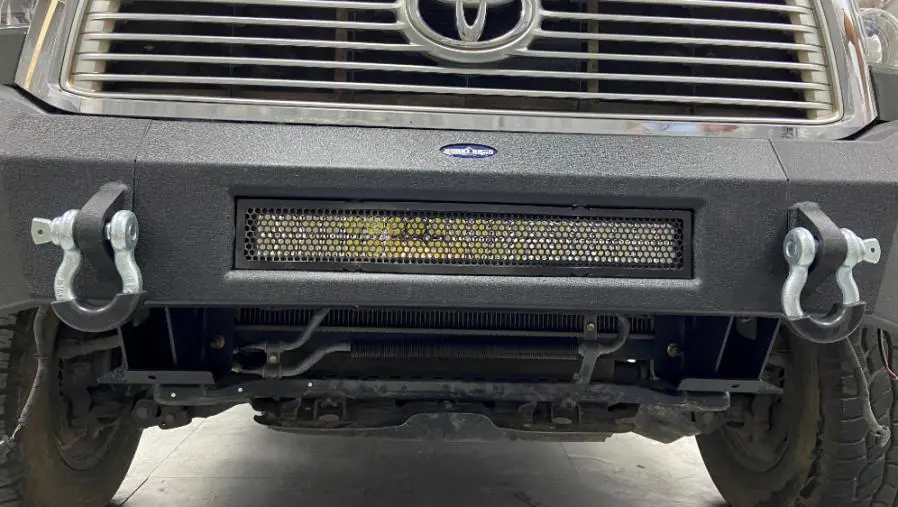
This installation guide covers the assembly and mounting of the Hooke Road front bumper for 2007-2013 Toyota Tundra vehicles. The installation process requires approximately 1-2 hours and is recommended for 2-3 people. Please verify all parts are present before beginning.
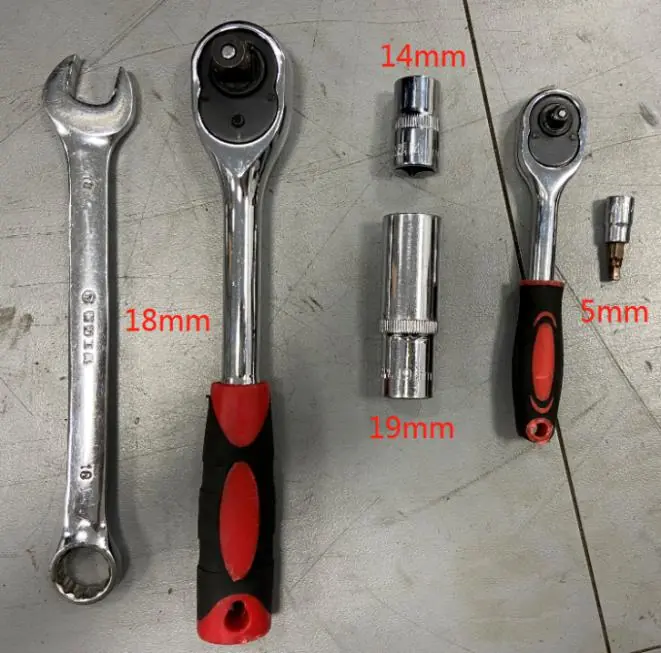
Tools required:
- 14mm HEX Socket Wrench
- 19mm HEX Socket Wrench
- 18mm Wrench
- 5mm HEX Socket Wrench
Package contents
The kit includes the following main components:
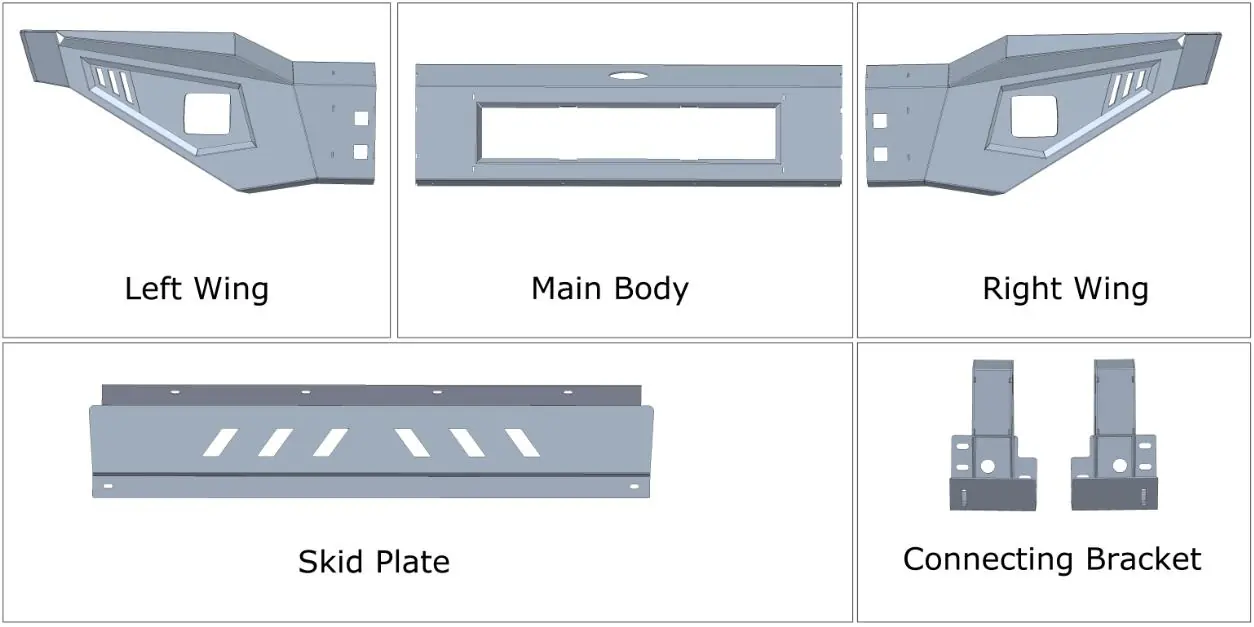
- Left Wing
- Main Body
- Right Wing
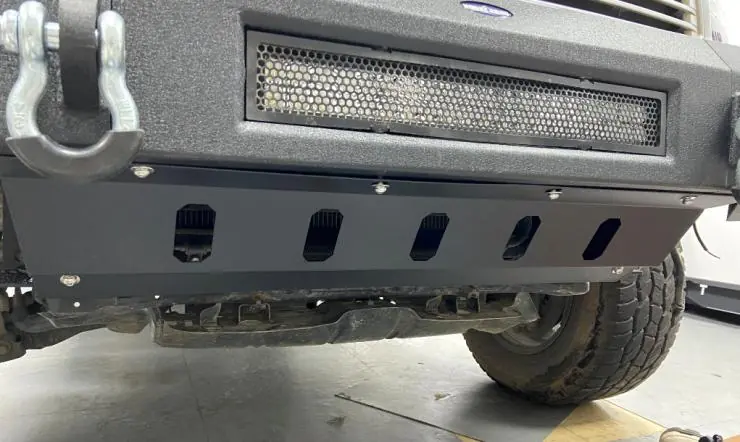
- Skid Plate
- Connecting Bracket
Hardware list
Ensure you have the following hardware before starting:
- 4x Hex Bolt (M12*110)
- 6x Hex Bolt (M12*30)
- 6x Button Head Socket Cap Bolts Screws (M8*20)
- 10x Split Lock Washer (M12)
- 6x Split Lock Washer (M8)
- 6x Flat Washer (M8*16*1.2)
- 20x Flat Washer (M12*30*2)
- 10x Hex Nuts (M12)
- 6x Flange Hex Lock Nuts (M8)
Installation instructions
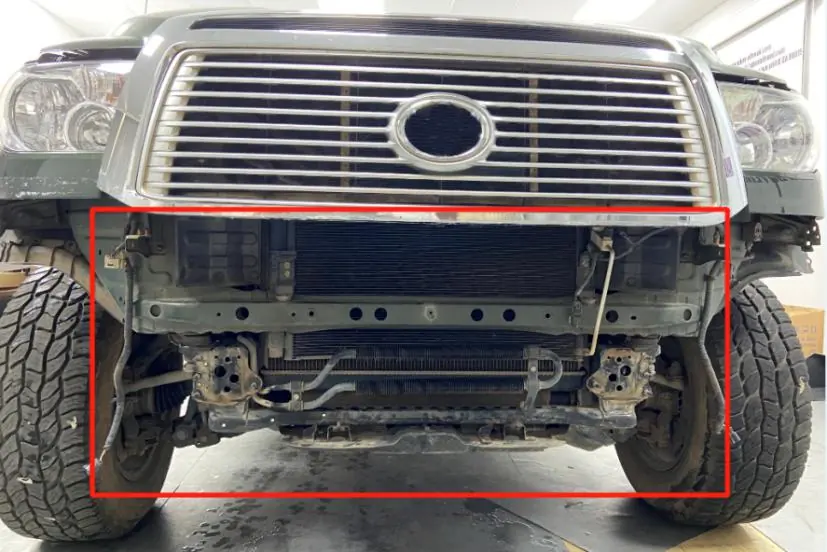
Step 1: Remove the original bumper from the vehicle.
Step 2: Assemble the left and right wings to the main body using the Hex Bolts (M12*30), Split Lock Washers (D12), Flat Washers (M12*30*2), and Hex Nuts (M12).
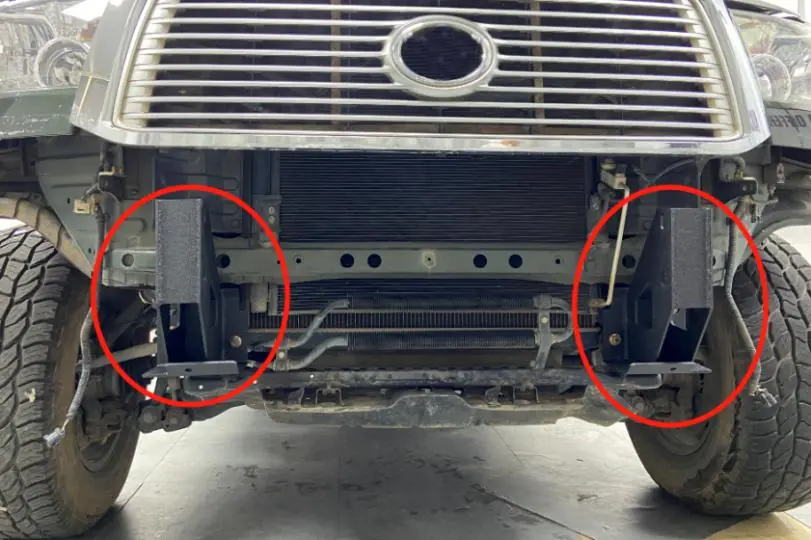
Step 3: Install the connecting brackets into the vehicle frame using the factory bolts.
Step 4: Install the assembled bumper onto the vehicle using the Hex Bolts (M12*110), Split Lock Washers (D12), Flat Washers (M12*30*2), and Hex Nuts (M12).
Step 5: Install the skid plate using the Button Head Socket Cap Bolts Screws (M8*20), Split Lock Washers (D8), Flat Washers (M8*16*1.2), and Flange Hex Lock Nuts (M8).
Step 6: Verify all bolts are tightened and the installation is complete.
Important notes
The product parts in this instruction may differ slightly from the actual product contents, but this generally does not affect the installation of the product. If you have any questions regarding your purchase, please contact your distributor.
Practical help
Common problems
Parts mismatch
The product parts in this instruction may differ slightly from the actual product contents but generally does not affect the installation of the product.
Installation difficulty
Requires 2-3 people and 1-2 hours depending on mechanical skill level.
Before use
- Verify all parts are present
- Read instructions carefully
- Gather required tools (14mm, 18mm, 19mm, 5mm wrenches/sockets)
Specs in practice
- Installation Time
- Approximately 1-2 hours
- Personnel Required
- 2-3 people
Images and diagrams
- The manual includes diagrams for assembling the wings to the main body and mounting the connecting brackets to the vehicle frame.
Model compatibility
- Designed for 2007-2013 Toyota Tundra.

Manual page author
Michael Turner
Technical manual editor
Reviews PDF manuals for structure, safety notes, and practical product details so readers can find the right information quickly.