Furniture / Tables & Desks
Assembly Instructions for Inspire GALIO 201-915WT Dining Table
Step-by-step assembly guide for the Inspire GALIO 201-915WT dining table, including parts list, hardware requirements, and essential maintenance tips.
Quick answers from the manual
Quick answer
- The Inspire GALIO 201-915WT dining table is assembled by attaching the base plate to the base, then securing the table top to the base assembly using the provided bolts and washers. p. 4, 5
Key actions
- Assemble the base and table top using the provided hardware. p. 5
- Perform maintenance by tightening screws after 2 weeks and every 6 months. p. 2
Maintenance and reset
- Tighten screws after two weeks of use and every six months thereafter. p. 2
Where to find it in the PDF
- Assembly Techniques p. 2
- Parts List p. 4
- Assembly Steps p. 5
Table of contents
Manual images
Click an image to enlargeQuick guide from the manual
This document provides assembly instructions for the Inspire GALIO 201-915WT dining table. Before starting, ensure all parts are present. Regular maintenance is required to keep the furniture stable and safe.
Parts and Hardware
Before beginning assembly, verify that you have all the necessary components:
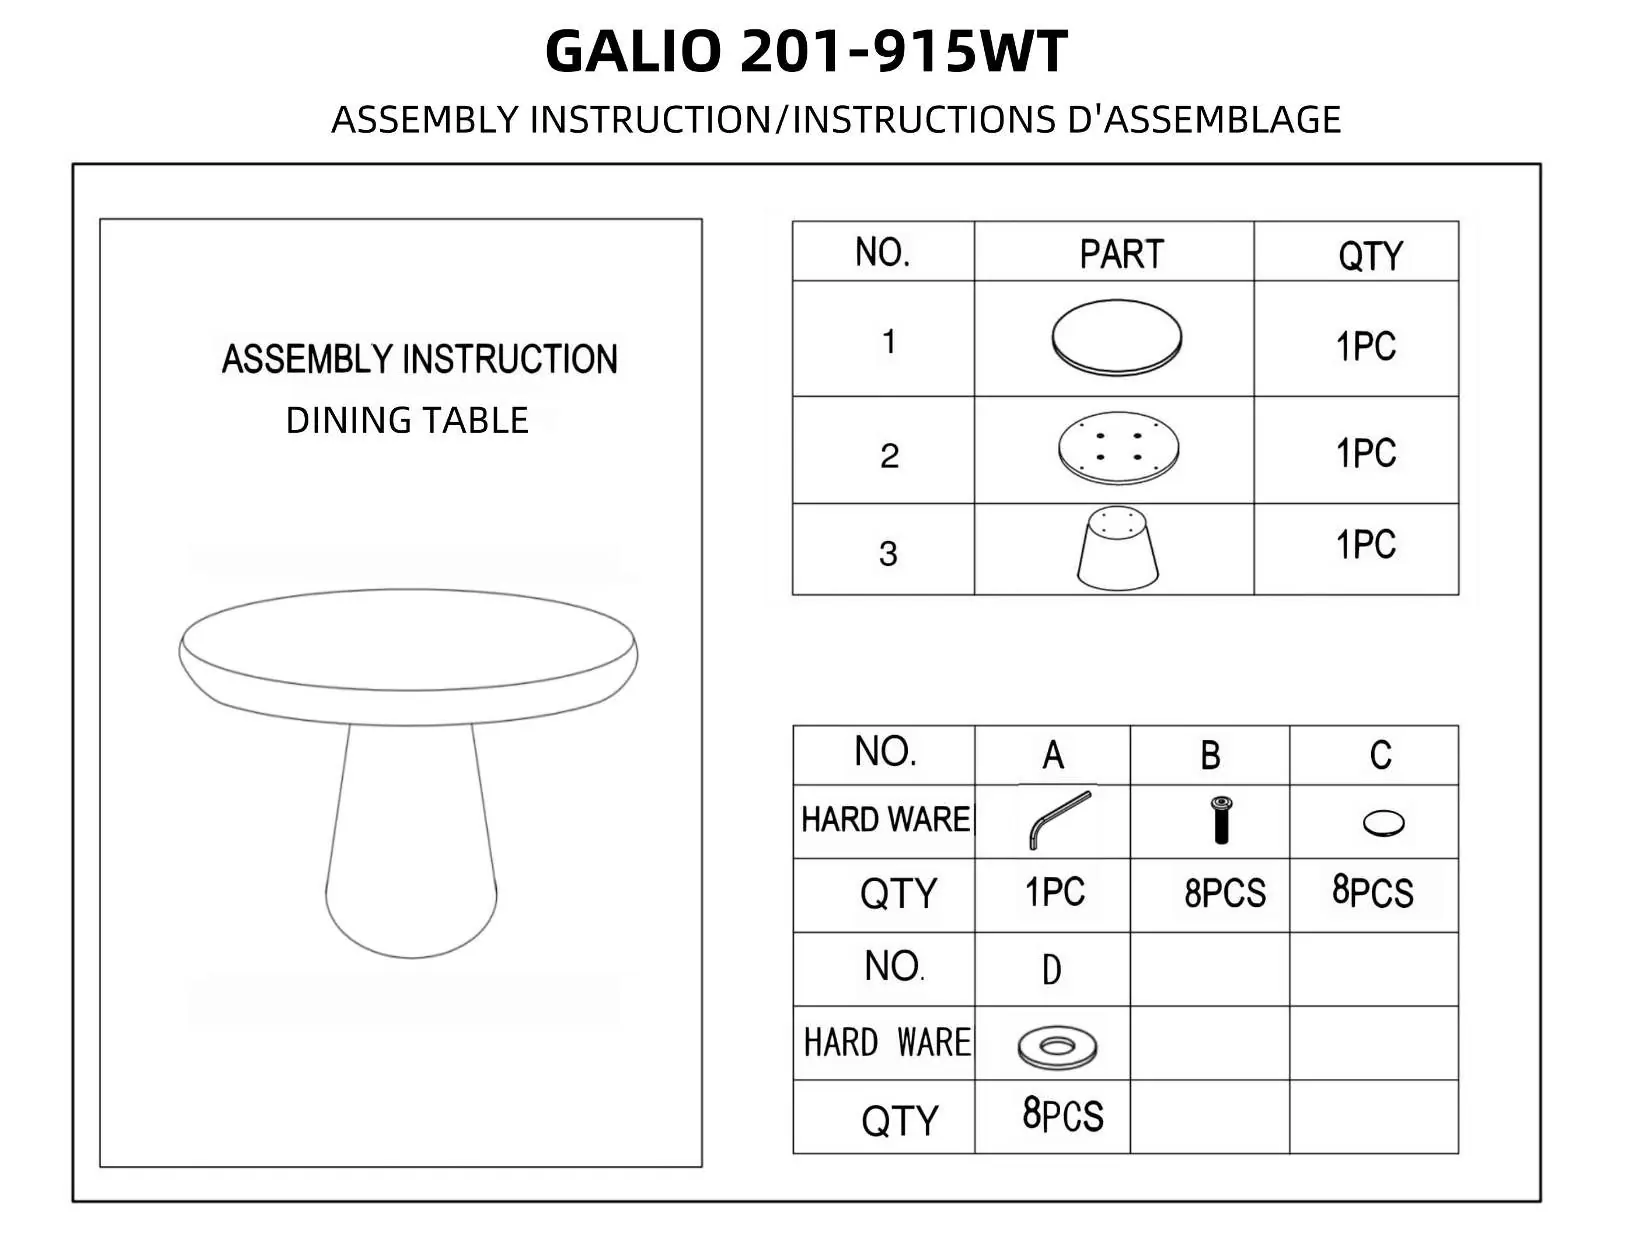
- Parts: Table top (1), Base plate (2), Table base (3).
- Hardware: Allen key (A), Bolts (B), Washers (C), Washers (D).
Assembly Instructions
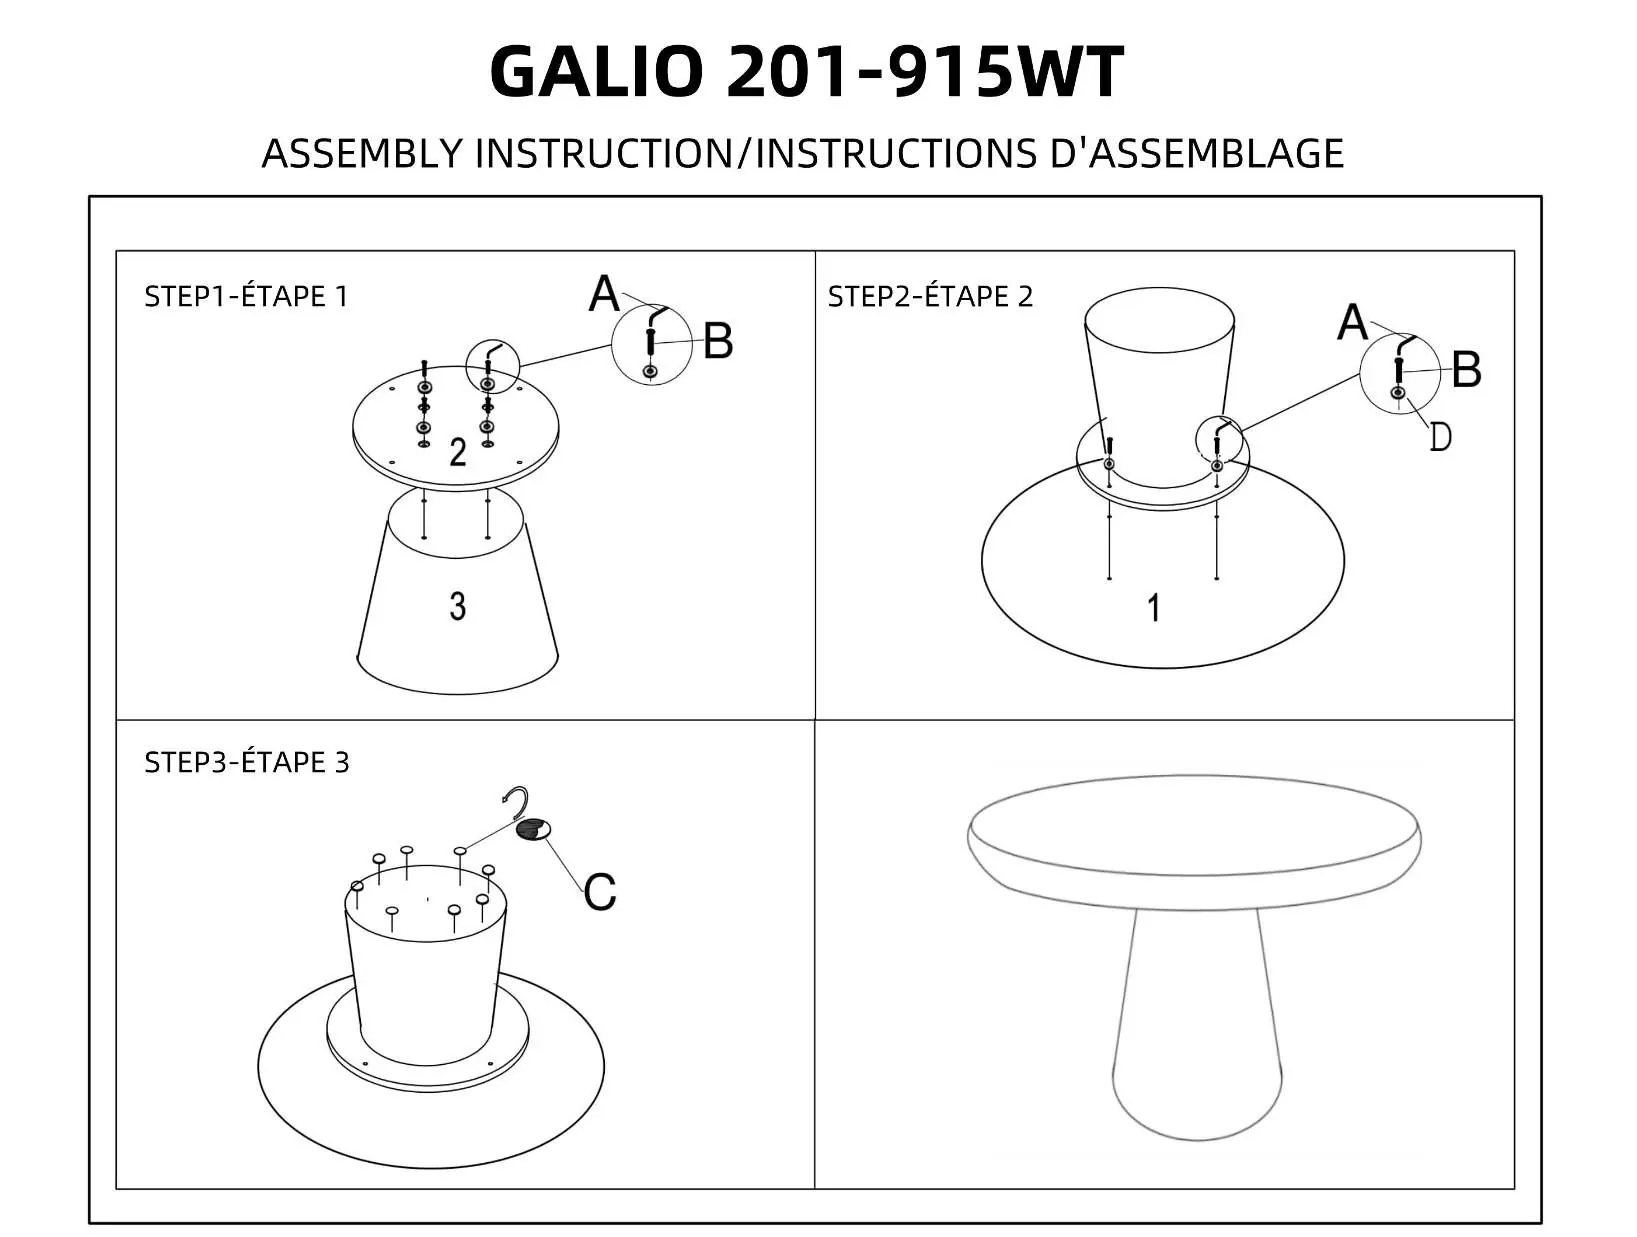
- Step 1: Attach the base plate (2) to the table base (3) using bolts (B) and washers.
- Step 2: Attach the table top (1) to the base assembly using bolts (B) and washers (D).
- Step 3: Secure all connections using the provided Allen key (A) and washers (C).
Maintenance and Safety
To ensure the longevity and safety of your furniture:
- Initial Tightening: Hand-tighten screws to 70% during assembly, then fully tighten with tools.
- Leveling: Ensure the furniture rests on a flat, level surface. Use a soft blanket or carpet when turning the piece on its side.
- Regular Maintenance: Tighten screws again after two weeks of use, and at least once every six months thereafter. Loose screws can cause the furniture to become wobbly and may lead to injury.
Practical help
Common problems
Table is wobbly
Check if the table is on a flat, level surface. Tighten all screws securely.
Screws loosening over time
Perform regular maintenance by tightening screws every six months.
Before use
- Verify all parts are included in the package.
- Prepare a soft surface (blanket or carpet) for assembly.
- Ensure you have the provided Allen key.
- Check that the smaller lock washer is between the larger washer and the screw head.
Images and diagrams
- Page 4 shows the parts list and hardware identification.
- Page 5 illustrates the three-step assembly process.

Manual page author
Michael Turner
Technical manual editor
Reviews PDF manuals for structure, safety notes, and practical product details so readers can find the right information quickly.