Electronics / Speakers & Soundbars
Installation Guide for JBL SLP 12-T and SLP14-T Loudspeakers
Comprehensive installation and setup guide for JBL SLP 12-T and SLP14-T wall-mount loudspeakers. Includes instructions for wiring, tap selector settings, cable management, and wall-mount bracket installation.
Table of contents
Manual images
Click an image to enlargeQuick Guide
This document provides installation instructions for the JBL SLP 12-T and SLP14-T Sleek Low-Profile Wall-Mount Loudspeakers. Installation must be performed by qualified personnel using safe installation standards. The installer is responsible for selecting appropriate mounting hardware for the wall structure.
Wiring the Loudspeaker
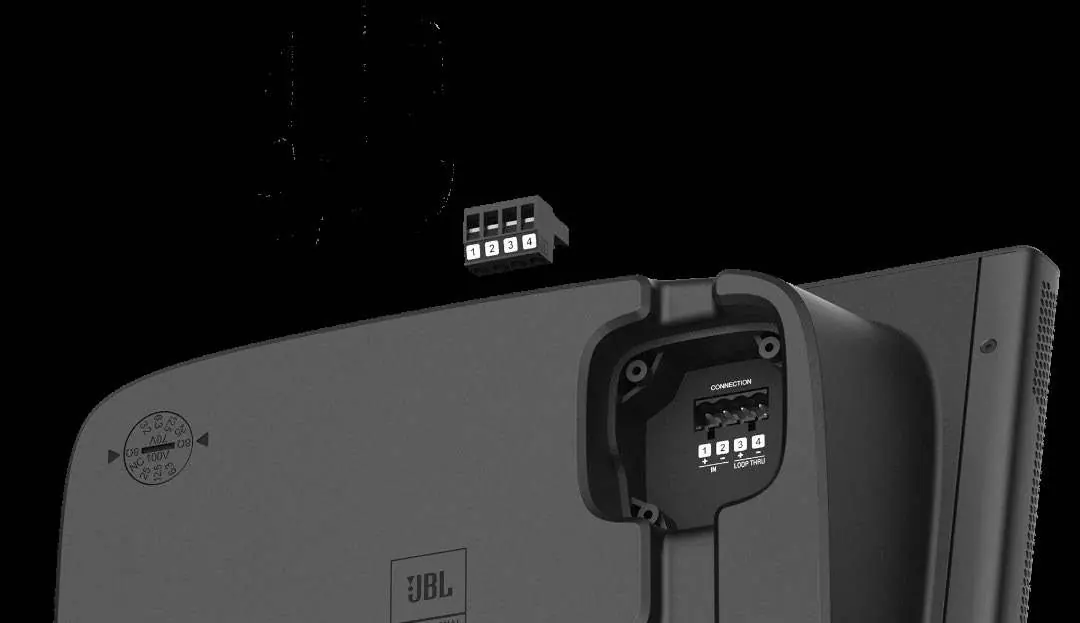
The speaker uses a multi-pin connector for wiring. Attach one or two pairs of wires to the included connector and tighten the set screws. Securely press the connector into the matching socket in the loudspeaker's terminal compartment. The internal terminals are connected in parallel, allowing for daisy-chaining to subsequent speakers in a distributed system.
Terminal Cover Installation
A terminal cover is included to protect the wiring compartment. Secure it using the four provided tapping screws. For improved sealing, you may apply installer-supplied silicone glue or other suitable sealant to the cable opening of the cover.
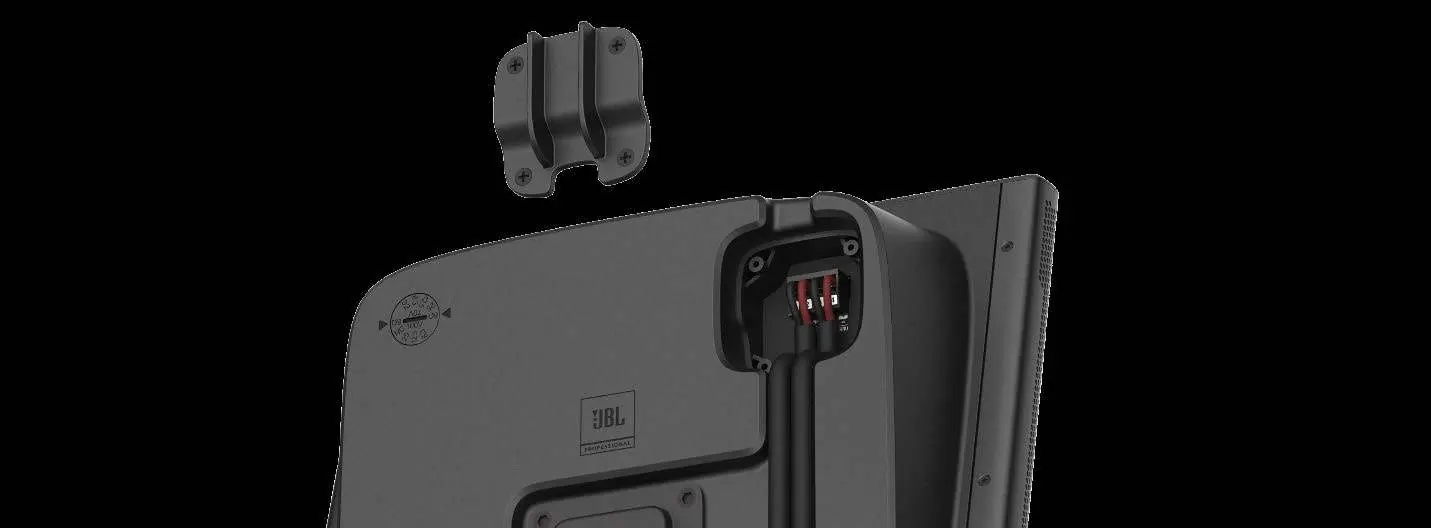
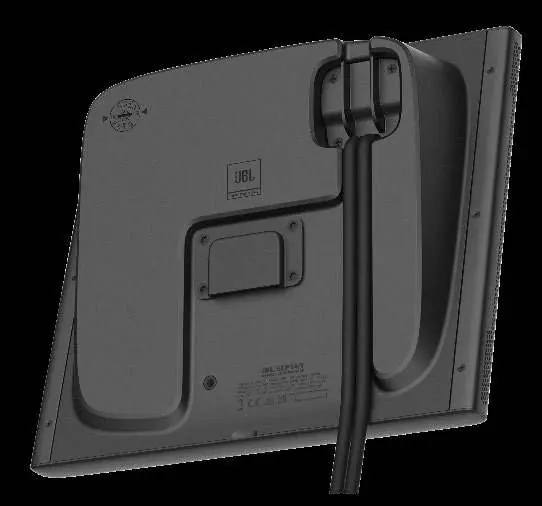
Routing Wiring
The back panel is designed to sit flush against the wall. Recesses are provided on the back panel to route wires in either an upward or downward direction, depending on your installation requirements.
Setting the Tap Selector Switch
Rotate the back-panel TAP SELECTOR SWITCH to configure the speaker for your specific system requirements:
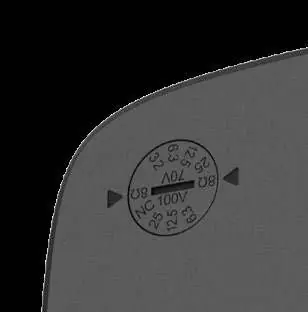
- SLP12/T: Select 8 Ohm for low-impedance/direct mode. Select 15W, 7.5W, or 3.8W for 70V/100V distributed systems. Select 1.9W for 70V systems only.
- SLP14/T: Select 8 Ohm for low-impedance/direct mode. Select 25W, 12.5W, or 6.3W for 70V/100V distributed systems. Select 3.2W for 70V systems only.
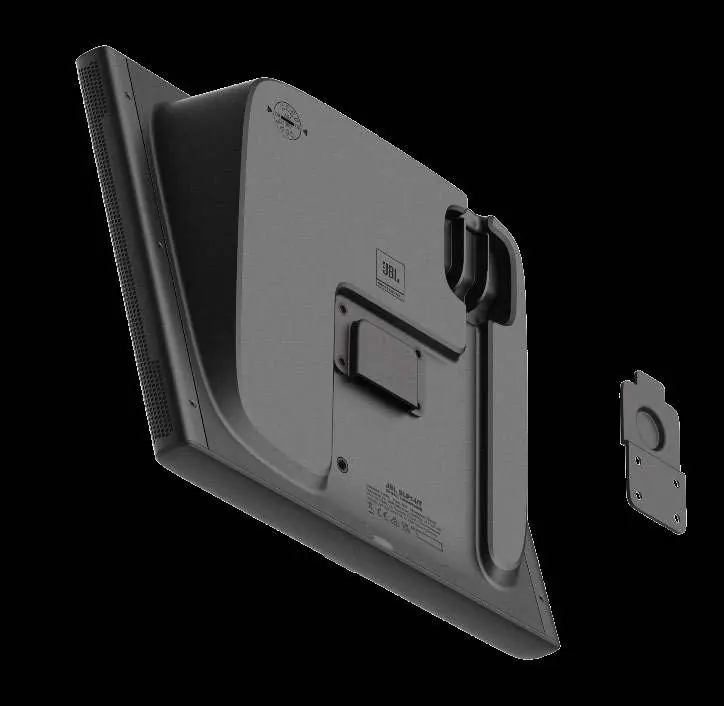
Mounting the Loudspeaker
Secure the wall-mount bracket to the wall using appropriate screws or bolts suitable for the wall material. Slide the loudspeaker down onto the wall bracket until it is fully engaged. A secondary safety cable must be attached to the M6 safety cable attachment insert point using an installer-supplied M6-1.0 x 10 mm bolt. The bolt head plus the lug thickness must not exceed 6.8 mm to avoid interference. Attach the other end of the safety cable to a separate, secure location on the building structure.
Manufacturer information
JBL
Practical help
Common problems
Safety cable bolt interference
Ensure the bolt head plus the thickness of the ring lug does not exceed 6.8 mm to prevent interference with the wall bracket or wall.
Mounting instability
Ensure the wall-mount bracket is attached using hardware appropriate for the specific wall material and construction.
Before use
- Verify wall material and construction for secure bracket mounting.
- Ensure installation is performed by qualified personnel.
- Prepare a secondary safety cable with a ring lug end.
- Check the tap selector switch setting to match your system (8 Ohm or 70V/100V).
- Ensure the terminal cover is installed if environmental sealing is required.
Images and diagrams
- The multi-pin connector diagram illustrates the parallel connection terminals for daisy-chaining.
- Back panel recesses allow for clean cable management in either upward or downward directions.
Model compatibility
- SLP12/T: 8 Ohm, 15W/7.5W/3.8W (70V/100V), 1.9W (70V only).
- SLP14/T: 8 Ohm, 25W/12.5W/6.3W (70V/100V), 3.2W (70V only).

Manual page author
David Miller
Documentation analyst
Organizes user manual content into clear summaries, with attention to model details, product context, and everyday usability.