Home Appliances / Food Processing Equipment
User Manual for Kenmore 11-Cup Food Processor
Quick guide for the Kenmore 11-Cup Food Processor. Learn how to assemble, operate, clean, and use the chopping, slicing, and shredding functions safely.
Table of contents
Manual images
Click an image to enlargeQuick Guide from the Manual
This Kenmore 11-Cup Food Processor is designed for household use. It features an interlock system that prevents operation unless the bowl and cover are securely locked. Always use the food pusher to feed items into the chute; never use your hands. The unit is not intended for ice, whipping cream, beating egg whites, or grinding hard items like coffee beans or spices.
Important Safeguards
- Always unplug the appliance when not in use, before cleaning, or when assembling/disassembling parts.
- Never immerse the motor base in water or other liquids.
- Blades and discs are extremely sharp; handle with care.
- Do not operate if the cord or plug is damaged.
- Use only recommended accessories to avoid fire or electric shock.
Assembly
Base and Bowl: Place the base on a flat, dry surface. Align the bowl handle with the unlock icon on the base and turn counterclockwise until it clicks into place.
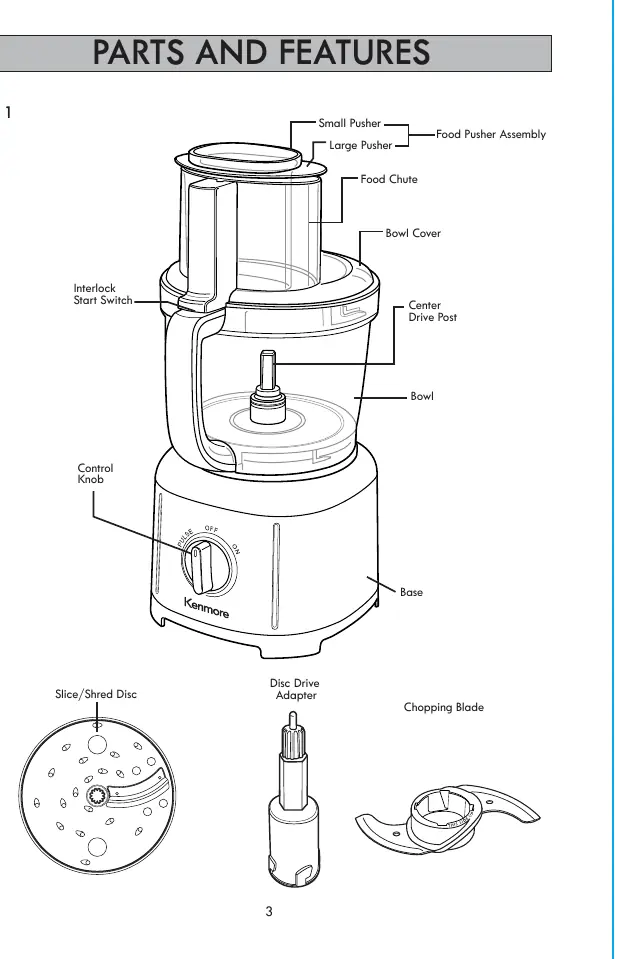
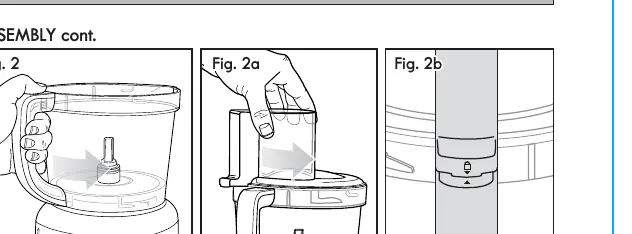
Cover: Place the cover on the bowl, aligning the arrow with the unlock icon. Turn counterclockwise until it clicks.
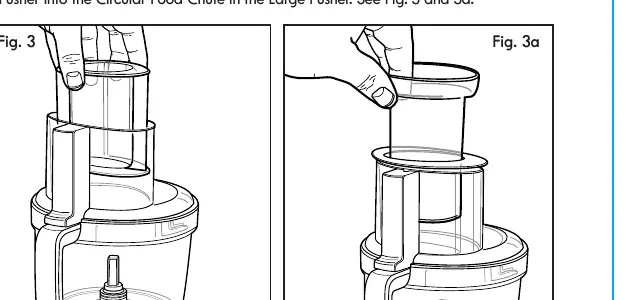
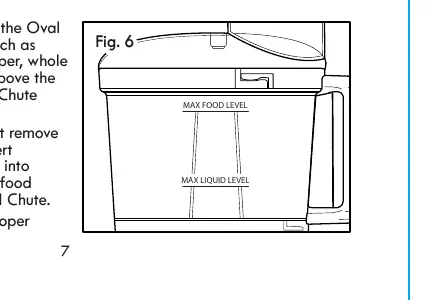
Food Pusher: The assembly consists of a large and small pusher. Align the raised seam on the large pusher with the slot in the interlock switch. Insert the large pusher into the oval chute, then insert the small pusher into the circular chute.
Operating Instructions
Controls:
- PULSE: Turn counterclockwise and hold for short tasks like chopping nuts or vegetables.
- ON: Turn clockwise for continuous operation, ideal for less tender foods.
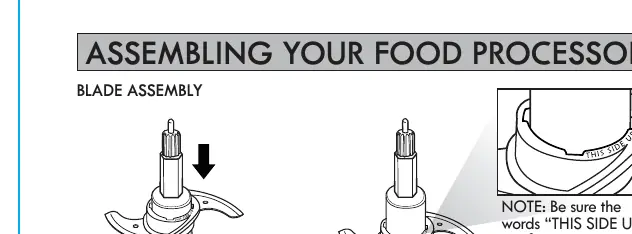
Chopping: Place the chopping blade on the center post. Add food to the bowl, lock the cover, and use the Pulse or On setting.
Slicing or Shredding: Slide the disc drive adapter onto the center post. Place the slice/shred disc with the desired side facing up. Lock the cover and fill the chute with food, using the appropriate pusher.
Care and Cleaning
- Turn the control knob to OFF and unplug the unit before cleaning.
- Wipe the base with a damp cloth; do not immerse in liquid.
- Removable parts (bowl, cover, blades, discs) can be washed by hand or in the top rack of a dishwasher.
- Do not use rough scouring pads.
- To remove stains from the bowl, use a paste of 2 tablespoons baking soda and 1 tablespoon warm water.
Processing Tips
Hot foods and liquids must be under 120°F to be processed. Process small amounts of liquid (2 cups or less) at a time to prevent leakage.
Practical help
Common problems
Unit will not start
Ensure the bowl is locked onto the base and the cover is locked onto the bowl. The interlock system prevents operation if these are not secure.
Food pusher not working
The large pusher must be inserted into the oval food chute to depress the spring in the interlock start switch.
Stains on the bowl
Make a paste of 2 tablespoons baking soda and 1 tablespoon warm water, apply to stains, rub with a cloth, then rinse and dry.
Before use
- Wash all parts (except the base) in hot, soapy water.
- Ensure the base is on a flat, dry, and stable surface.
- Check that the control knob is in the OFF position.
- Ensure the bowl is locked onto the base.
- Ensure the cover is locked onto the bowl.
- Verify the food pusher is correctly assembled.
Specs in practice
- Max Fill Line
- Do not exceed this level when filling the chute with food or liquid.
Images and diagrams
- Fig 1: Overview of all parts including the base, bowl, cover, and pusher assembly.
- Fig 2: Shows the correct alignment for locking the bowl cover onto the bowl.
- Fig 4: Illustrates the correct placement of the chopping blade on the drive adapter.
- Fig 6: Indicates the maximum fill levels for food and liquids in the chute.
Model compatibility
- Not suitable for ice, whipping cream, beating egg whites, or grinding coffee beans/spices.
- Hot liquids must be below 120°F.
- Process liquids in batches of 2 cups or less.

Manual page author
Michael Turner
Technical manual editor
Reviews PDF manuals for structure, safety notes, and practical product details so readers can find the right information quickly.