Home Appliances / Small Kitchen Appliances
User Manual for Adler AD 4224 Food Processor
Quick guide and user manual for the Adler AD 4224 food processor. Includes setup, operating modes, cleaning instructions, and troubleshooting tips.
Table of contents
Manual images
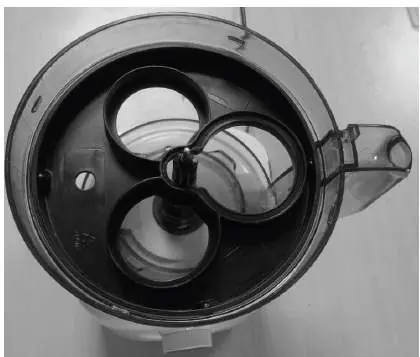
Click an image to enlargeQuick guide from the manual
The Adler AD 4224 is a versatile food processor designed for home use. Before first use, ensure all parts are clean and correctly assembled. The device features a touch control panel with both manual and automatic modes. Always ensure the bowl is locked securely into place (listen for a click) before starting the device. Do not exceed the 2000 ml capacity when mixing hot products.
Product description
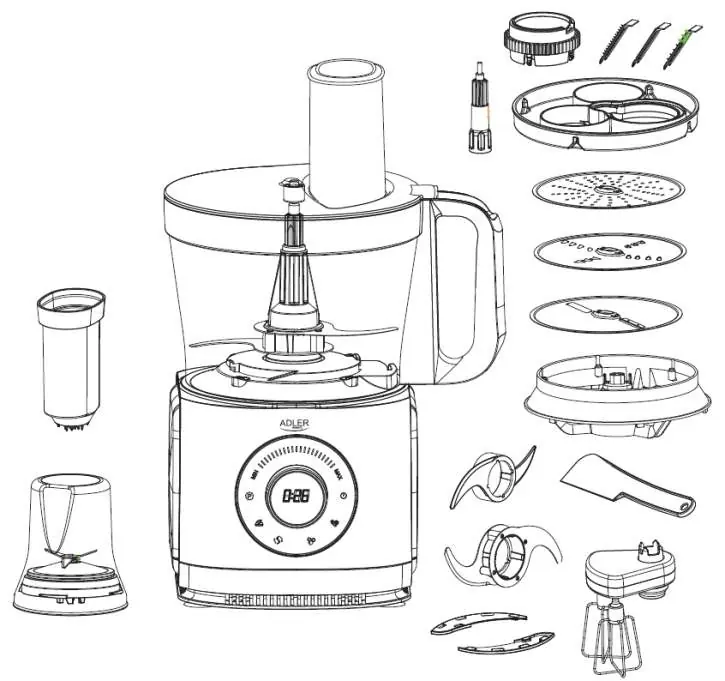
The food processor consists of a motor base, a bowl, and various attachments including a slicing disc, shredding discs, a chopper blade, a kneading blade, a double beater, a grinder, and a spiralizer. Refer to the parts diagram for specific identification of components.
Control panel
The touch control panel includes:

- Start/Pause button: Starts or pauses the selected program.
- Power button: Turns the device on or off.
- Function buttons: Dedicated buttons for Ice crush, Smoothie, Meat chopping, and Pulse.
- Speed control knob: Allows manual speed selection from MIN to MAX.
- LCD screen: Displays working time.
Operation
Manual mode
Press the Power button, then rotate the speed knob to select a speed from 1 to 7. Press the Start/Pause button to begin. Press the Power button again to stop the program.
Automatic modes
Select the desired function (Ice crush, Smoothie, or Meat chopping) after turning the device on. The icon will blink to indicate selection. Press the Start/Pause button to begin the program. The LCD screen will show a countdown.
Functions and installation
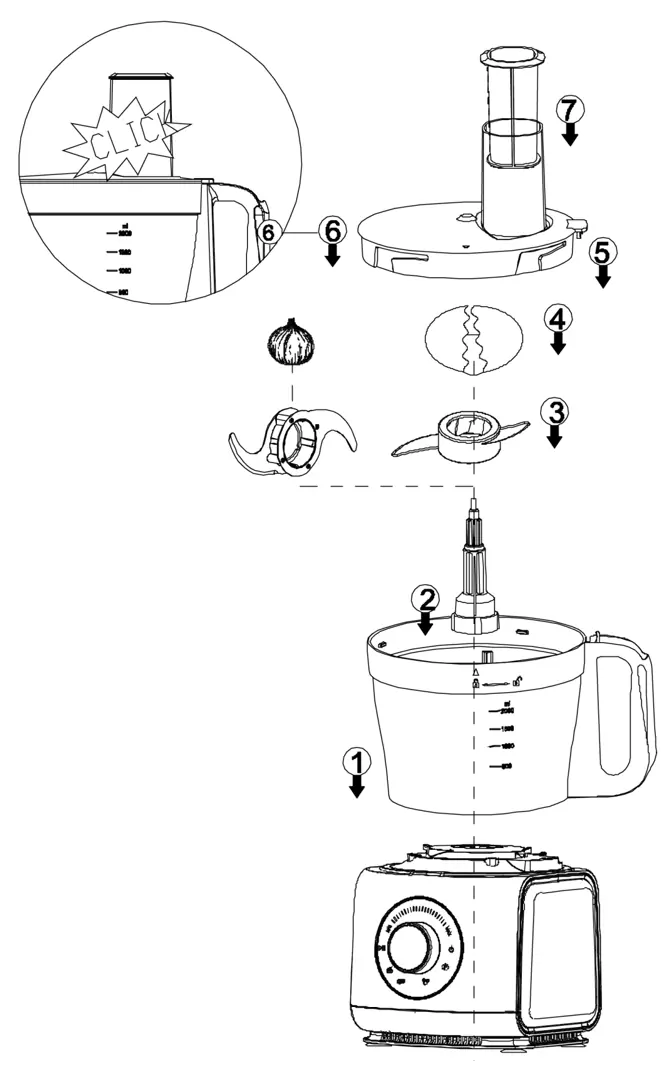
- Chopper (21) & Mixing (22): Install according to Figure C. Ensure the blade is properly seated on the shaft.
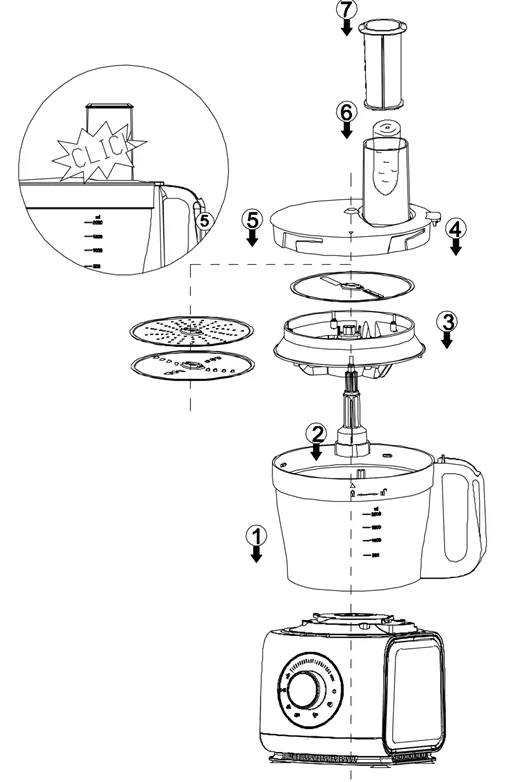
- Slicing & Shredding (6, 7, 8): Install according to Figure D. Select the appropriate disc based on the desired cut.
- Whipping (23): Install according to Figure E. Use for eggs, cream, or egg whites.
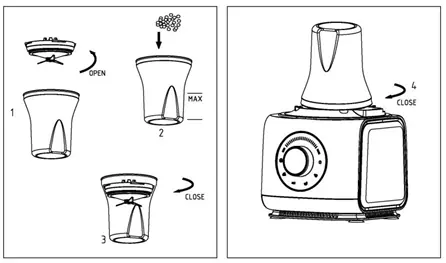
- Grinding (11-12): Install according to Figure F. Suitable for coffee beans, nuts, and spices. Do not operate continuously for more than 15 seconds.
- Spiralizer (13-19): Install according to Figure G. Used for creating vegetable spirals.
Cleaning and storage
Always unplug the device before cleaning. Do not immerse the motor base in water. Removable accessories can be washed in water. Dry all parts thoroughly after cleaning. Store the device in a dry, well-ventilated place.
Troubleshooting
- Device doesn't work: Check assembly and ensure the power plug is connected correctly.
- Device stops suddenly: The bowl may have loosened during processing. Re-install the bowl cover until it clicks.
- Motor runs but accessories don't: Ensure the shaft (4 or 13) is correctly installed on the rotor inside the bowl.
Manufacturer information
Adler Europe Group
Practical help
Common problems
Device does not work
Check assembly and ensure the power plug is connected correctly.
Device stops suddenly
The bowl may have loosened during processing. Re-install the bowl cover until it clicks.
Motor runs but accessories do not
Ensure the shaft (4 or 13) is correctly installed on the rotor inside the bowl.
Before use
- Ensure all parts are clean and dry.
- Check that the power cord is undamaged.
- Verify all accessories are correctly mounted.
- Ensure the bowl is locked in place (listen for a click).
Specs in practice
- Bowl Capacity
- 3.5L for dry food, 2.0L for liquids
- Max Rotation
- 16500 rpm
Images and diagrams
- Figure A: Parts identification
- Figure C: Chopper/Mixing installation
- Figure D: Slicing/Shredding installation
- Figure E: Whipping installation
- Figure F: Grinding installation
Model compatibility
- Designed for small amounts of food products.
- Not intended for industrial food processing.
- Use only indoors.

Manual page author
David Miller
Documentation analyst
Organizes user manual content into clear summaries, with attention to model details, product context, and everyday usability.