Tools / Drills
User Manual for KIMO 1005A 12V Cordless Drill
Quick guide for the KIMO 1005A 12V Cordless Drill. Learn how to operate, charge, maintain, and troubleshoot your drill with this comprehensive manual summary.
Table of contents
Manual images
Click an image to enlargeQuick guide from the manual
This manual provides essential safety, operation, and maintenance instructions for the KIMO 1005A 12V Cordless Drill. Always read the full safety warnings before use. Key operations include battery management, torque adjustment, and proper accessory attachment.
Components and Specifications
The drill consists of the following main parts:
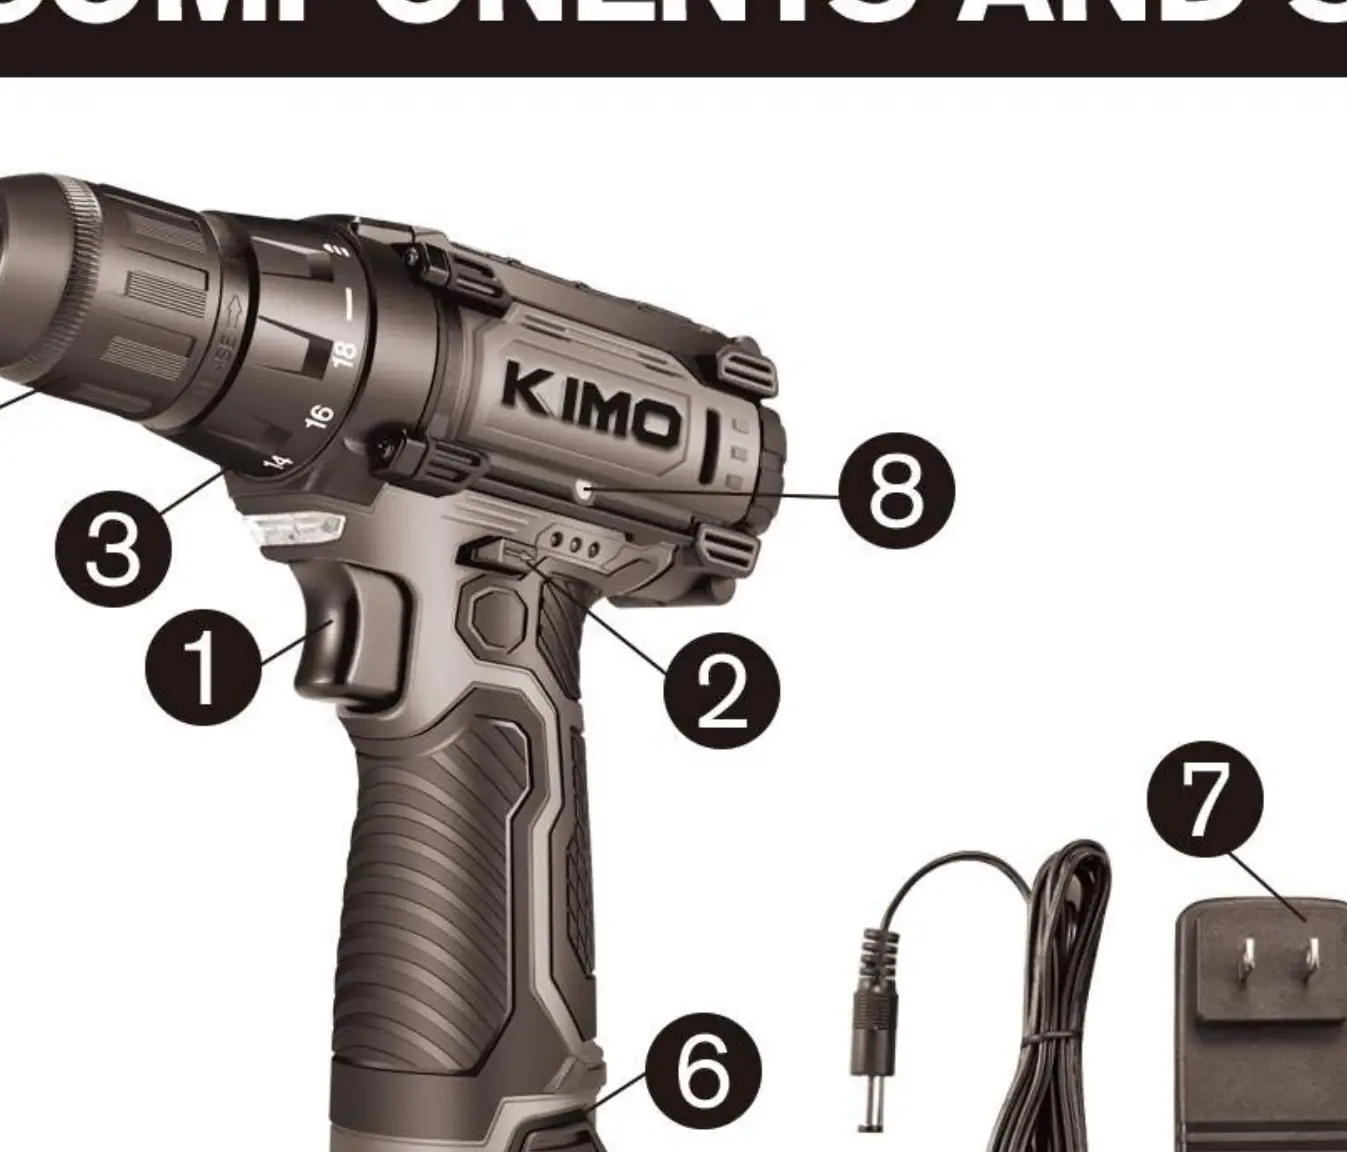
- 1. Variable Speed Switch
- 2. Forward/Reverse Button (Lock-Off Button)
- 3. Torque Adjustment Collar
- 4. Keyless Chuck
- 5. Battery
- 6. Battery Release Button
- 7. Charger
- 8. Magnetic Bit Holder
Technical Specifications:
- Voltage: 12V
- Battery: 2.0 Ah
- Charging Time: 1-1.5 Hour
- Chuck Size: 3/8"
- Max Torque: 280 In-Lb
- Low Speed: 350 RPM
- High Speed: 1350 RPM
- Weight (Tool + Battery): 2.21 Lbs
Battery Operation
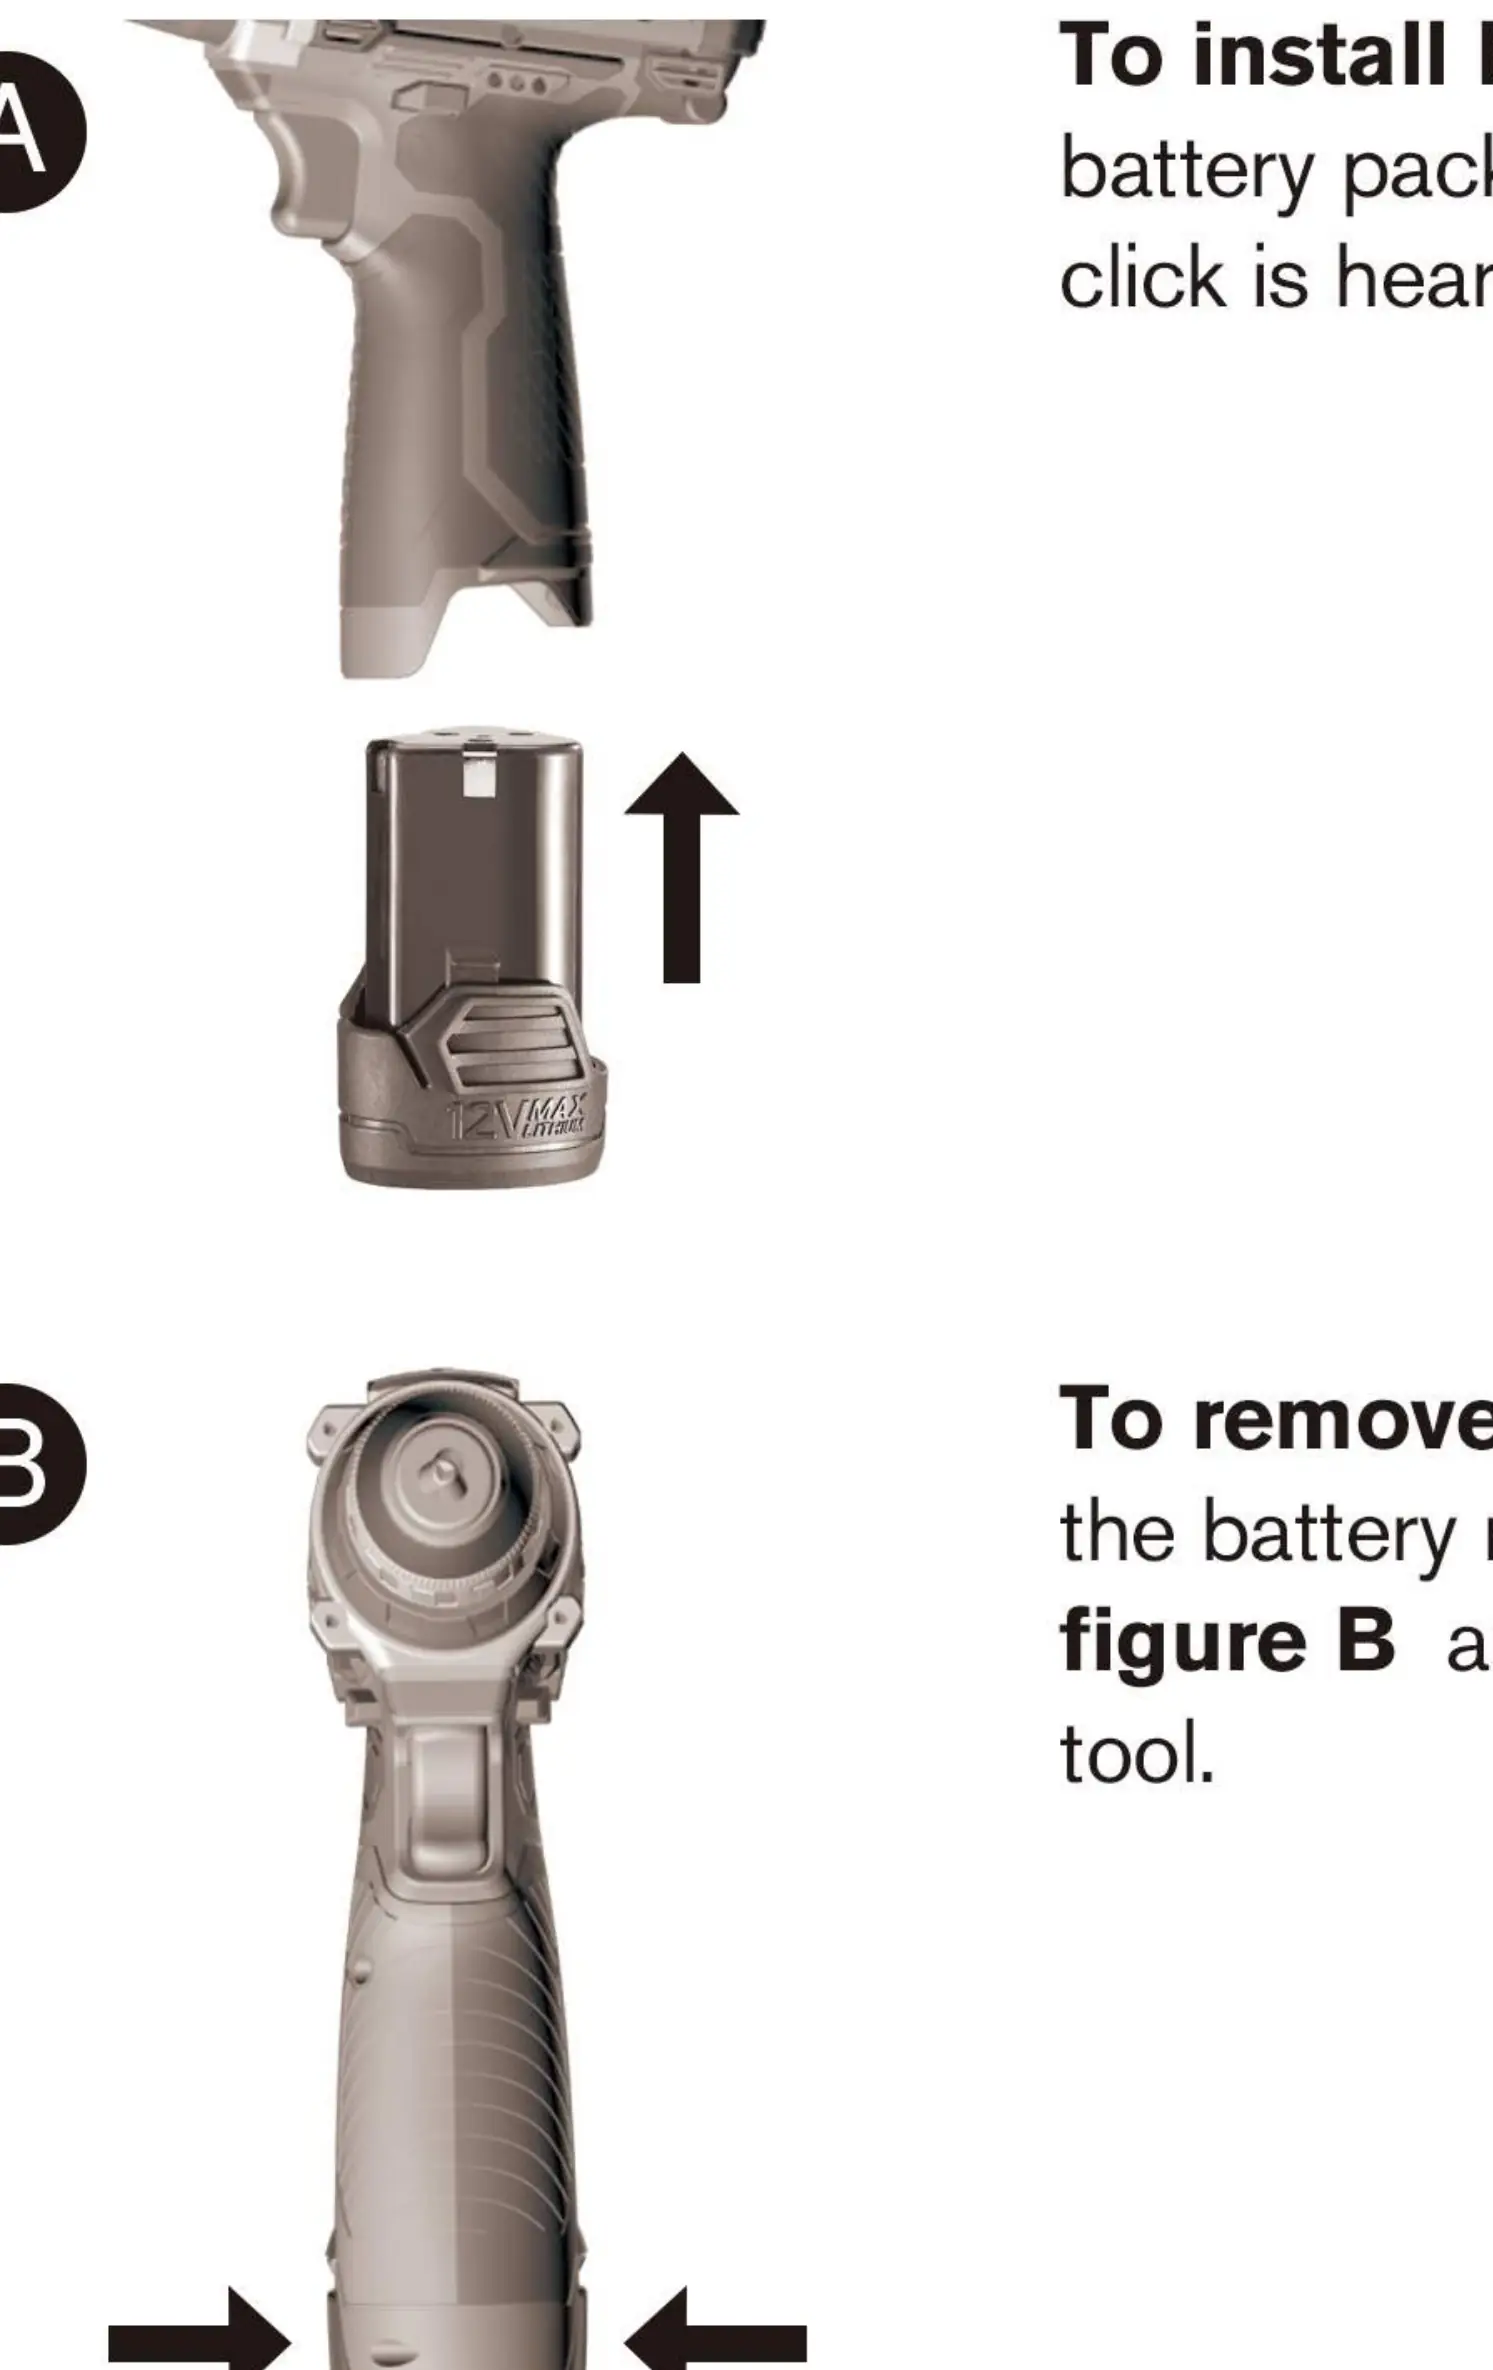
Installing and Removing: To install, insert the battery pack into the tool until an audible click is heard. To remove, depress the battery release button and pull the pack out.
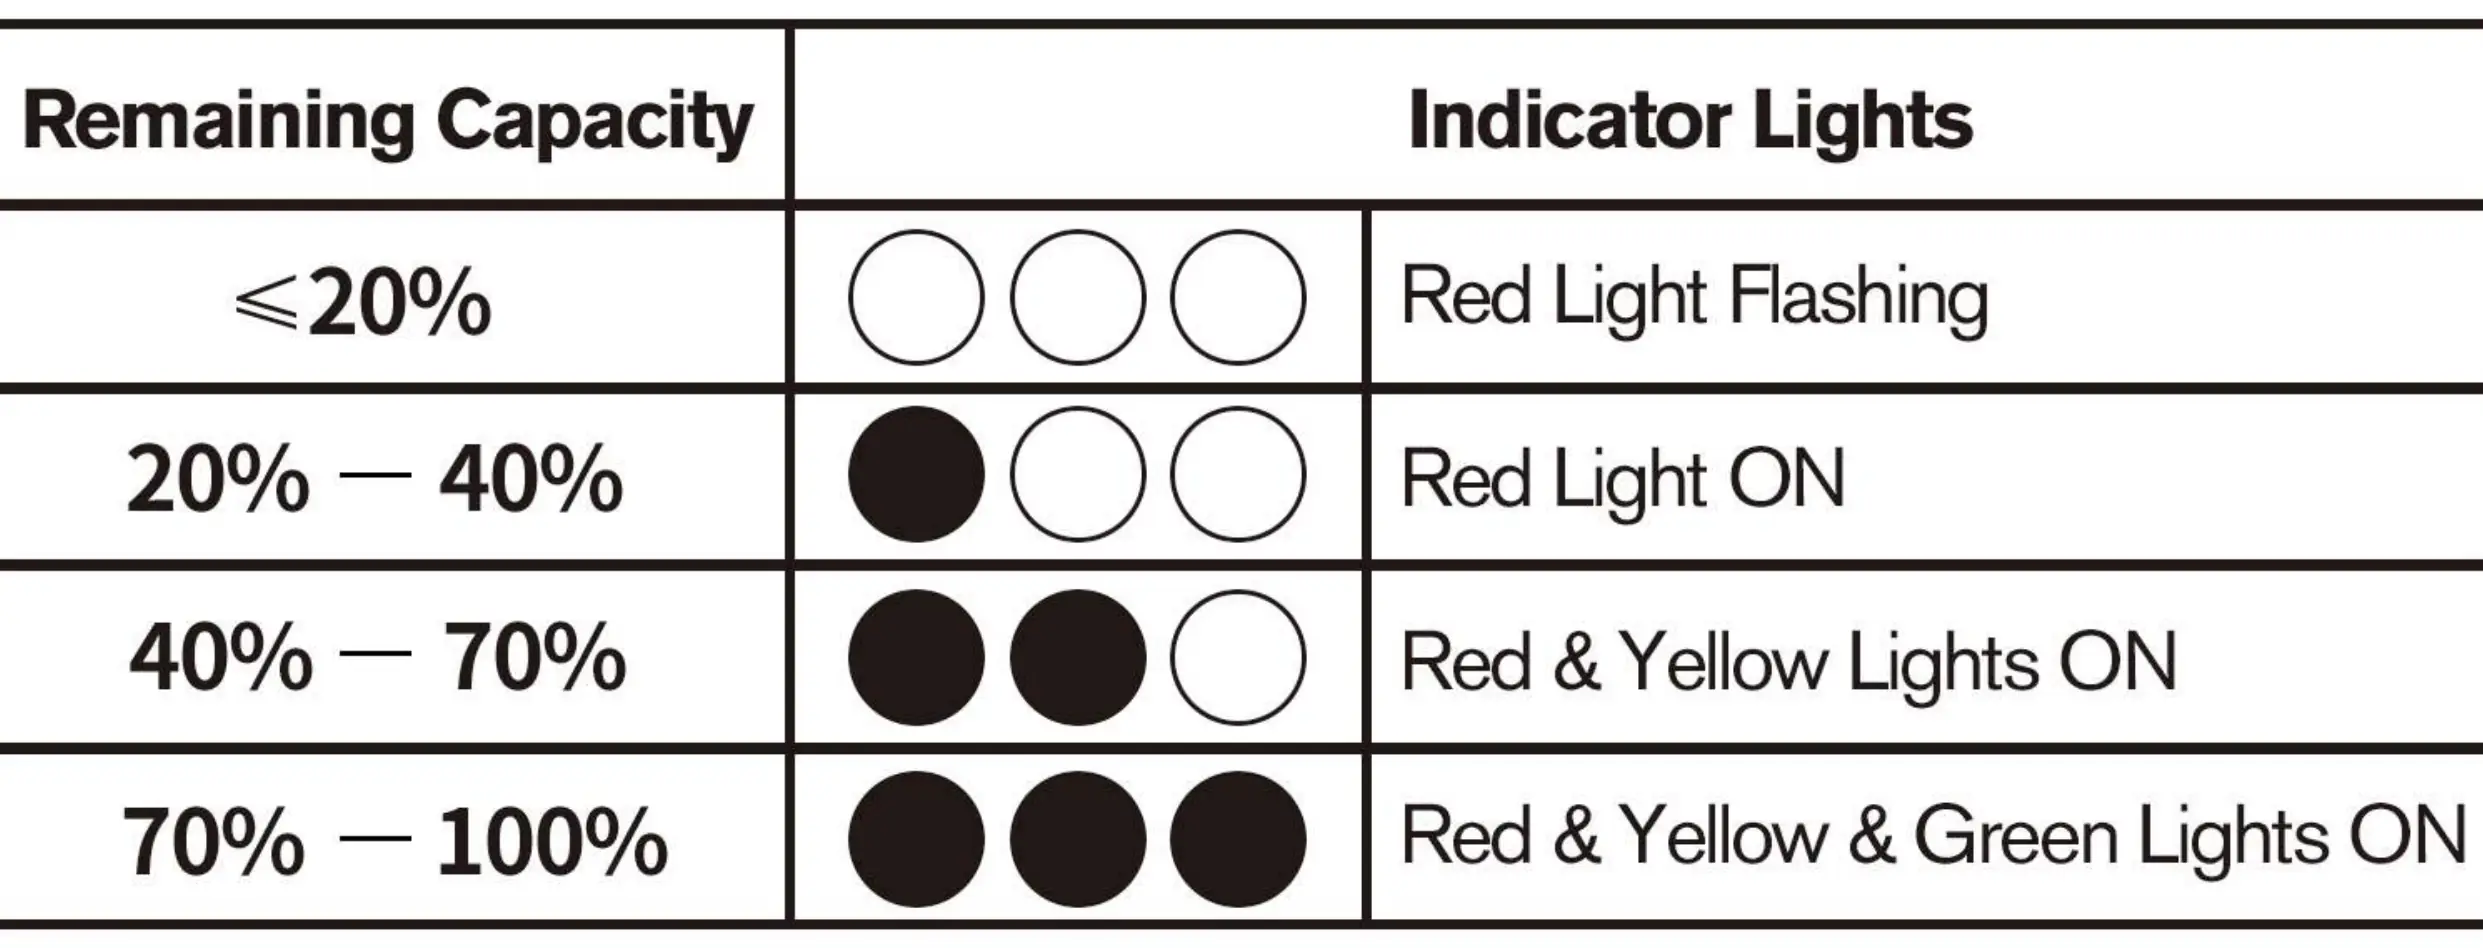
Fuel Gauge: The drill features LED indicators to show remaining charge:
- ≤20%: Red Light Flashing
- 20% - 40%: Red Light ON
- 40% - 70%: Red & Yellow Lights ON
- 70% - 100%: Red, Yellow & Green Lights ON
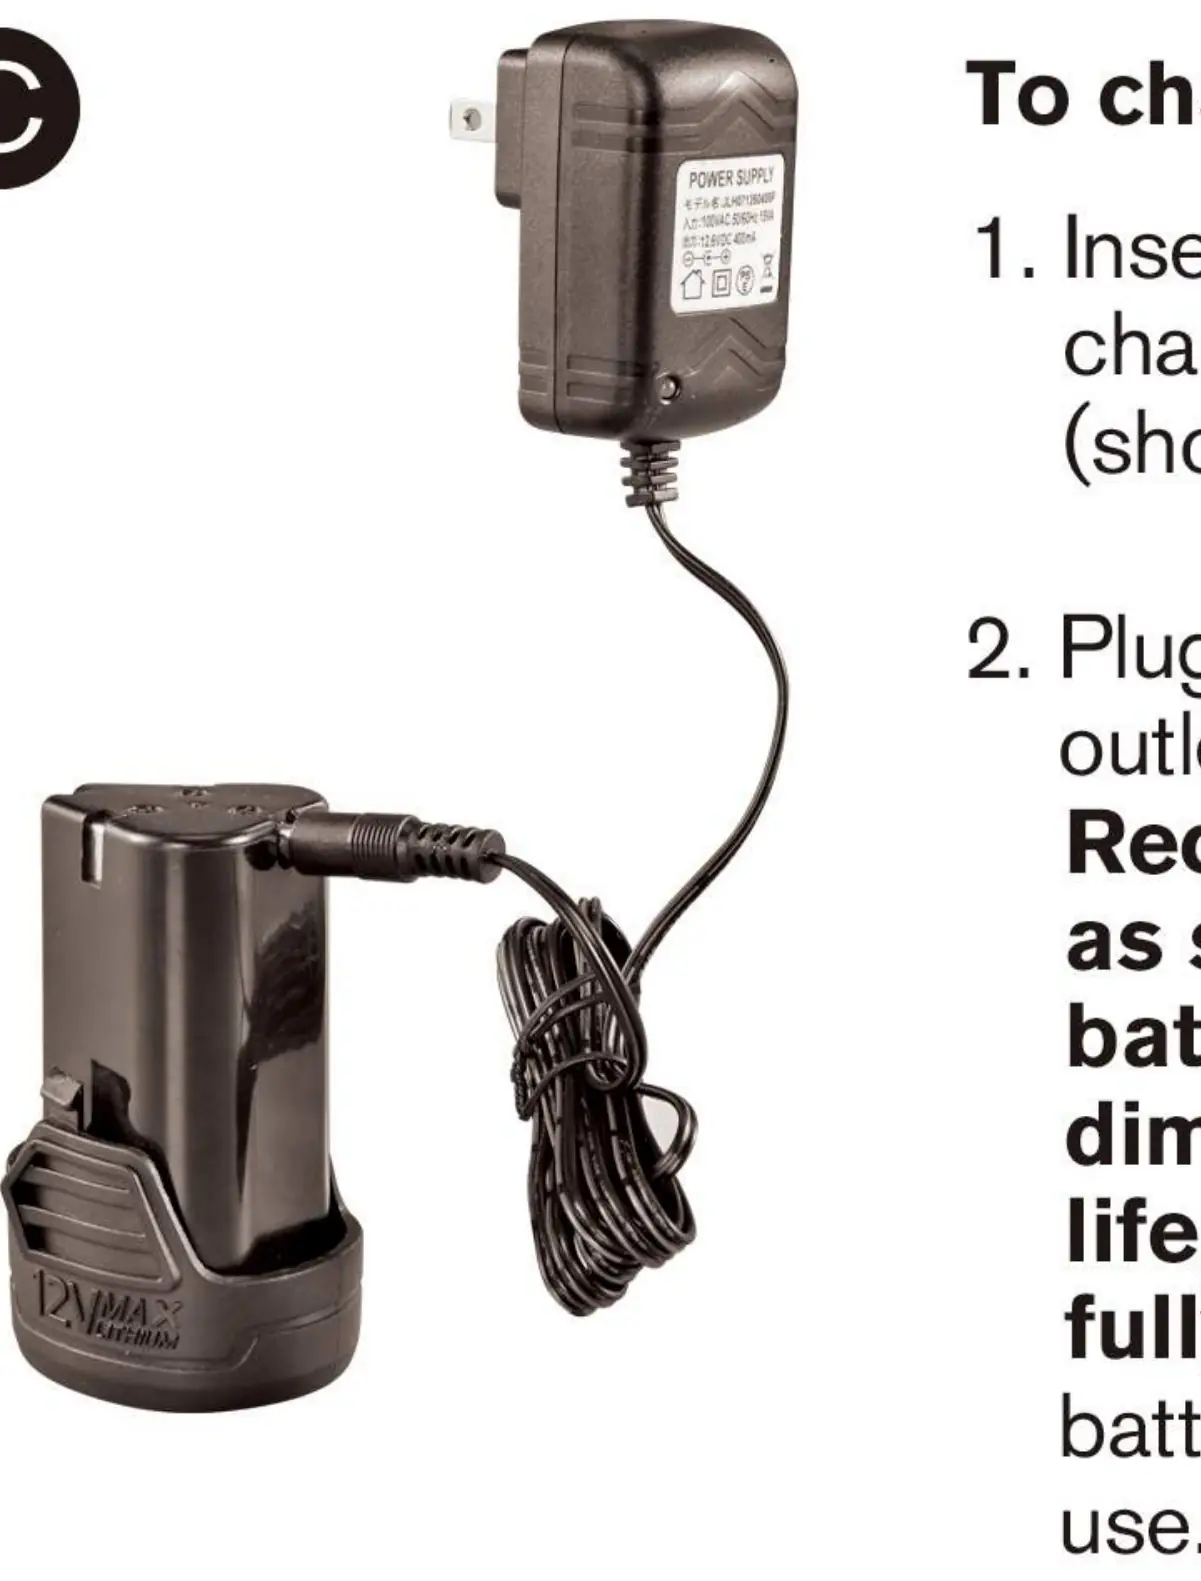
Charging: Insert the charger cable into the battery charging port. Plug the charger into an appropriate outlet. Recharge discharged batteries as soon as possible after use to maintain battery life.
Operating the Drill
Forward/Reverse Control: The button (2) determines the rotation direction and acts as a lock-off button. The center position locks the tool in the off position.
Speed Control: Pull the trigger switch (1) to turn the tool on. Vary the speed by increasing or decreasing pressure on the switch.
Torque Adjustment: Use the torque adjustment collar (3) to select the operating mode and set the torque for tightening screws. Use higher settings for large screws and hard materials.
Attaching Accessories
To insert a drill bit or accessory:
- Grasp the rear half of the chuck (4) with one hand.
- Rotate the front half (4a) counterclockwise to open.
- Insert the bit fully.
- Tighten securely by holding the rear half and rotating the front portion clockwise.
Maintenance and Safety
Keep air vents and the motor housing free of dirt and dust. Wipe the equipment with a clean cloth or use low-pressure compressed air. Do not use harsh cleaning agents or solvents. Always lock the trigger switch or remove the battery before performing maintenance or storing the tool.
Troubleshooting
If the unit will not operate, check the battery installation and charge status. If the battery will not charge, ensure the cable is inserted properly, the charger is plugged into a working outlet, and the ambient temperature is within the safe range (above 40°F and below 105°F). If the unit shuts off abruptly, it may have reached its thermal limit; allow it to cool down.
Manufacturer information
Zhejiang Kimo Power Tools Co., Ltd.
Practical help
Common problems
Unit will not operate
Check battery pack installation and ensure it is charged.
Battery pack will not charge
Ensure charging cable is inserted properly, charger is plugged in, and ambient temperature is between 40°F and 105°F.
Unit shuts off abruptly
The tool may have reached its thermal limit; allow the battery pack to cool down.
Before use
- Ensure work area is clean and well-lit.
- Wear eye protection and appropriate safety gear.
- Remove adjusting keys or wrenches before turning the tool on.
- Ensure the switch is off before plugging in the battery.
- Check for loose clothing or jewelry that could get caught in moving parts.
Specs in practice
- 350/1350 RPM
- Low and high speed settings for different drilling/driving tasks.
Images and diagrams
- 1: Variable Speed Switch - Controls tool speed and activation.
- 2: Forward/Reverse Button - Sets rotation direction and locks the trigger.
- 3: Torque Adjustment Collar - Sets the torque level for different materials.
- 4: Keyless Chuck - Holds drill bits and accessories.
Model compatibility
- Use only accessories recommended by the manufacturer.
- Do not use the tool if the switch does not turn it on or off.

Manual page author
Michael Turner
Technical manual editor
Reviews PDF manuals for structure, safety notes, and practical product details so readers can find the right information quickly.