Furniture / Home Furnishing
User Guide for Leitner 00-20LJCH-1809 Jerry Can Holder
Installation and usage guide for the Leitner 00-20LJCH-1809 Jerry Can Holder. Includes assembly steps, hardware requirements, load limits, and safety guidelines for your rack system.
Table of contents
Quick guide from the manual
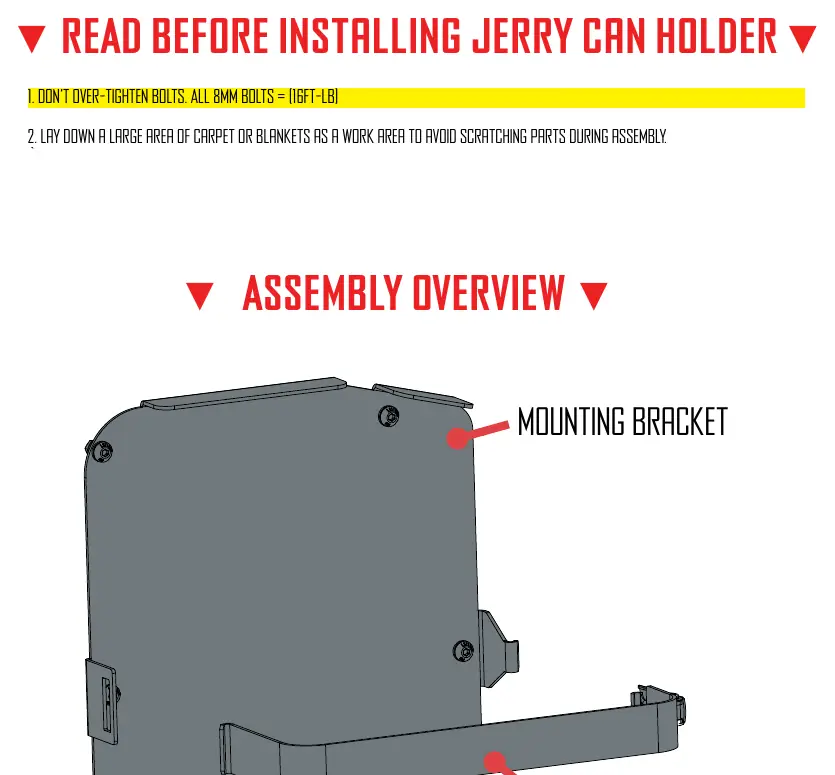
Before beginning the installation of your Leitner Jerry Can Holder, please note the following critical safety and preparation steps:
- Do not over-tighten bolts: All 8mm bolts must be torqued to 16ft-lb.
- Protect your workspace: Lay down a large area of carpet or blankets to avoid scratching parts during assembly.
- Pre-installation: The Side Kick panel must be removed from the vehicle before installing the holder.
- Latch adjustment: The latch is not adjusted from the factory and must be adjusted to fit your specific jerry can.
Tools and requirements
The installation is rated for a novice skill level and takes approximately 1 hour to complete. You will need the following tools:
- Torque wrench
- T40 Torx bit socket
- 13mm wrench
Hardware
Ensure you have the following hardware included in your kit:
- 8 x M8 x 20 screws
- 8 x M8 locknuts
Installation
Follow these steps to attach the Jerry Can Holder to your Side Kick plate:
- Remove the Side Kick panel from the vehicle.
- Align the Jerry Can Holder with the mounting points on the Side Kick plate.
- Using the 8 M8 x 20 screws and 8 M8 locknuts, attach the holder securely to the plate.
- Ensure all bolts are tightened to the specified torque of 16ft-lb.
Securing the jerry can
Once the holder is installed, secure your jerry can as follows:
- Ensure the retaining strap hook is fully engaged before securing the latch.
- Adjust the latch mechanism to fit your specific jerry can, as it is not pre-adjusted from the factory.
Use guidelines and safety
To ensure the safety of your vehicle and rack system, adhere to the following guidelines:
- Load limits: Maximum load is 150# off-road and 300# on-road. This limit is subordinate to the maximum load recommended by the vehicle manufacturer.
- Maintenance: Periodically inspect all knobs, bolts, screws, straps, and locks for signs of wear, corrosion, and fatigue. Check your load at stops during trips.
- Driving safety: Never drive with any lock, knob, or rack in an open or unlocked position. Obey all posted speed limits and adapt your speed to road conditions and the load being carried.
- Legal compliance: Be aware of local and state laws regarding the projection of objects beyond the vehicle perimeter.
- Off-road usage: High-speed off-road driving, even with a light load, can cause damage to the rack, accessories, and vehicle body. Such damage is not covered under warranty.
Warranty
Leitner Designs warrants the product to be free from defects in material and workmanship for two years from the date of purchase. For warranty claims, you must retain proof of purchase and contact the factory for instructions. Damage caused by accidents, fire, vandalism, negligence, mis-installation, misuse, or acts of God is not covered. For warranty issues, call Leitner Designs customer service at 949-395-3049 or email [email protected].
Practical help
Common problems
Damage to rack or vehicle
Avoid high-speed off-road driving, as this can cause damage not covered by warranty.
Latch not securing properly
The latch is not adjusted from the factory; you must manually adjust it to fit your specific jerry can.
Loose hardware
Periodically inspect all knobs, bolts, screws, straps, and locks for wear, corrosion, and fatigue. Check load security at stops.
Before use
- Lay down carpet or blankets to protect parts during assembly.
- Verify you have 8 M8x20 screws and 8 M8 locknuts.
- Remove the Side Kick panel before installation.
- Torque all 8mm bolts to 16ft-lb.
- Ensure the retaining strap hook is fully engaged before securing the latch.
Images and diagrams
- Assembly Overview: Shows the mounting bracket and retaining strap locations.
- Hardware: Identifies the M8 locknut and M8x20 bolt.
- Installation: Illustrates attaching the holder to the Side Kick plate.
- Securing: Shows the hook side and latch side for securing the jerry can.
Model compatibility
- Requires Leitner Side Kick panel for installation.
- Always check the current Fit Guide when obtaining a new vehicle to ensure compatibility.

Manual page author
Michael Turner
Technical manual editor
Reviews PDF manuals for structure, safety notes, and practical product details so readers can find the right information quickly.