Furniture / Home Furnishing
Leitner Grenadier Chase Light Bracket Installation Instructions
A quick guide to installing the Leitner Grenadier Chase Light Bracket (00-GCLBA-1759). Includes tool requirements, step-by-step mounting procedures, and safety guidelines for your rack system.
Table of contents
Manual images
Jump to the sectionQuick guide from the manual
This document provides installation instructions for the Leitner Grenadier Chase Light Bracket (part number 00-GCLBA-1759). The installation process takes approximately 15-20 minutes and requires basic hand tool knowledge. Always verify vehicle compatibility and load limits before use.
Tools and hardware
Before beginning the installation, ensure you have the following tools:
- T30 Torx wrench
- T40 Torx wrench
The kit includes M8 x 14 hardware.
Installation procedure
Removing existing bolts
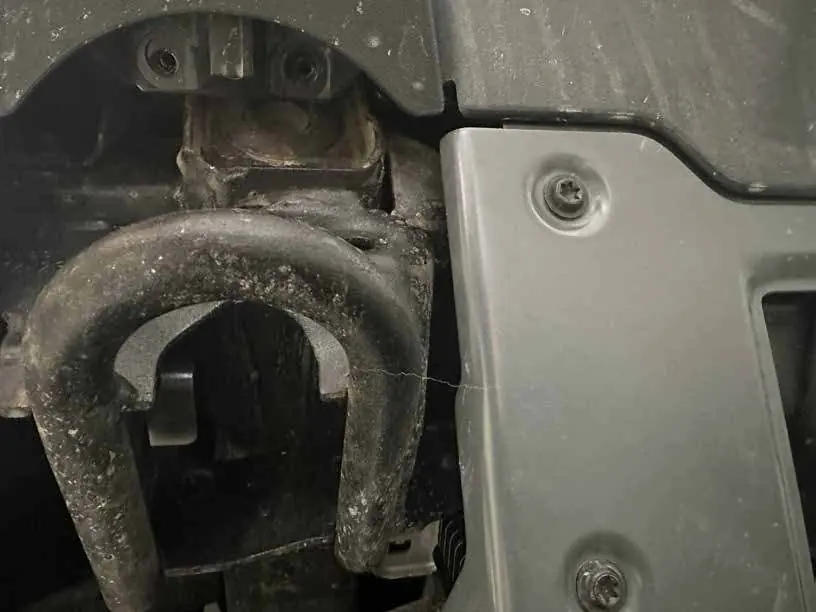
Locate the two M6 bolts situated directly under the rear tow hooks. Use a T30 Torx wrench to remove them. If you are installing brackets on both sides of the vehicle, repeat this process for the other side.
Installing the bracket
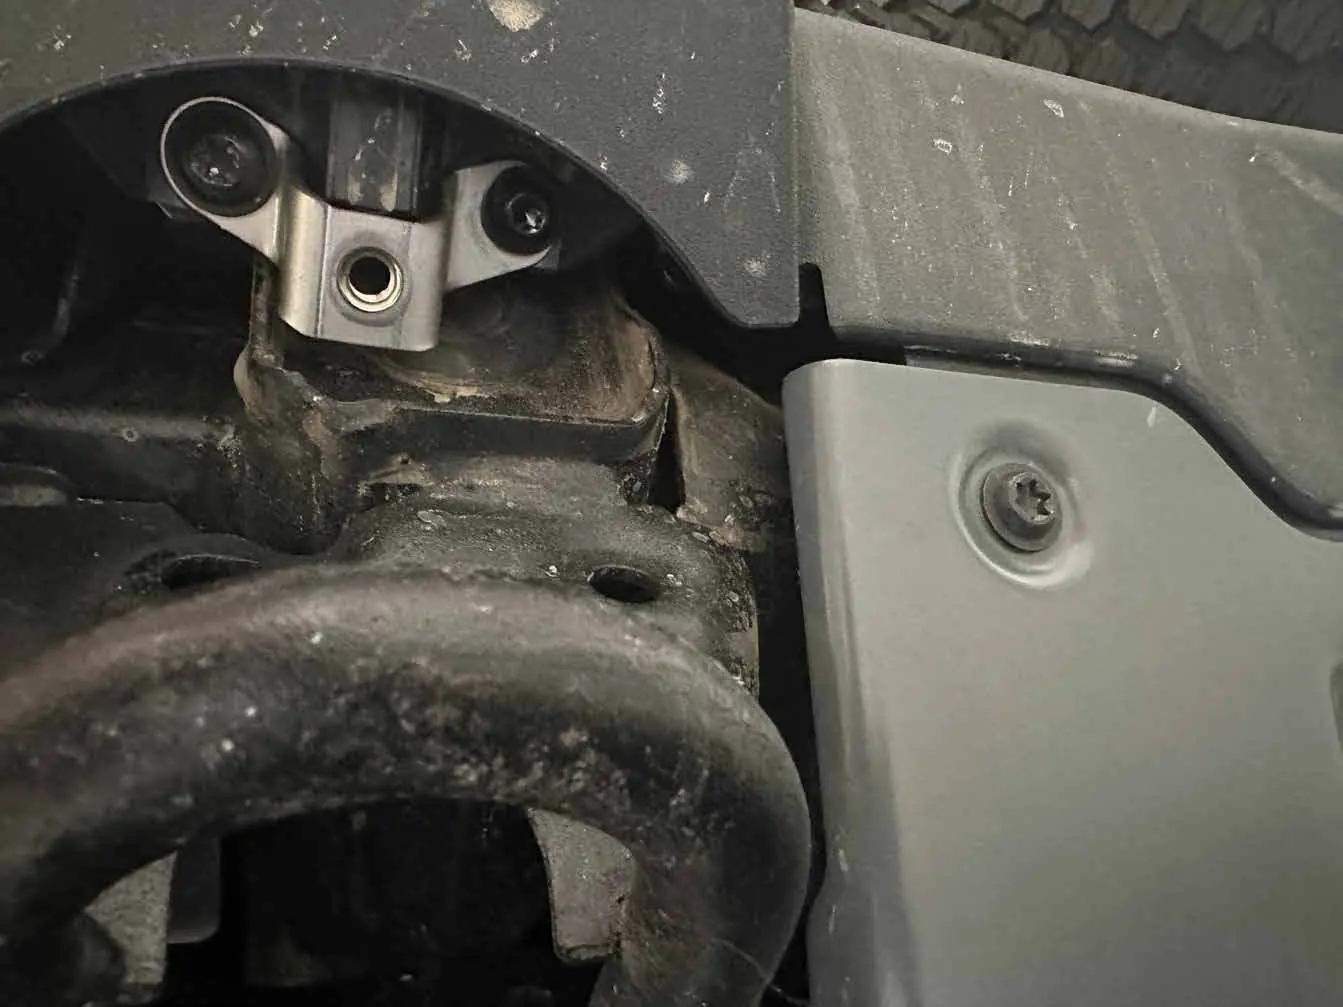
Position the chase light bracket as shown in the manual and secure it using the bolts removed in the previous step.
Attaching the light
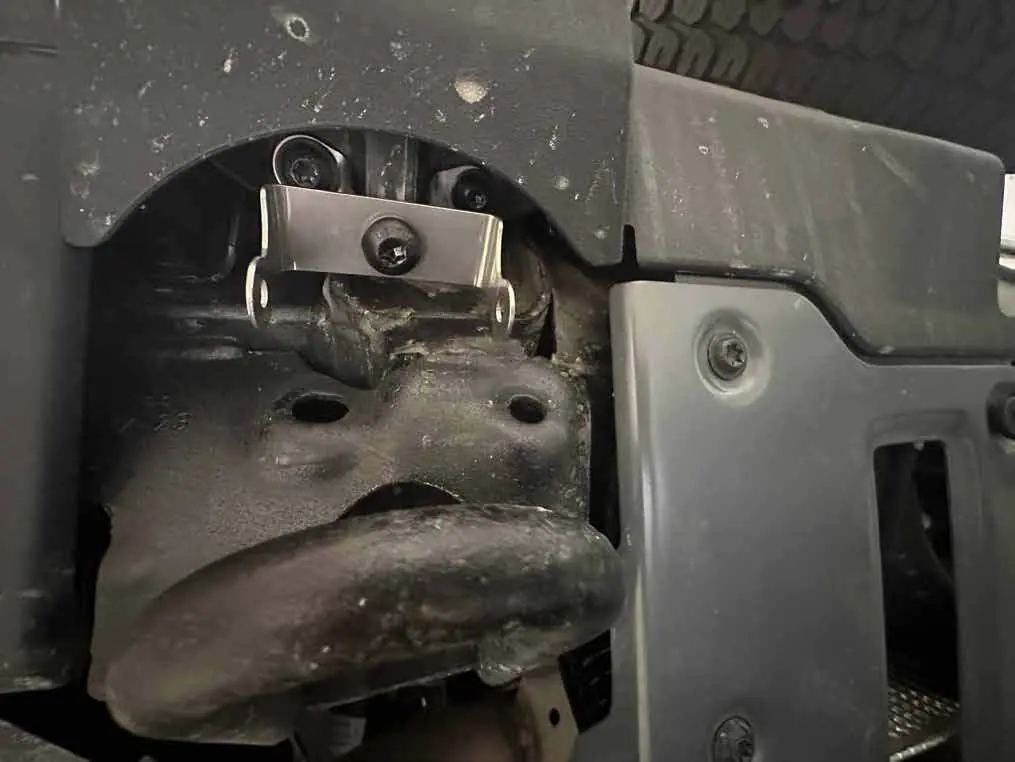
Install the light bracket first using the supplied M8 screw, then attach the light. While most 2" x 3" lights are compatible, the manufacturer recommends the Baja Designs S2 Sport (Work/Scene Clear Lens part # 547806 or Amber Lens part # 547816).
Use guidelines and safety
To ensure safety and prevent damage to your rack system and vehicle:
- Do not exceed maximum load limits: 250 lbs off-road or 500 lbs on-road. Note that vehicle manufacturer load limits always take precedence.
- High-speed off-road driving can cause damage not covered by warranty.
- Periodically inspect all knobs, bolts, screws, straps, and locks for wear, corrosion, or fatigue.
- Ensure all cargo is secured; long loads must be tied down to bumpers or tow hooks.
- Keep locks lubricated with graphite or dry lubricant.
Warranty
The product includes a two-year warranty from the date of purchase covering defects in material and workmanship under normal use. For warranty claims or support, contact Leitner Designs at 949-395-3049 or email [email protected].
Practical help
Common problems
Damage from high-speed off-road driving
Avoid high-speed driving with loads; damage caused by abuse is not covered under warranty.
Water damage to gear
Gear pods are water-resistant, not waterproof. Store sensitive items in air-tight containers inside the pod.
Before use
- Verify vehicle compatibility using the current Fit Guide.
- Ensure you have a T30 Torx wrench.
- Ensure you have a T40 Torx wrench.
- Check that all bolts and locks are tightened before every trip.
- Verify that the total load (carrier + accessories + cargo) does not exceed vehicle limits.
Images and diagrams
- Page 3 shows the location of the M6 bolts under the rear tow hooks to be removed.
- Page 4 shows the correct positioning of the chase light bracket.
- Page 5 shows the final installation of the light bracket and the light itself.
Model compatibility
- Designed for Leitner rack systems.
- Compatible with most 2" x 3" lights.
- Recommended: Baja Designs S2 Sport (Part # 547806 or # 547816).

Manual page author
Emily Carter
User documentation editor
Prepares concise manual descriptions and highlights the most useful setup, operation, and maintenance information for readers.