Automotive / Motorcycle Accessories
Installation Guide for Madstad Engineering Harley Davidson Pan America Windshield System
Step-by-step installation guide for the Madstad Engineering windshield system on the 2020-Up Harley Davidson Pan America. Includes hardware lists, removal of factory parts, and adjustment instructions.
Quick answers from the manual
Quick answer
- This guide provides instructions for installing the Madstad Engineering windshield system on the 2020-Up Harley Davidson Pan America, including removing factory components and adjusting the new windshield. p. 1, 7
Key actions
- Remove factory windshield, side deflectors, and windshield cage. p. 2, 3
- Install MadStad brackets and back brace. p. 4
- Attach digital display and front deflector. p. 5
- Assemble cage to bike and attach windshield. p. 5, 6
First start
- Ensure all fasteners are tightened securely and the windshield is properly mounted before operating the motorcycle. p. 7
Problems and fixes
Windshield brackets are too tight to slide
Loosen the pivot screw lock nut slightly.
p. 7Technical specifications
| Parameter | Value | Meaning | Pages |
|---|---|---|---|
| Vertical travel | 2 inches | Adjustment range | p. 7 |
| Angle adjustment | 20 degrees | Tilt range | p. 7 |
Where to find it in the PDF
- Hardware and Tools p. 1
- Removal Steps p. 2, 3
- Installation Steps p. 4, 5, 6
- Adjustments and Warranty p. 7
Table of contents
Manual images
Click an image to enlargeQuick guide from the manual
This document provides instructions for installing the Madstad Engineering windshield system on the 2020-Up Harley Davidson Pan America. Before beginning, ensure you have the necessary tools: a 10mm wrench, a Phillips head screwdriver, and Torx wrenches. Read the entire manual before proceeding with the installation.
Preparation and Removal
Before installing the new system, you must remove the factory components:
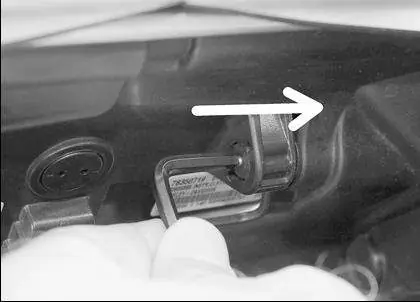
- Factory Shield/Cowl/Deflector: Loosen the four screws holding the windshield (these will not be reused). Remove the two factory screws from each side deflector (these will be reinstalled). Pull the sides of the cowl toward you to release the internal plugs.
- Windshield Cage: Support the cage and remove the four factory Torx screws (T-27). These screws will be reused. Remove the front deflector from the stock cage. Keep the metal bars that glide behind the front deflector, as they will fall out.
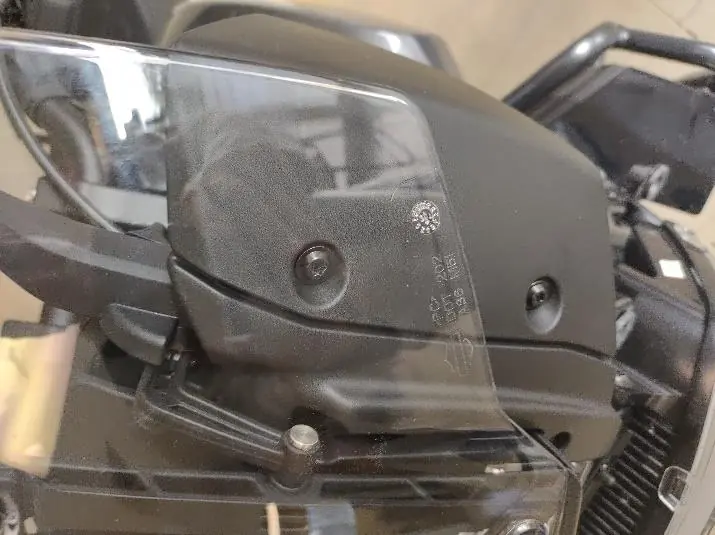
- Digital Display: Set the stock cage on a flat surface. Remove the two plugs holding the panel to the cage by pushing the backside of the plug outward using a small Allen wrench. Disconnect the power connector and the USB plug on the throttle side.
Installation
Follow these steps to install the MadStad system:

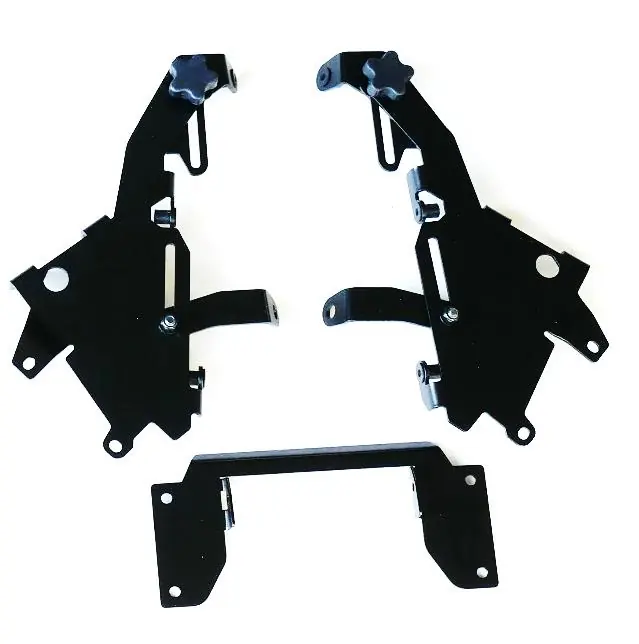
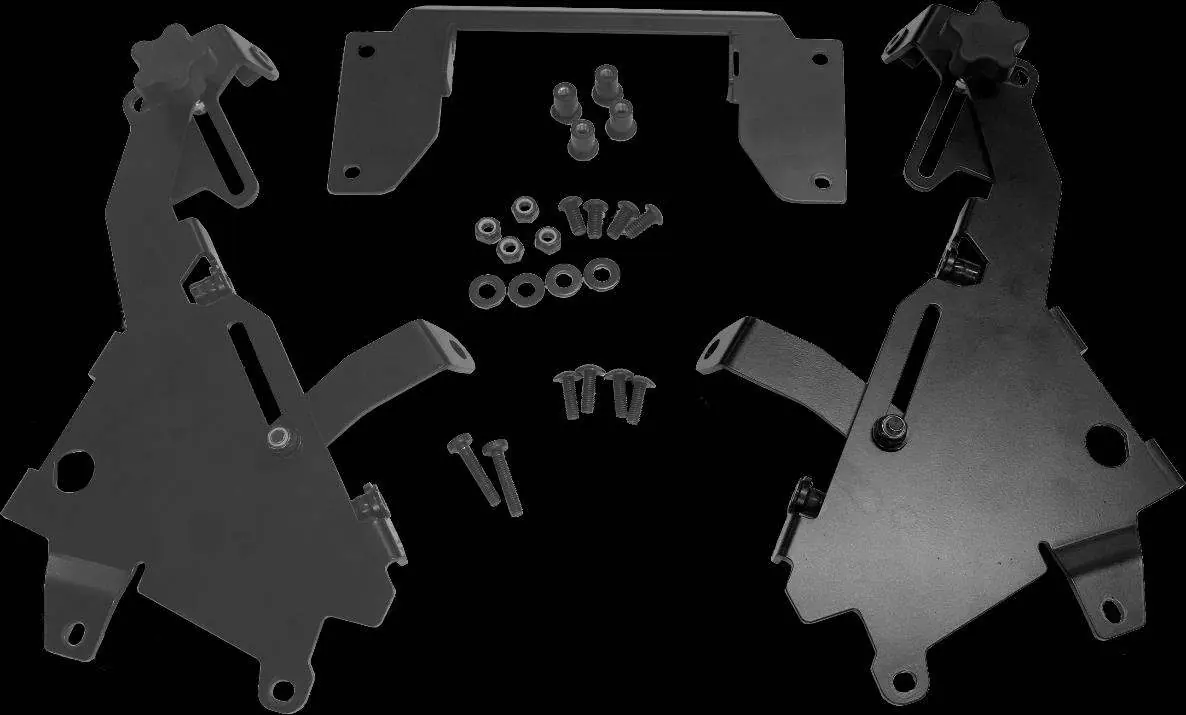
- MadStad Brackets: Set the bracket arm through the slot in the front deflector. Ensure adjustment knobs face outward and the arm tab faces inward. Attach the back brace to the back of the brackets using M6 X 16 screws, washers, and lock nuts.
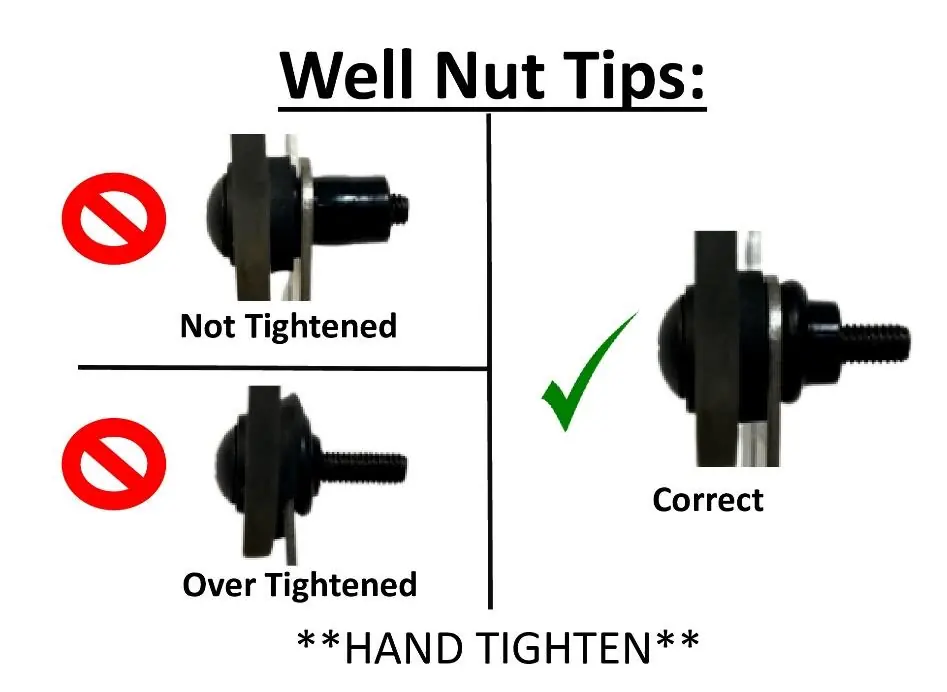
- Well Nuts: Insert the MadStad Arm Tabs through the front deflector and insert the Well Nuts from the backside of the hole.
- Digital Display: Use M5 Well Nuts to attach the display to the display clamps. Secure it using M5 X 30 screws, tightening from the outside until the Well Nuts swell and hold the display firmly.
- Assembly: Insert the two front factory screws (closest to the headlight) into the cage and tighten halfway. Reconnect the USB plug and display. Insert the last two factory cage screws and tighten all four. Attach the front deflector using M5 X 20 screws into the 4 Well Nuts in the brackets.
Final Assembly
Reattach the side deflectors to their position on the bike using the factory screws. Line up the cowl's prongs to the rubber sockets on the bike and push into place. Pre-install the M5 X 20 truss screws and washers into the windshield holes, guide them into the Well Nuts, and hand-tighten until they swell behind the bracket. Do not overtighten.
Adjustments
The system offers at least 2 inches of vertical travel and 20 degrees of angle adjustment. To adjust, loosen the knobs 1-2 turns, position the shield, and tighten until snug. The pivot screw on each bracket is factory-adjusted; if you need to adjust the tightness or pivot position, use a 4mm Allen wrench and a 10mm socket.
Practical help
Common problems
Windshield brackets won't slide
Ensure the pivot screw lock nut is not tightened completely; it should have minimum play.
Well nuts not holding
Ensure they are hand-tightened only until they swell up; do not overtighten.
Before use
- Phillips Head Screwdriver
- Torx Wrenches
- Ensure all fasteners are tightened securely before riding
- Verify windshield does not interfere with handlebars or controls
Specs in practice
- Vertical travel
- At least 2 inches of adjustment range.
- Angle adjustment
- 20 degrees of tilt range.
Images and diagrams
- Well Nut installation: Hand tighten only to ensure proper swelling.
- Pivot screw adjustment: Use 4mm Allen wrench and 10mm socket.
Model compatibility
- Fits 2020-Up Harley Davidson Pan America.

Manual page author
David Miller
Documentation analyst
Organizes user manual content into clear summaries, with attention to model details, product context, and everyday usability.