Tools / Saws
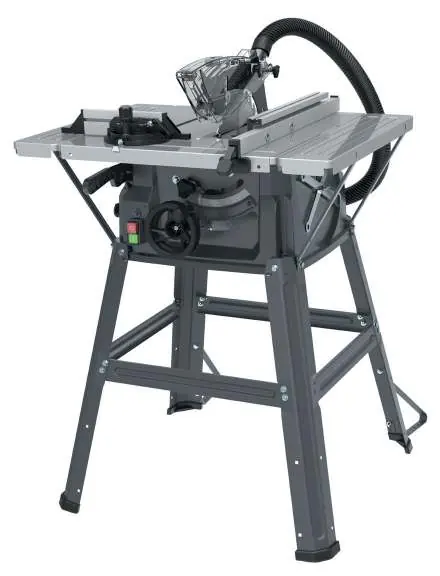
User Manual for MAX 31139 Bench Circular Saw
Quick guide for the MAX 31139 bench circular saw. Includes assembly, safety instructions, operation, settings, and maintenance procedures.
Table of contents
Manual images
Click an image to enlargeQuick guide from the manual
This manual provides essential instructions for the safe and efficient operation of the MAX 31139 bench circular saw. Always read the safety warnings before use. The saw is designed for longitudinal and cross-cutting of wood. Ensure the machine is placed on a stable, level, and well-lit surface before operation.
Assembly and Preparation
The saw requires assembly before first use. Follow these steps:
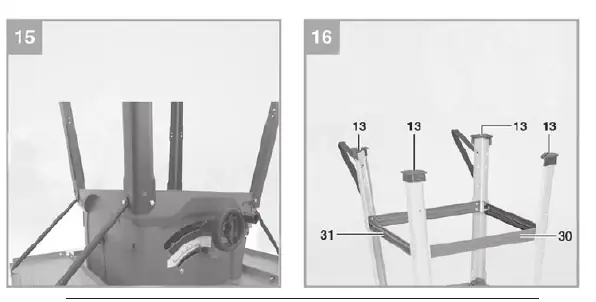
- Frame Assembly: Lay out all parts. Attach legs (29) to the corners of the saw using hex screws (b). Secure short (30) and long (31) cross braces to the legs using hex screws (b) and nuts (c). Attach rollover brackets (A) to the rear legs to prevent tipping.
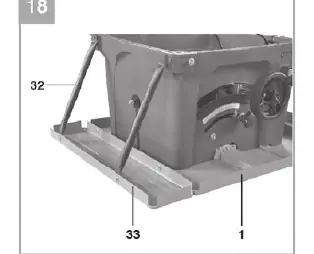
- Bench Extensions: Attach extensions (33) to the main saw bench (1) using hex screws (b) and nuts (c). Secure supports (32) to each extension, ensuring they are flush with the main table.
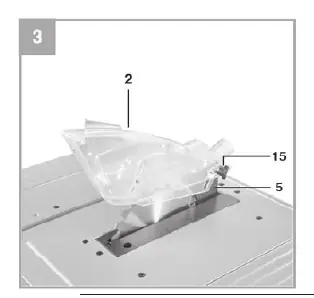
- Blade Guard: Lower the saw blade using the handwheel (8). Attach the blade guard (2) to the riving knife (5) using the screw (15) through the hole (18). Ensure the guard moves freely and does not contact the blade.
Settings and Adjustments
- Cutting Depth: Turn the handwheel (8) to raise or lower the blade. The blade should protrude no more than one tooth height above the workpiece.
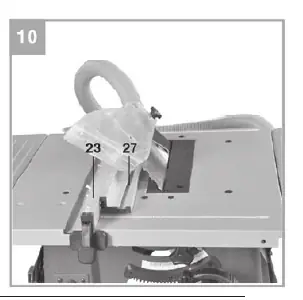
- Parallel Guide: Lift the lock knob (12) to position the guide. Use the measurement scale (22) to set the desired width. Press the knob down to lock. Ensure the rail (23) is at least 2 cm from the blade.
- Mitre Angle: Loosen the wing nut (20) on the mitre guide (14), set the desired angle, and retighten.
- Blade Angle: Loosen the adjustment knob (9), tilt the blade to the desired angle (0-45°), and retighten.
Operation
Starting and Stopping: Use the green button (11) to start and the red button (11) to stop. If a dangerous situation occurs, press the red button immediately.
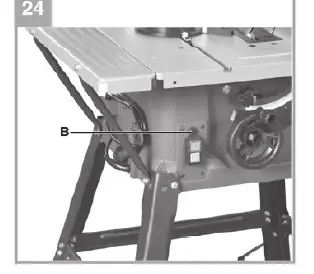
Overload Protection: The saw is equipped with an overload protection switch (B). If the motor stops due to overload, let the saw cool for 30 minutes, then press the overload protection button (B) to reset.
Maintenance
- Cleaning: Regularly remove sawdust and debris from under the table and the dust extraction port (16) using a vacuum or brush.
- Blade Replacement: Unplug the saw. Lower the blade, remove the blade guard (2) and bench inlay (6). Hold the axle securely and loosen the lock nut (35). Replace the blade, ensuring the rotation direction matches the motor.
- Carbon Brushes: If the carbon brushes are worn, both must be replaced.
Practical help
Common problems
Blade jams or gets stuck in the workpiece
Switch off the saw immediately, unplug it, and clear the jam before restarting.
Saw stops due to overload
Let the saw cool down for 30 minutes, then press the overload protection button (B) and restart.
Before use
- Ensure the saw is placed on a stable, level surface.
- Check that the blade guard and riving knife are correctly installed.
- Verify that the blade rotation direction matches the motor direction.
- Ensure the work area is clean and well-lit.
- Wear appropriate PPE (ear protection, eye protection, dust mask).
Specs in practice
- Voltage/Frequency
- 220-240 V~ 50 Hz
- Power Rating
- 1500 W
Images and diagrams
- Fig 15-17: Frame assembly steps.
- Fig 18: Bench extension installation.
- Fig 3: Blade guard and riving knife setup.
- Fig 9-13: Parallel guide and rail adjustments.
- Fig 24: Overload protection reset button location.
Model compatibility
- Use only saw blades recommended by the manufacturer.
- Do not use HSS steel saw blades.
- Ensure saw blades are tested and marked according to EN 847-1.

Manual page author
Michael Turner
Technical manual editor
Reviews PDF manuals for structure, safety notes, and practical product details so readers can find the right information quickly.