HVAC / Heaters & Fireplaces
Operating Instructions for Mr. Heater MH140CKT, MH185CKT, and MH220CKT Kerosene Forced-Air Heaters
Quick guide for the Mr. Heater MH140CKT, MH185CKT, and MH220CKT kerosene forced-air heaters. Includes setup, operation, maintenance, troubleshooting, and safety instructions.
Table of contents
Manual images
Click an image to enlargeImportant Information
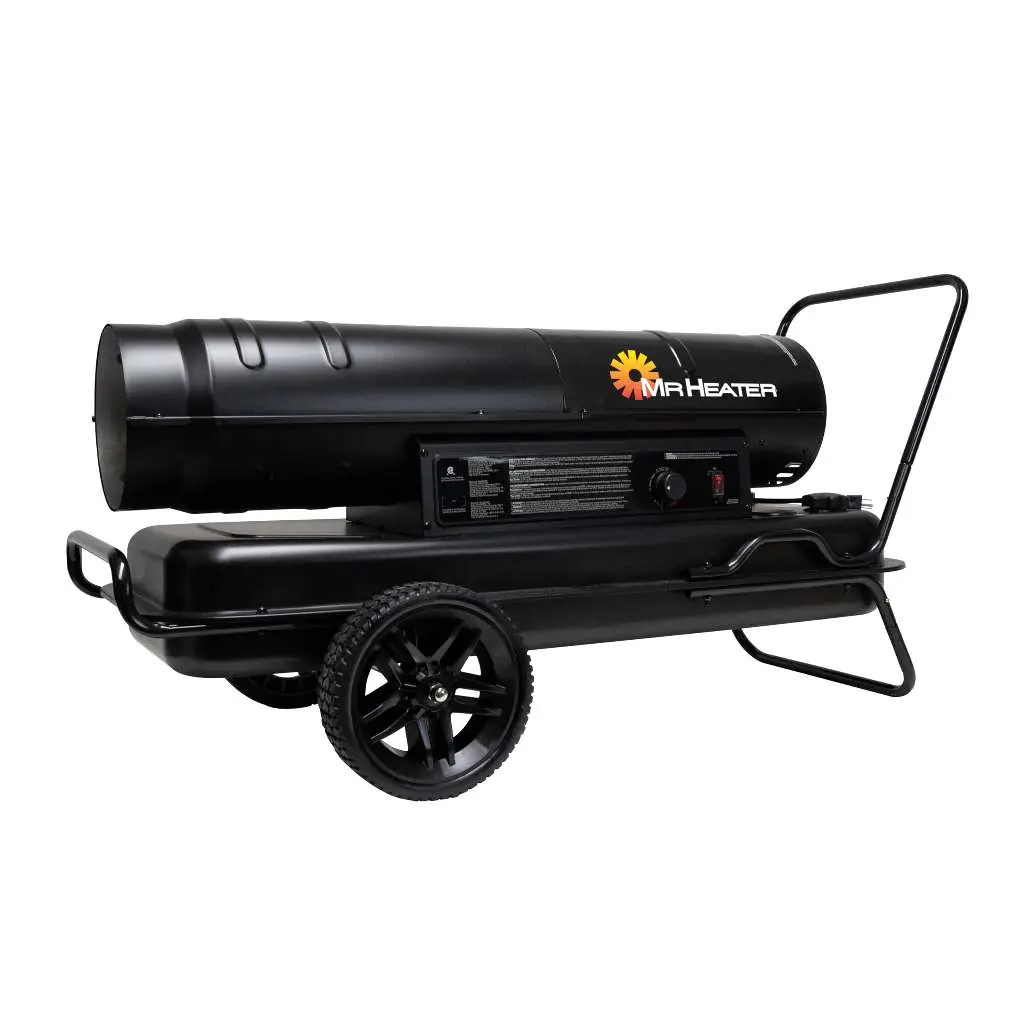
This manual provides operating instructions for the Mr. Heater MH140CKT, MH185CKT, and MH220CKT kerosene forced-air heaters. These units are intended for temporary heating of buildings under construction, alteration, or repair. They are not for home or recreational vehicle use.
Safety Warnings:
- Never leave the heater unattended while burning.
- Do not use gasoline, naphtha, or volatile fuels.
- Always operate in well-ventilated areas. Inadequate ventilation can lead to carbon monoxide poisoning.
- Keep combustibles (paper, wood, canvas, plastic) at least 8 ft. from the outlet and 3 ft. from the sides and inlet.
- Do not use in areas where flammable liquids or vapors are present.
- Plug into a properly grounded three-prong receptacle.
Specifications
The heaters are factory tested for No. 1-K kerosene, No. 2-K kerosene, No. 1 or No. 2 Diesel, No. 1 or No. 2 fuel oil, JP8 Jet A fuel, and Biodiesel blends B2, B5, B10, and B20. CSA certified for use with No. 1-K kerosene only.
- MH140CKT: 140,000 Btu/hr, 8-gallon tank.
- MH185CKT: 185,000 Btu/hr, 13-gallon tank.
- MH220CKT: 220,000 Btu/hr, 13-gallon tank.
- Electrical: 115V, 60Hz.
Assembly
The heater comes with wheels, axle, and handles in the shipping carton.

- Handles are pre-assembled on the tank.
- Install one large lock nut onto the end of the axle.
- Slide one wheel onto the axle, then one spacer.
- Slide the axle through the wheel support frame.
- Slide the second spacer, then the second wheel, and finally the second large lock nut onto the axle.
- Tighten both nuts using two adjustable wrenches. Do not overtighten.
Operation
Start-Up:
- Turn the thermostat to the lowest setting and ensure the On/Off switch is in the "Off" position.
- Plug the heater into a grounded 115V outlet.
- Turn the thermostat to the highest setting.
- Push the toggle switch to "On".
- Adjust the thermostat to the desired setting. The heater will cycle on/off as needed.
Shut Down:
- Push the On/Off switch to "Off". For extended shutdown, unplug the heater.
Maintenance and Storage
Periodic maintenance is required for efficient operation.
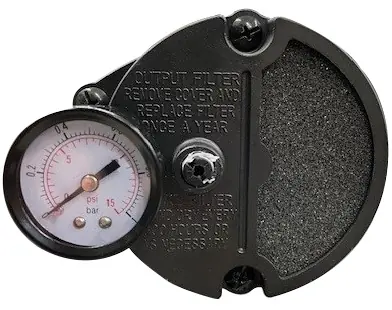
- Pump Pressure Adjustment: If the flame is inconsistent or smokes, the pump pressure may need adjustment. Locate the pressure adjustment screw on the rear of the heater. Use a flat-head screwdriver to turn clockwise to increase pressure or counter-clockwise to decrease pressure.
- Cleaning: Clean air intake filters, remove dust from the burner/fan area, and clean the cad cell eye regularly.
- Storage: Store in a dry location. Drain and flush the fuel tank with clean fuel before long-term storage.
Troubleshooting
If the heater fails to operate, check the following:
- Heater shuts off: Ensure the unit is cool, toggle switch to "Off", wait 5 minutes, and retry.
- No spark: Check extension cord requirements, wiring to the ignition electrode, and the electrode gap (3.5 mm).
- Abnormal motor operation: Ensure the fan rotates freely; if not, the motor or power-pack may need replacement.
- Unable to detect flame: Clean the cad cell eye with a soft cloth and rubbing alcohol.
Manufacturer information
Mr. Heater, Inc.
Practical help
Common problems
Heater shuts off after continued operation
Make sure heater is cooled off, toggle switch to 'OFF' position, wait 5 minutes and retry.
Heater does not spark
Check extension cord length/gauge, check wiring to ignition electrode, check electrode gap (3.5 mm), or replace igniter/control board.
Abnormal motor operation or overheating
Check if motor is free (rotate fan), check pump rotor for damage, or replace motor/power-pack.
Heater smokes or spits raw fuel
Pump pressure is too low; turn adjustment screw clockwise.
Flame extends beyond heater
Pump pressure is too high; turn adjustment screw counter-clockwise.
Before use
- Inspect for shipping damage.
- Ensure proper ventilation (2 sq. ft. opening near floor and ceiling).
- Verify fuel type (No. 1-K kerosene recommended).
- Place on a stable, level surface.
- Maintain required clearances (8 ft. from outlet, 3 ft. from sides/top).
- Ensure electrical connection is grounded and matches specifications.
Specs in practice
- Electrical Input
- Requires 115V, 60Hz power supply.
- Fuel Tank Capacity
- 8 gallons for MH140CKT, 13 gallons for MH185CKT/MH220CKT.
- Pressure Setting
- Manufacturer recommended pump pressure (41.4 to 53.8 kPa).
Images and diagrams
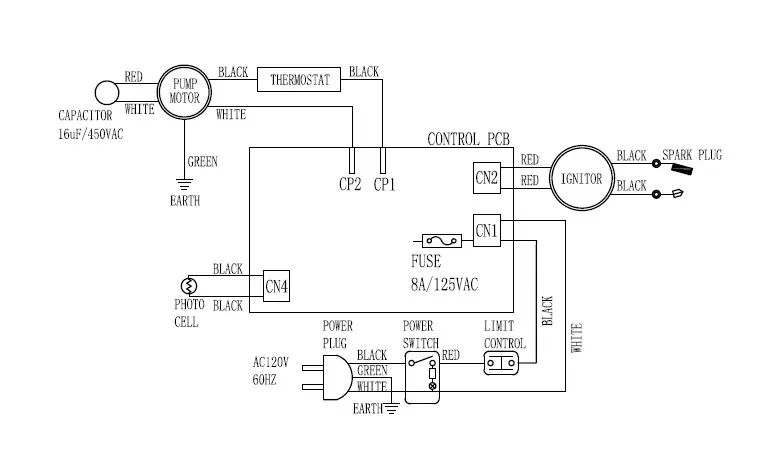
- Wiring diagram shows connections for motor, thermostat, ignitor, and control PCB.
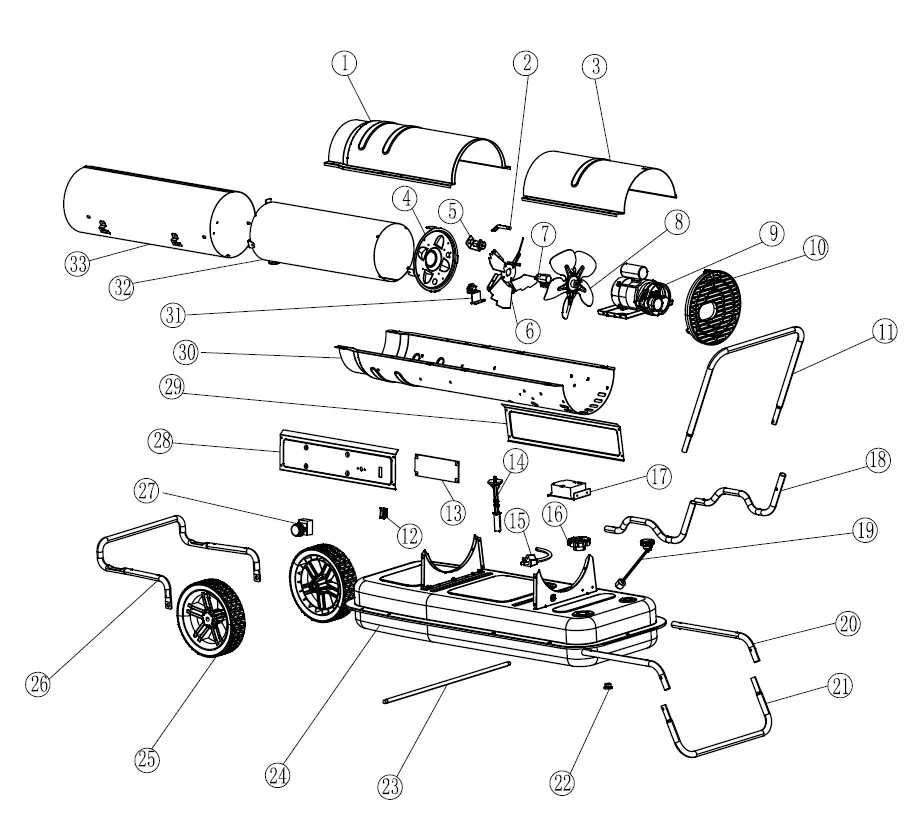
- Exploded view shows assembly of shell, motor, fan, and fuel system.
Model compatibility
- CSA certified for No. 1-K kerosene only.
- Factory tested for No. 2-K, Diesel #1/#2, Fuel Oil #1/#2, JP8, Biodiesel B2-B20.

Manual page author
Michael Turner
Technical manual editor
Reviews PDF manuals for structure, safety notes, and practical product details so readers can find the right information quickly.