Tools / Air Compressors & Pneumatics
NEO TOOLS 12K020, 12K021, 12K022 Oil-Free Air Compressor
Quick guide for the NEO TOOLS 12K020, 12K021, and 12K022 oil-free air compressors. This guide covers assembly, operation, maintenance, and troubleshooting to ensure safe and efficient use.
Table of contents
Manual images
Click an image to enlargeQuick guide from the manual
This document provides essential information for the safe operation and maintenance of the NEO TOOLS 12K020, 12K021, and 12K022 oil-free air compressors. Always read the full safety instructions before use. The compressor is designed for producing compressed air for pneumatic tools and is not intended for commercial or industrial use.
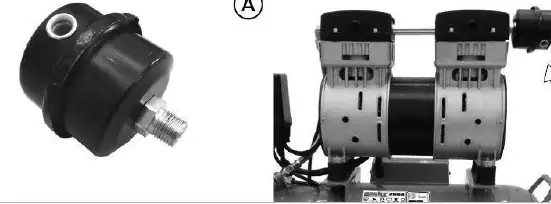
Description of the device
Key components include:
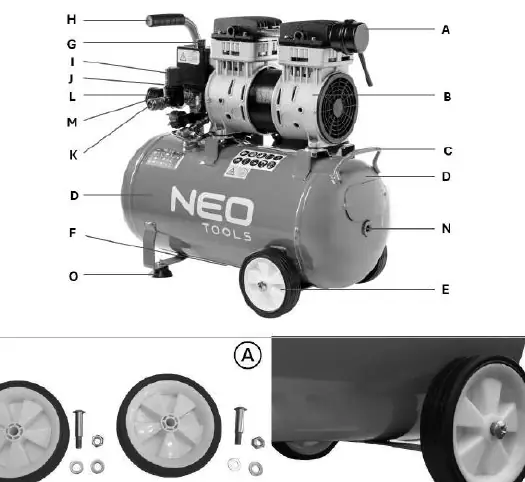
- A: Air filter
- B: Motor
- C: Handle
- D: Tank
- E: Wheel
- F: Drain valve
- G: Main switch
- H: Self-propelled handle
- I: Secondary pressure regulator
- J: Lock nut
- K: Quick connector
- L: Outlet pressure gauge
- M: Tank pressure gauge
- N: Inspection hole
- O: Supporting foot
Assembly
The product requires assembly before first use:
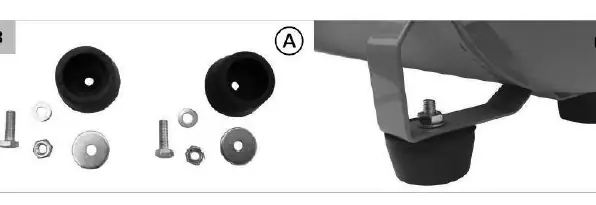

- Place the compressor on a flat, stable surface.
- Attach the transport wheels to the wheel holders on the underside of the air nozzle using the provided screws.
- Attach the support foot to the bracket on the underside of the air nozzle using the provided screw.
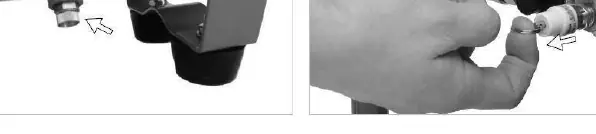
- Install the air filter on the thread and tighten clockwise by hand.
- Check that the tank drain valve is tightly closed.
Operation
Always drain the pressure from the tank before performing maintenance or connecting tools. To start, press the lower part of the main switch. The compressor will automatically stop when the maximum pressure is reached and restart if the pressure drops. Always switch off the machine and drain the tank after use.
Maintenance
Proper maintenance is essential for safe operation:
- Before each use: Drain condensate from the tank, check for unusual sounds or vibrations, and ensure all nuts and bolts are tight.
- Every 10 hours: Clean the air filter.
- Every 40 hours: Check the air system for leaks using soapy water.
- Annually: Have the machine checked and adjusted by an authorized service center.
Troubleshooting
If the machine fails to start, check the power supply, fuse, or circuit breaker, and allow the motor to cool if overheated. If there is a pressure issue, check the safety valve, clean or replace the air filter, or have the non-return valve replaced by an authorized service center.
Practical help
Common problems
Compressor does not start
Check power supply, fuse, or circuit breaker. If overheated, wait for the motor to cool down.
Pressure issues
Check safety valve manually, clean or replace air filter, or have non-return valve replaced by an authorized service center.
Safety valve releases
Check if pressure switch is faulty or incorrectly regulated; replace at an authorized service center.
Before use
- Check for transport damage.
- Ensure all bolts and nuts are securely tightened.
- Drain condensate from the air tank.
- Check the condition of the safety valve and air accessories.
- Verify the air filter is clean.
- Ensure the air hose is correctly connected.
Specs in practice
- Rated motor power
- 500W (12K020), 800W (12K021), 1150W (12K022)
- Max pressure
- 8 bar
- Switch-on pressure
- 6 bar
- Tank capacity
- 12L (12K020), 24L (12K021), 50L (12K022)
Images and diagrams
- Fig 2: Wheel assembly instructions.
- Fig 3: Support foot assembly instructions.
- Fig 4: Air filter installation.
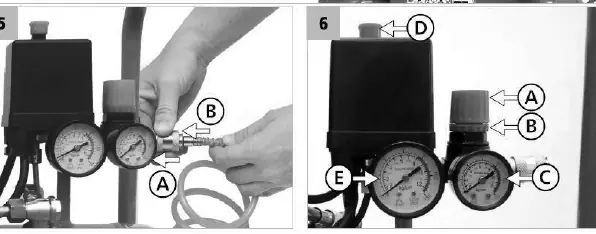
- Fig 5: Air hose connection and disconnection.
- Fig 6: Pressure regulator and gauge operation.
Model compatibility
- Requires 220-230V / 50Hz power supply.
- Not intended for commercial, retail, or industrial use.
- Use only original spare parts and accessories.

Manual page author
Emily Carter
User documentation editor
Prepares concise manual descriptions and highlights the most useful setup, operation, and maintenance information for readers.