Furniture / Storage Cabinets
User Manual for Origin 21 22-IN Mirror 1690MR-22-318
Quick guide for the Origin 21 22-IN Mirror (1690MR-22-318). Includes installation steps for vertical or horizontal mounting, care instructions, and hardware details.
Quick answers from the manual
Quick answer
- The Origin 21 22-IN Mirror (1690MR-22-318) can be mounted vertically or horizontally. Installation involves measuring the hanger distance, marking the wall, installing anchors/screws, and hanging the mirror. p. 4, 5, 6
Key actions
- Install the mirror p. 5, 6
First start
- Prepare for installation p. 3
Show 3 more answers Show less
Problems and fixes
Missing or damaged parts
Do not assemble; contact customer service at 888-251-1026.
p. 3Maintenance and reset
- Cleaning and touch-up p. 7
Where to find it in the PDF
- Installation Instructions p. 5, 6
Table of contents
Manual images
Click an image to enlargeQuick guide from the manual
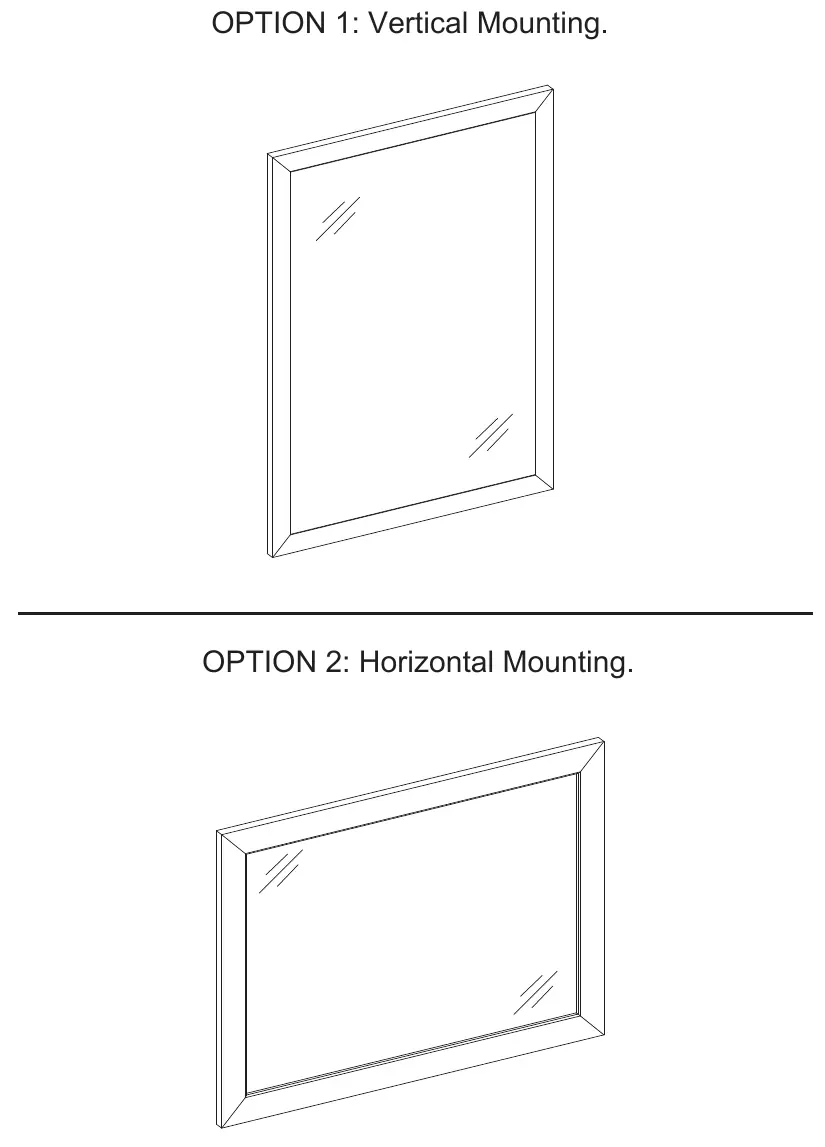
This document provides instructions for the installation and maintenance of the Origin 21 22-IN Mirror (1690MR-22-318). The mirror can be mounted either vertically or horizontally. Installation takes approximately 10 minutes and requires basic tools like a Phillips screwdriver, level, and measuring tape.
Package Contents
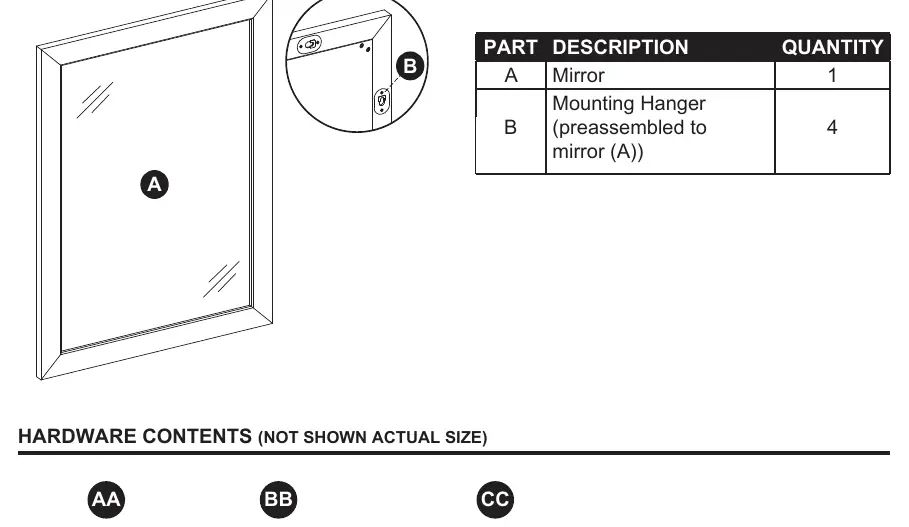
- A: Mirror (1)
- B: Mounting Hanger (4, preassembled to mirror)
- AA: Anchor (2)
- BB: Screw (2)
- CC: Touch Up Pen (1)
Installation Instructions
Before starting, ensure all parts are present. If any part is missing or damaged, do not attempt to assemble the product.
Step 1: Measure
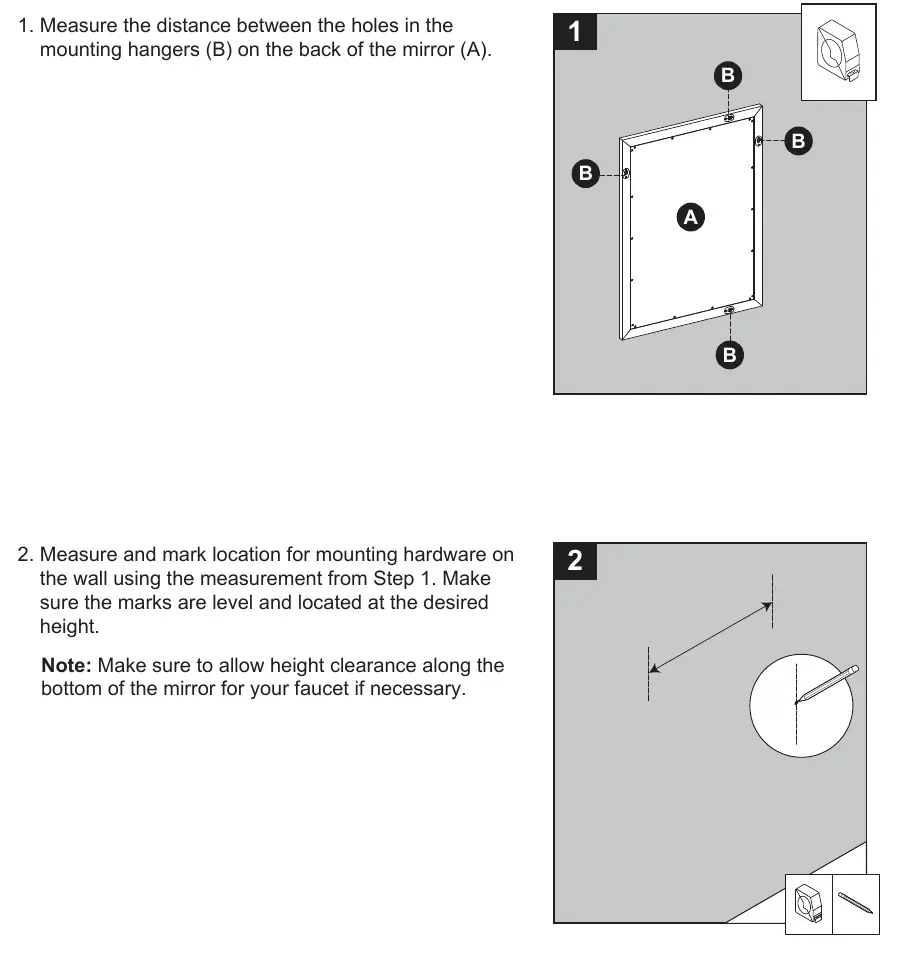
Measure the distance between the holes in the mounting hangers (B) on the back of the mirror (A). Ensure you allow for height clearance at the bottom of the mirror if a faucet is present.
Step 2: Mark
Measure and mark the location for the mounting hardware on the wall using the measurement from Step 1. Ensure the marks are level and at the desired height.
Step 3: Install Hardware
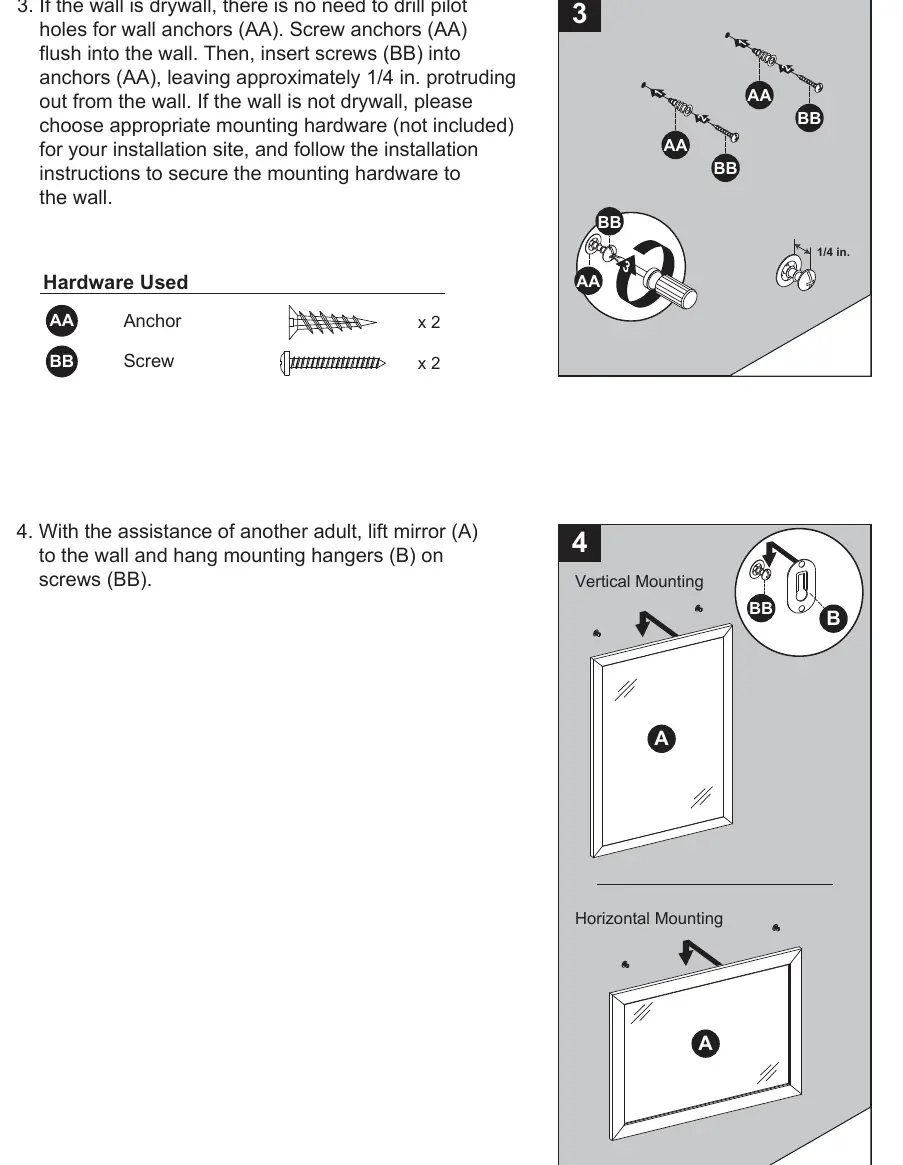
If installing on drywall, screw the anchors (AA) flush into the wall. Insert the screws (BB) into the anchors, leaving approximately 1/4 inch protruding from the wall. For non-drywall surfaces, use appropriate mounting hardware (not included).
Step 4: Hang Mirror
With the assistance of another adult, lift the mirror (A) and hang the mounting hangers (B) onto the screws (BB).
Care and Maintenance
- Dust the frame regularly with a soft, non-lint producing cloth or household dusting product.
- Clean the mirror frame with a gentle, non-abrasive household cleaner.
- Dry the wood immediately with a soft cloth or towel.
- Clean the glass using standard household glass cleaning agents.
- Use the included touch-up pen (CC) for scratches or worn areas, stroking in the direction of the scratch or wood grain.
Practical help
Common problems
Missing or damaged parts
Do not attempt to assemble the product. Contact customer service at 888-251-1026.
Wall is not drywall
Use appropriate mounting hardware for your specific wall type (not included) and follow the installation instructions to secure the hardware.
Before use
- Verify all parts are present against the package contents list.
- Gather required tools: Phillips screwdriver, utility knife or scissors.
- Gather helpful tools: Measuring tape, level.
- Decide on mounting orientation: Vertical or Horizontal.
- Ensure you have assistance from another adult for lifting the mirror.
Show more Show less
Specs in practice
- Estimated Installation Time
- Approximately 10 minutes.
- Mounting Hardware
- Includes anchors and screws for drywall installation.
Images and diagrams
- The mirror features pre-assembled mounting hangers on the back.
- Installation requires measuring the distance between hangers before marking the wall.
Model compatibility
- Designed for wall mounting.
- Hardware provided is specifically for drywall installation.

Manual page author
Michael Turner
Technical manual editor