Lighting / Fixtures
Installation Instructions for Resistex Argos LED Tubular Luminaire
Quick installation guide for the Resistex Argos LED Tubular Luminaire. Includes safety notes, mounting steps, and wiring instructions.
Quick answers from the manual
Quick answer
- The Resistex Argos is a tubular LED luminaire. Installation must be performed by a professional. Ensure power is off before starting. p. 1, 2
Key actions
- Mounting the fixture p. 2
- Wiring the fixture p. 2
First start
- Ensure power is off, install brackets, connect wires to terminal block, and restore power. p. 2
Show 3 more answers Show less
Maintenance and reset
- Do not use chemicals or abrasive products to clean the fixture. p. 1
Technical specifications
| Parameter | Value | Meaning | Pages |
|---|---|---|---|
| Drill hole diameter | 4mm | Size for mounting holes | p. 2 |
Where to find it in the PDF
- Safety and Maintenance p. 1
- Installation Steps p. 2
Table of contents
Manual images
Click an image to enlargeImportant Information
This document provides installation instructions for the Resistex Argos LED Tubular Luminaire. It is essential to follow these steps to ensure safe and correct operation. The luminaire is available in different lengths and versions (ON/OFF or HF sensor).
Safety Notes
- Power: Never work on the luminaire while it is connected to a power source.
- Installation: Must be performed by a professional installer in compliance with local electrical standards and regulations.
- ESD: The product is sensitive to electrostatic discharges (ESD). Handle with appropriate precautions.
Installation
Follow these steps to install the luminaire:

- Preparation: Ensure the power supply is turned off.
- Drilling: Drill holes for the mounting brackets. The spacing depends on the specific model length (400mm to 1100mm). Use a 4mm drill bit.
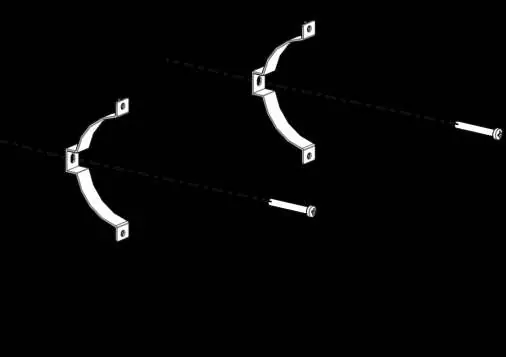
- Mounting: Secure the mounting brackets to the surface.
- Fixture Attachment: Insert the luminaire into the brackets and secure it.
- Wiring: Open the terminal box. Connect the wires according to the markings (L, E, N).
- Closing: Close the terminal box securely.
- Finalization: Restore power.
Maintenance
Do not use chemicals or abrasive products to clean the fixture. Keep these instructions for future maintenance or dismantling. Additional information is available at www.resistex-sa.com.
Official resources from the manual
Practical help
Common problems
Fixture not turning on
Verify that the power supply is connected correctly to the L, E, and N terminals and that the main power is on.
ESD risk
Handle the luminaire with appropriate precautions as per ESD norms during installation.
Before use
- Ensure main power is disconnected
- Verify professional installer is available
- Check mounting surface suitability
- Confirm correct drill bit size (4mm)
- Verify model length for bracket spacing
Show more Show less
Images and diagrams
- Mounting brackets installation steps
- Wiring connection diagram for terminal block
Model compatibility
- Mounting hole spacing varies by model length (400mm to 1100mm)

Manual page author
David Miller
Documentation analyst