Tools / Power Tools
User Manual for Ryobi 18V Brushless Hole Auger P2903
Quick guide for the Ryobi 18V Brushless Hole Auger P2903. Includes assembly instructions, operation steps, safety warnings, maintenance, and troubleshooting.
Table of contents
Manual images
Click an image to enlargeQuick guide from the manual
This manual provides essential instructions for the safe operation and maintenance of the Ryobi 18V Brushless Hole Auger (P2903). Always read the full safety warnings before use. The tool is designed for outdoor use, such as planting trees, shrubs, flowers, cultivating soil, and digging for light-duty fencing.
Product Description
The hole auger features a brushless motor for optimized power and battery runtime. It includes an anti-kickback mechanism to protect the user from injury when the tool detects tough soil or debris. The rotation is reversible, allowing for forward or reverse operation.
Assembly
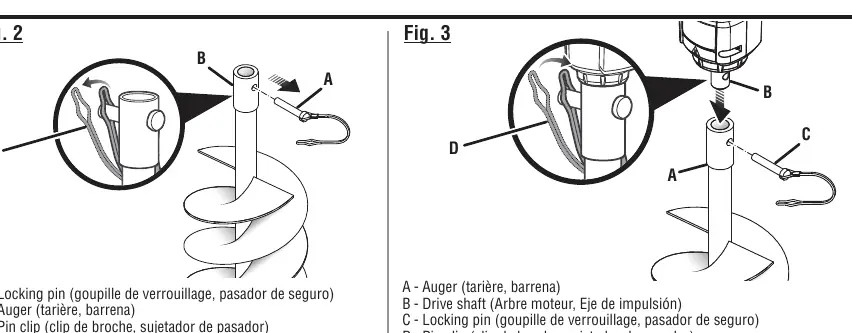
- Stand the auger bit upright with the tip pointing down.
- Remove the locking pin from the auger.
- Install the drive shaft into the auger.
- Align the holes on the auger and drive shaft.
- Insert the locking pin and secure it with the pin clip.
Operation
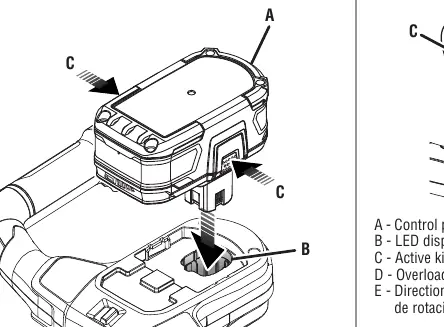
Battery Installation: Insert the battery pack into the battery port until the latches snap into place. Ensure it is fully seated before operation.
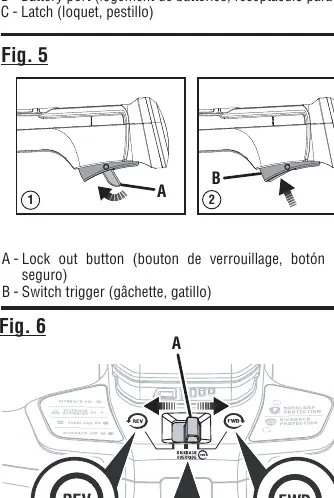
Starting and Stopping: To start, press and hold the lockout button, then squeeze the switch trigger. Release the trigger to stop the tool.
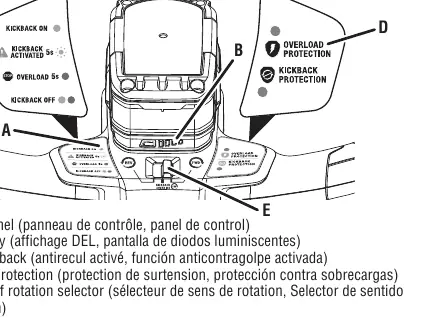
Rotation and Kickback: Use the selector on the top handle to choose forward (FWD) or reverse (REV) rotation. Kickback protection is active in forward mode by default. If the tool detects an obstruction, it will stop, and the green light will flash for 5 seconds. You must wait for this period before restarting.
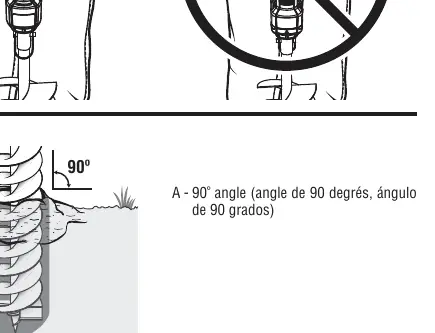
Digging: Maintain a firm grip with both hands. Keep the auger bit at a 90-degree angle to the surface. Allow the auger to reach full speed before lowering it into the material. Periodically lift the auger while running to clear debris from the hole.
Maintenance
Always remove the battery pack before cleaning or performing maintenance. Clean the auger bit using a damp cloth with mild detergent. Do not use strong solvents or detergents on the plastic housing. Store the tool in a dry, well-ventilated area, inaccessible to children, and away from corrosive agents like garden chemicals or de-icing salts.
Safety
Always wear eye protection with side shields (ANSI Z87.1 compliant) and non-slip, heavy-duty gloves. Keep bystanders at least 50 feet away. Never use the tool near buried electrical cables or gas lines. If the tool vibrates abnormally or is dropped, stop immediately and inspect for damage.
Manufacturer information
Ryobi
Practical help
Common problems
Tool stops during operation
The tool may be overloaded or hit an obstruction. Release the trigger, lift the tool from the hole, and check for debris or obstructions. Restart the tool.
Kickback event occurs
The tool stops and the green light flashes for 5 seconds. You cannot restart the tool until the 5 seconds have elapsed. Lift the tool from the hole, restart, and lower it gently.
Before use
- Inspect the product for damaged, missing, or loose parts.
- Ensure the battery pack is fully charged and securely seated.
- Clear the work area of debris, cords, or wires.
- Verify the auger bit is properly installed and secured with the locking pin.
- Wear appropriate personal protective equipment (eye protection, gloves, non-slip footwear).
Specs in practice
- Auger Bit Diameter
- 6 inches (150 mm).
- Maximum Hole Depth
- 31 inches (800 mm).
Images and diagrams
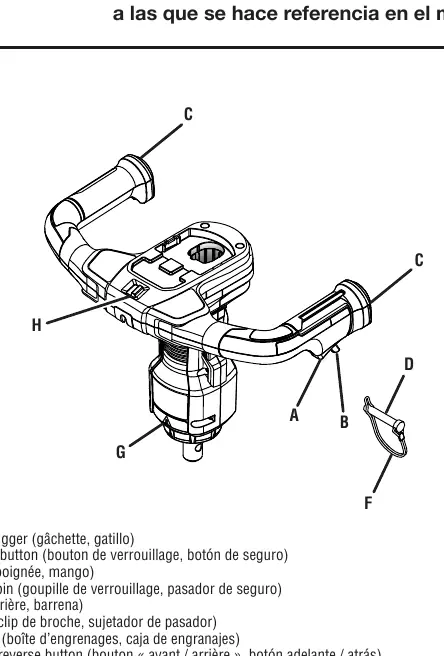
- Fig 1: Overview of the tool components including switch trigger, handle, locking pin, and gear box.
- Fig 2-3: Step-by-step assembly of the auger bit to the drive shaft using the locking pin and clip.
- Fig 6: Switch positions for Forward (FWD), Reverse (REV), and Kickback Off.
- Fig 7: Control panel layout showing LED indicators for kickback and overload protection.
Model compatibility
- Use only manufacturer-recommended replacement augers.
- Intended for outdoor use only.
- Do not use with attachments not recommended by the manufacturer.

Manual page author
Emily Carter
User documentation editor
Prepares concise manual descriptions and highlights the most useful setup, operation, and maintenance information for readers.