Electronics / Monitors
Repair Guide for Samsung LS24F330EANXZA Monitor
Official repair and disassembly guide for the Samsung LS24F330EANXZA monitor. This manual provides essential safety precautions, step-by-step disassembly instructions for the stand, rear cover, main board, and jog board, as well as basic...
Quick answers from the manual
Quick answer
- This document is a service manual for the Samsung LS24F330EANXZA monitor, providing safety precautions, disassembly instructions, and basic troubleshooting steps. p. 1, 18
Key actions
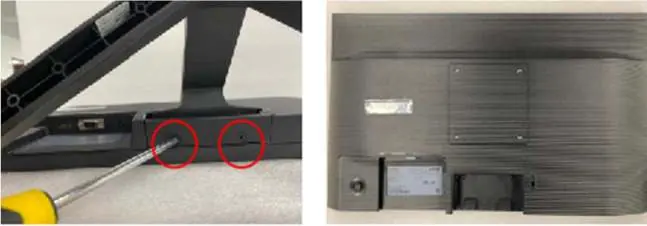
- Disassemble the stand by removing two screws on the bottom. p. 11
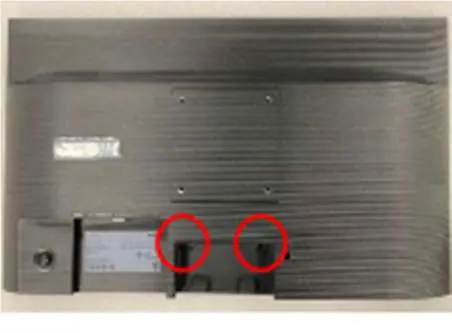
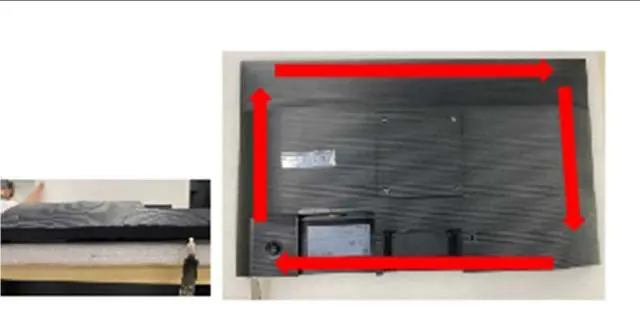
- Disassemble the rear cover using the Delphinus JIG. p. 13
Problems and fixes
Power LED off
Check power cord connection.
p. 18
No image, LED blinks
Check cable connections or exit power-saving mode.
p. 18Show 2 more answers Show less
Technical specifications
| Parameter | Value | Meaning | Pages |
|---|---|---|---|
| Leakage Current | < 0.5mA | Maximum allowable leakage current. | p. 5 |
| Insulation Resistance | > 1 megohm | Minimum insulation resistance at 500V. | p. 7 |
Where to find it in the PDF
- Safety Precautions p. 5, 6, 7, 8
- Disassembly p. 10, 11, 12, 13
- Troubleshooting p. 18
Table of contents
Manual images
Click an image to enlargeImportant Safety Information
Before performing any repairs, ensure you have read and understood the safety guidelines. Always work in a safe, clean area and use appropriate personal protective equipment. Key safety measures include:
- Power Disconnection: Always disconnect the AC power cord and DC power jack before servicing.
- ESD Precautions: Use a grounded-tip soldering iron and anti-static tools. Drain electrostatic charge from your body before handling semiconductor components.
- Leakage Current Check: After reassembly, perform a leakage current test. The current should not exceed 0.5mA.
- Insulation Resistance: Ensure insulation resistance between the AC plug blades and accessible conductive parts is greater than 1 megohm (tested at 500V).
- Design Integrity: Do not modify the mechanical or electrical design of the unit.
Disassembly Procedures
The following steps outline the disassembly process. Use the recommended P-jig-2017 (BN81-14946B) where required.
Stand Disassembly
Place the monitor on a cushion on a flat surface to prevent damage. Remove the two screws on the bottom to detach the stand.
Cover Rear Disassembly
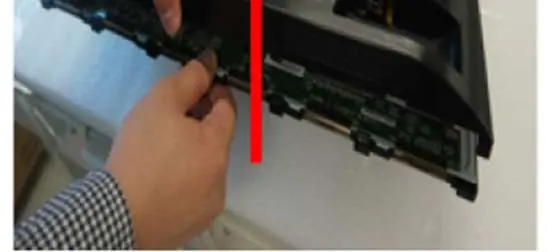
Remove the two screws from the rear cover. Insert the Delphinus JIG into the lower left groove of the rear cover and lift it to release the snaps. Sequentially lift the cover using the jig, then open the clips on the left, right, and top to remove the rear cover.
Main Board Disassembly
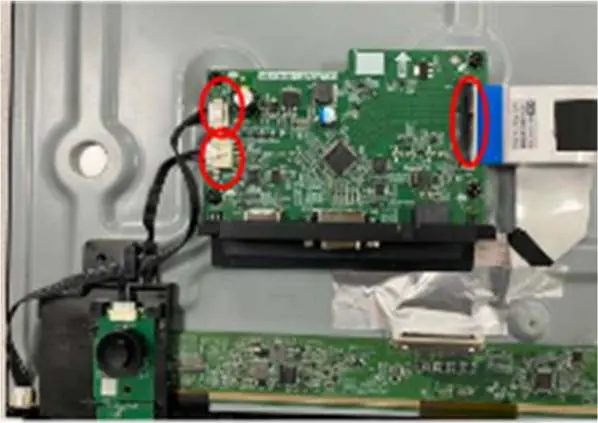
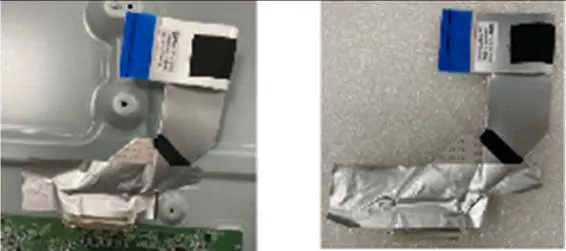
Disconnect all cables connected to the main board. Remove the IO cover of the Main-Assy, then unfasten the screws to remove the assembly. Remove the EMI tape from the top of the harness cable if necessary.
Jog Board Disassembly
Disconnect the Key-Board-Holder and all associated cables to remove the jog board.
Basic Troubleshooting
If you encounter issues, refer to these common solutions:
- Power LED off / Screen won't turn on: Check that the power cord is connected properly.
- No image / LED blinks: Check the cable connection between the monitor and PC, ensure connectors are locked, or press a key/move the mouse to exit power-saving mode.
- Popping noise: This is typically caused by the expansion and contraction of the outer casing and does not indicate a malfunction.
Manufacturer information
Samsung Electronics
Practical help
Common problems
Power LED is off / Screen will not turn on
Check that the power cord is connected properly.
No image on screen and power LED blinks every 0.5 to 1 second
Check the cable connection between the monitor and PC, ensure connectors are locked, or press any key on the keyboard/move the mouse to return to normal operating mode. The monitor may be in power-saving mode.
Product is making a popping noise
This is caused by the expansion and contraction of the outer casing and is normal; the product is safe to use.
Before use
- Disconnect AC power and DC power jack before servicing
- Use a clean, safe area for repair
- Use personal protective equipment (gloves, safety goggles)
- Use ESD precautions (grounding, anti-static tools)
- Perform leakage current test after reassembly
- Use genuine Samsung parts
Show more Show less
Specs in practice
- Leakage Current
- Should not exceed 0.5mA during the hot check.
- Insulation Resistance
- Should be greater than 1 megohm when tested at 500V.
Images and diagrams
- The manual includes diagrams for stand removal, rear cover disassembly using a jig, main board cable disconnection, and jog board removal.
Model compatibility
- Assembly is in reverse order of disassembly.
- Appearance may vary depending on the specific product variant.

Manual page author
Emily Carter
User documentation editor