Plumbing / Toilets Urinals
User Manual for Sanela SLW 01NKB Toilet Flushing Unit
Quick guide for the Sanela SLW 01NKB and SLW 01NKBX toilet flushing unit. Includes installation steps, battery replacement, water flow adjustment, and troubleshooting.
Table of contents
Manual images
Click an image to enlargeQuick Guide for Sanela SLW 01NKB
The Sanela SLW 01NKB and SLW 01NKBX are automatic toilet flushing units designed for pressured water systems. This guide provides essential information for installation, operation, and maintenance.
Installation
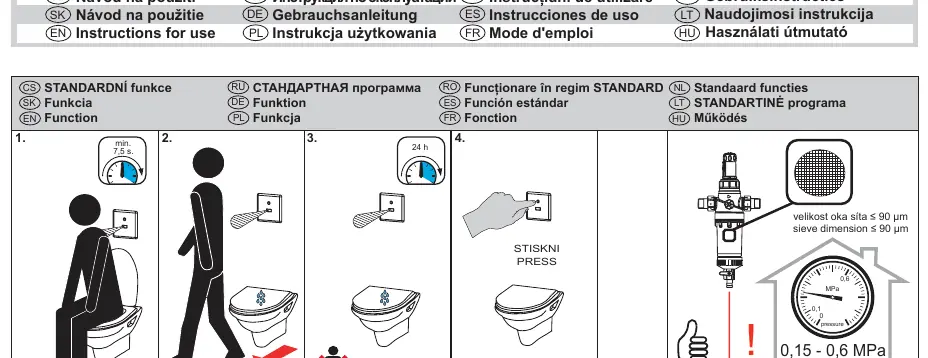
Before installation, ensure the water pressure is between 0.15 and 0.6 MPa. The sieve dimension must be ≤ 90 µm. Follow these steps:
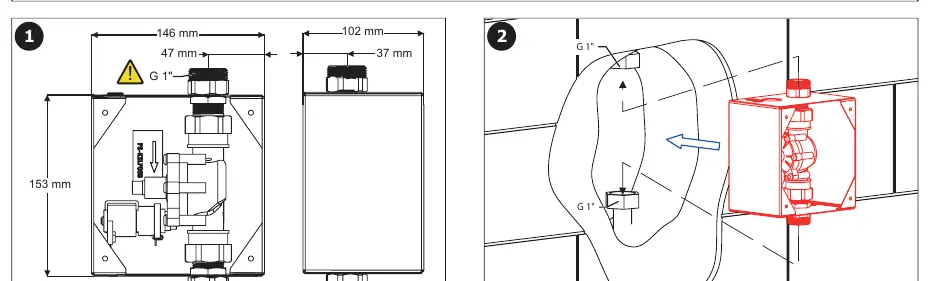
- Ensure you have the necessary mounting frame (SLR 03 for brick walls or SLR 03A for drywall).
- Follow the installation diagrams on pages 2-4 to mount the unit and connect the water supply.
- Ensure all electrical connections are secure as shown in the diagrams.
Water Flow Adjustment
To adjust the water flow:
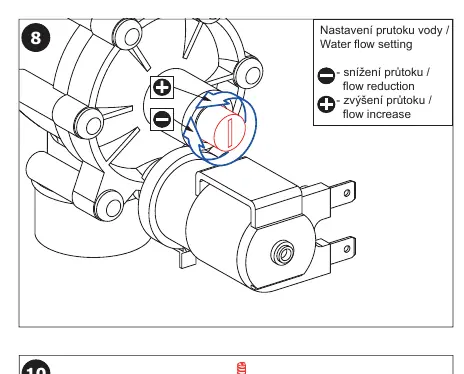
- Locate the flow adjustment valve (refer to step 8 on page 3).
- Turn the valve to the minus (-) side to reduce flow or to the plus (+) side to increase flow.
Battery Replacement and Status
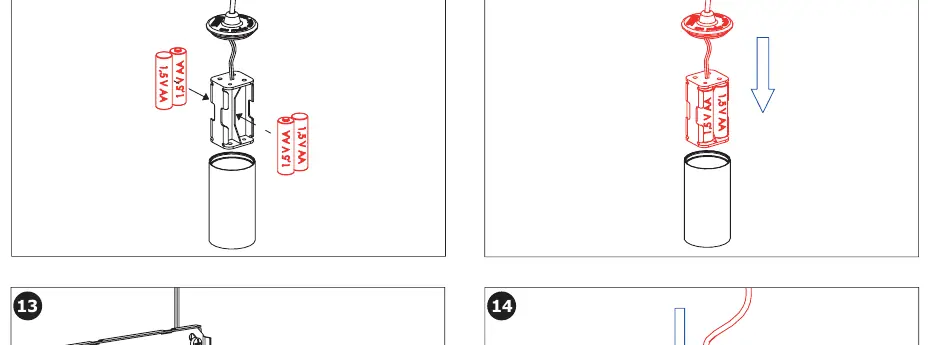
The unit operates on 4x AA alkaline batteries (6V). Monitor the battery status via the LED indicator:
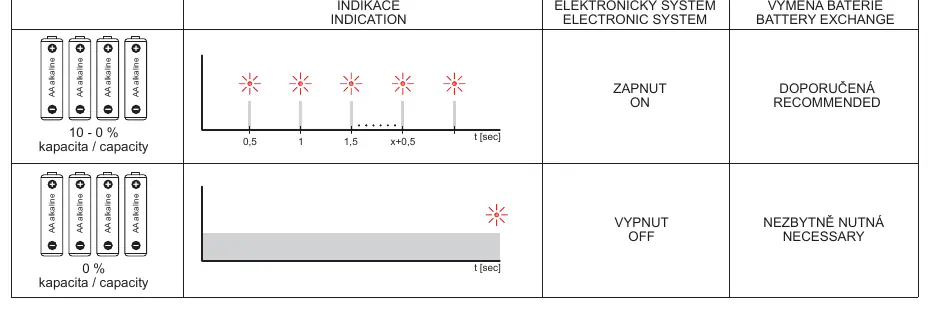
- Zapnut (ON): System is operating normally.
- Vypnut (OFF): Battery replacement is necessary.
- Battery Exchange: When the indicator shows 'Necessary', replace all 4 batteries immediately.
Maintenance and Support
Regular maintenance is recommended. For technical support, service interventions, or troubleshooting, contact your installation company or visit www.sanela.cz/podpora.
Official resources from the manual
Manufacturer information
SANELA spol. s r. o.
Practical help
Common problems
Unit not flushing or LED indicates battery low
Check the battery status indicator (page 5). If it shows 'Necessary', replace all 4 AA alkaline batteries.
Water flow is too high or too low
Adjust the flow using the valve shown in step 8 on page 3.
Before use
- Verify water pressure is between 0.15 and 0.6 MPa.
- Ensure sieve dimension is ≤ 90 µm.
- Have 4x AA alkaline batteries ready.
- Read the attached safety instructions before starting installation.
Specs in practice
- Operating Pressure
- 0.15 - 0.6 MPa
- Power Supply
- 6V (4x AA alkaline batteries)
- Sieve Dimension
- ≤ 90 µm
Images and diagrams
- Step 8: Shows the water flow adjustment valve.
- Step 11-12: Shows battery installation procedure.
- Page 5: Battery status LED indicators and their meanings.
Model compatibility
- Compatible with SLD 03 remote control for settings.
- Compatible with SLR 03 (brick wall) and SLR 03A (drywall) mounting frames.

Manual page author
David Miller
Documentation analyst
Organizes user manual content into clear summaries, with attention to model details, product context, and everyday usability.