Tools / Welding Equipment
User Manual for Sealey MWH120I Handheld Inverter Welder
Quick guide for the Sealey MWH120I Handheld MMA/ARC Inverter Welder. Includes setup, safety instructions, operation steps, and troubleshooting tips.
Table of contents
Manual images
Click an image to enlargeQuick guide from the manual
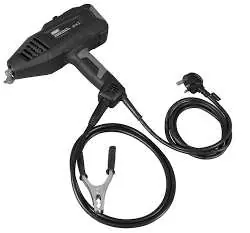
The Sealey MWH120I is a compact, handheld MMA/ARC inverter welder designed for mobile use. Before operating, ensure the machine is placed in a dry, well-ventilated area. Always wear appropriate personal protective equipment (PPE), including a welding mask, gauntlets, and non-slip safety footwear. Ensure the power supply is grounded and the cables are in good condition before connecting.
Safety precautions
Electrical Safety: Always inspect cables, plugs, and connections for damage before use. Do not use damaged equipment. Use an RCD (Residual Current Device) with all electrical products. Do not pull the appliance by the power cable.
General Safety: Keep unauthorized persons away from the work area. Do not weld near flammable materials, liquids, or gases. Avoid welding in rain or snow. Ensure adequate ventilation to prevent the buildup of toxic fumes, especially when welding materials coated with or containing toxic substances like lead, cadmium, or mercury.
Fire Hazard: Sparks and slag can fly up to 10 meters. Do not weld within 10 meters of combustible materials. Keep fire extinguishing equipment nearby.
Product overview
The MWH120I is an ultra-compact unit weighing 1.3kg. It features an adjustable output current from 20-120A, a clear LED screen, and over-current/overheat protection. It is compatible with rutile electrodes from 1.6mm to 3.2mm.
Operation
Pre-operation: Ensure the air intake is not blocked. Connect the electrode holder to either the positive or negative terminal depending on your polarity requirements. Ensure the ground clamp is securely attached to the workpiece.
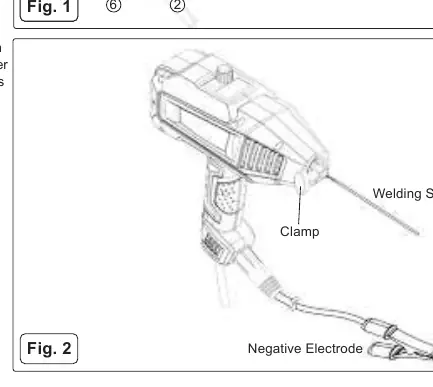
Polarity: For DCEN (Electrode Negative), connect the electrode holder to the '-' terminal and the work clamp to the '+'. For DCEP (Electrode Positive), connect the electrode holder to the '+' terminal and the work clamp to the '-'.
Welding: Turn on the power switch. Use the knobs to adjust the welding current and arc-striking force. For MMA welding with a 2.5mm electrode, the recommended current is typically 70-90A.
Maintenance
Regularly remove dust from the machine using dry, clean compressed air. If the machine is used in environments with heavy smoke or pollution, perform this daily. Inspect internal circuitry for loose or damaged connections. If the unit will not be used for an extended period, store it in its original packaging in a dry, protected environment.
Troubleshooting
If the indicator light is off and the fan is not working, check the power supply, fuses, and circuit breakers. If the fan is working but the current is unstable, check for inconsistent power supply voltage or electrical interference. If excessive spatter occurs, verify the polarity and ensure the current is appropriate for the electrode diameter.
Manufacturer information
Sealey Group
Practical help
Common problems
Arc-striking is difficult or inconsistent
Use high-quality electrodes, keep electrodes dry, and ensure the cable is not excessively long.
Output current does not reach rated value
Check that the input voltage is stable and matches the rated specification.
Excessive spatter during welding
Check that the polarity is correct for the application and ensure the current is not too high for the electrode diameter.
No welding output
Check power supply, fuses, and internal connections. If the abnormal indicator is lit, allow the machine to cool down.
Before use
- Check that the air intake is not blocked.
- Inspect power supply leads, plugs, and connections for damage.
- Ensure the work area is clean and free of flammable materials.
- Wear a welding mask, protective gloves, and safety footwear.
- Verify the mains voltage matches the appliance rating.
- Ensure the ground clamp is securely attached to the workpiece.
Specs in practice
- Electrode Capacity
- Supports rutile electrodes with diameters between 1.6mm and 3.2mm.
- IP Rating (IP21)
- Protected against solid objects larger than 12.5mm and vertically falling water drops (indoor use only).
- Welding Current
- Adjustable range from 20A to 120A.
Images and diagrams
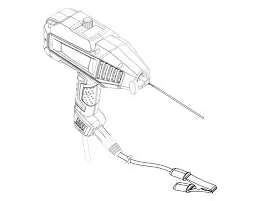
- Fig 1: Shows the control panel with the digital display, current dial, and VRD button.
- Fig 2: Illustrates the connection of the electrode holder and the ground clamp.
Model compatibility
- Suitable for indoor use in dry environments only.
- Do not use in rain or snow.
- Not for use in unventilated confined spaces without an air-supplied respirator.

Manual page author
Michael Turner
Technical manual editor
Reviews PDF manuals for structure, safety notes, and practical product details so readers can find the right information quickly.