Home / Clocks
Shopify 020505US-01-25A-AA TV Stand with Electric Fireplace
Assembly and installation guide for the Shopify 020505US-01-25A-AA TV stand with integrated electric fireplace. Includes parts list, step-by-step assembly instructions, LED light installation, and safety warnings.
Table of contents
Manual images
Click an image to enlargeQuick guide from the manual
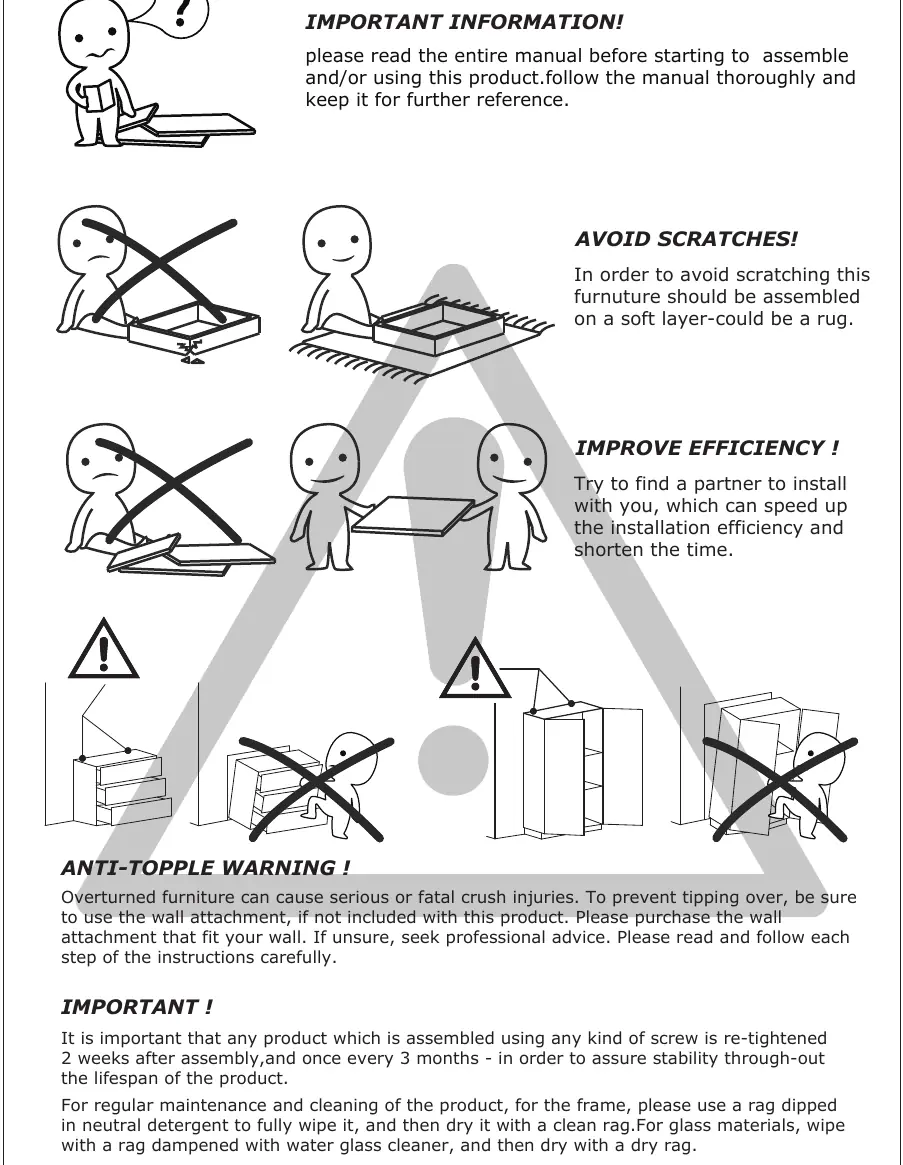
Before beginning assembly, ensure you have a partner to assist, as this will improve efficiency and safety. Assemble the furniture on a soft surface, such as a rug, to prevent scratches. Do not use an electric screwdriver, as excessive force can easily break the boards. Re-tighten all screws two weeks after assembly and once every three months to ensure long-term stability.
Parts and tools
Prepare the following tools: pencil, screwdriver, hammer, and drill. Verify all components against the parts list, which includes eccentric rods (A), cam locks (B), wooden dowels (C), screws (G, K), buckles (F), and the LED light strip (H). Note that "+2" in the parts list indicates spare parts.

Assembly instructions
The assembly process involves connecting various wooden panels (numbered 1-13) using the provided hardware. Follow the steps sequentially:
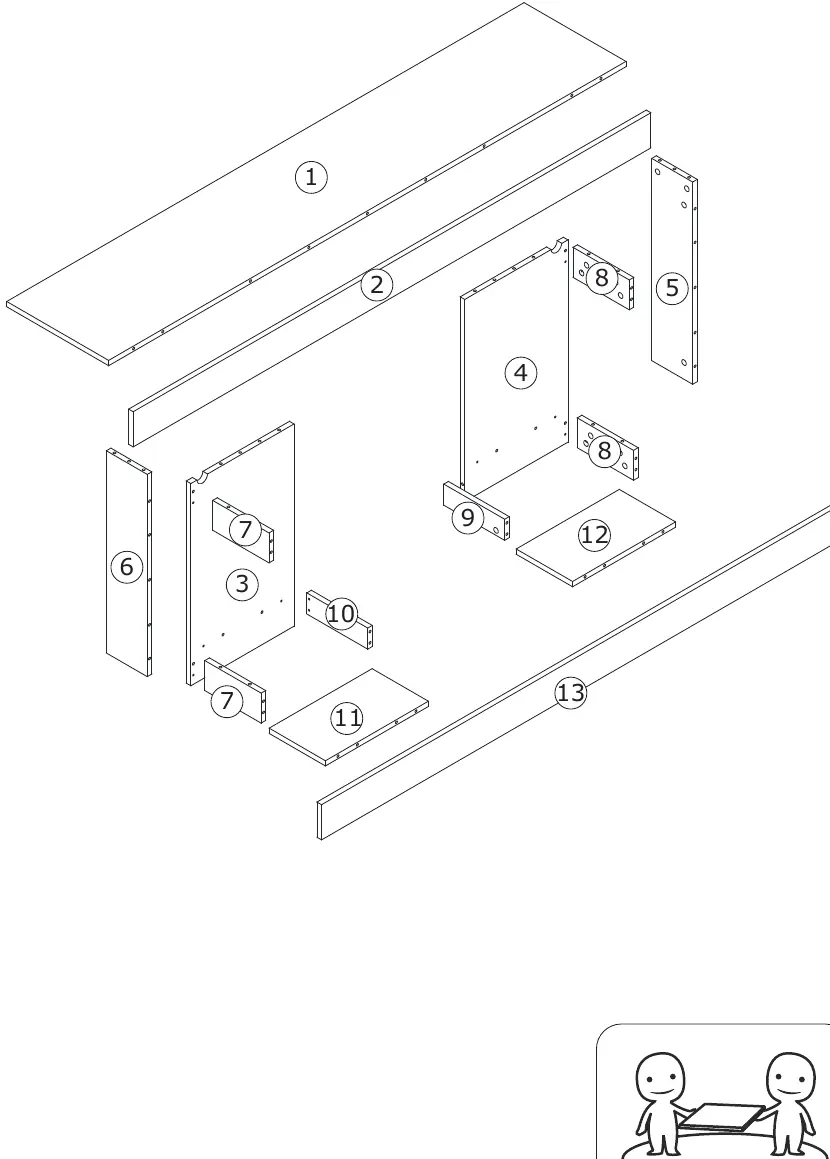
- Steps 1-3: Prepare boards by screwing eccentric rods (A) into the designated holes.
- Steps 4-8: Connect the main structural boards using wooden dowels (C) and cam locks (B). Ensure cam locks are turned clockwise to tighten.
- Steps 10-13: Assemble the main frame by attaching the boards to the top and bottom panels.
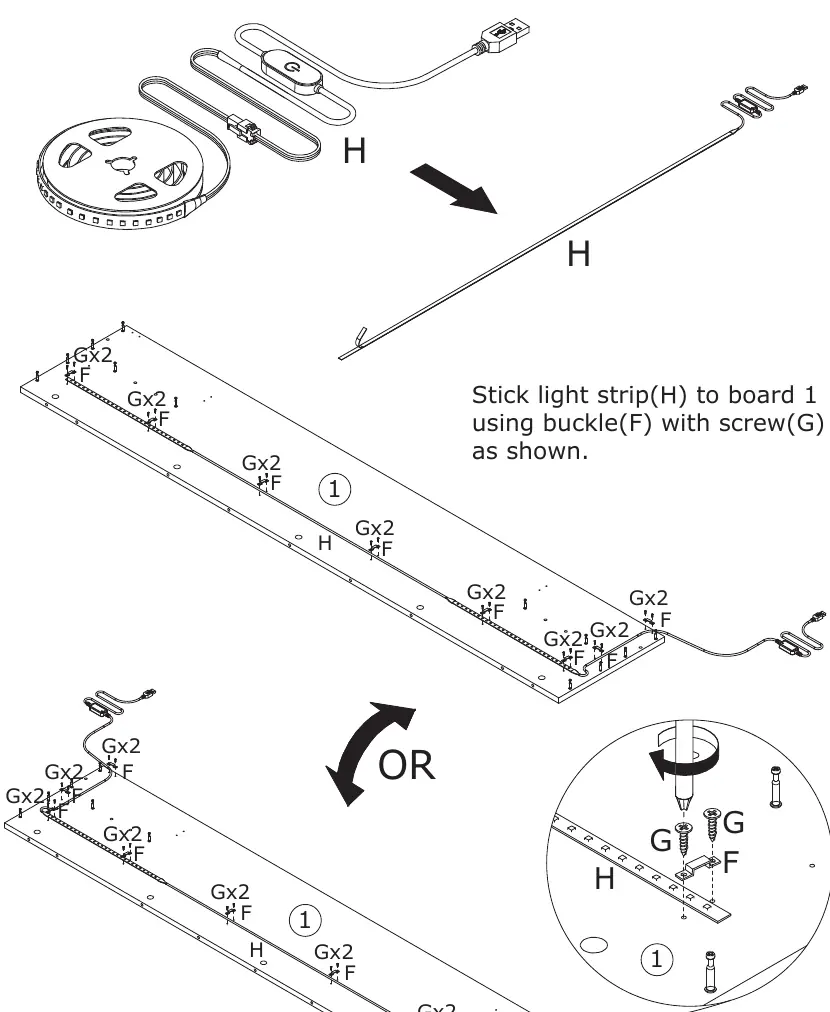
LED light installation
To install the lighting, stick the LED light strip (H) to board 1. Use the provided buckles (F) and screws (G) to secure the strip in place as shown in the diagram.
Fireplace installation
Fix part (D) to the fireplace unit using screws (K). Then, secure the fireplace to boards 12 and 13 using parts (J) and screws (K) as indicated in the assembly steps.
Safety and maintenance
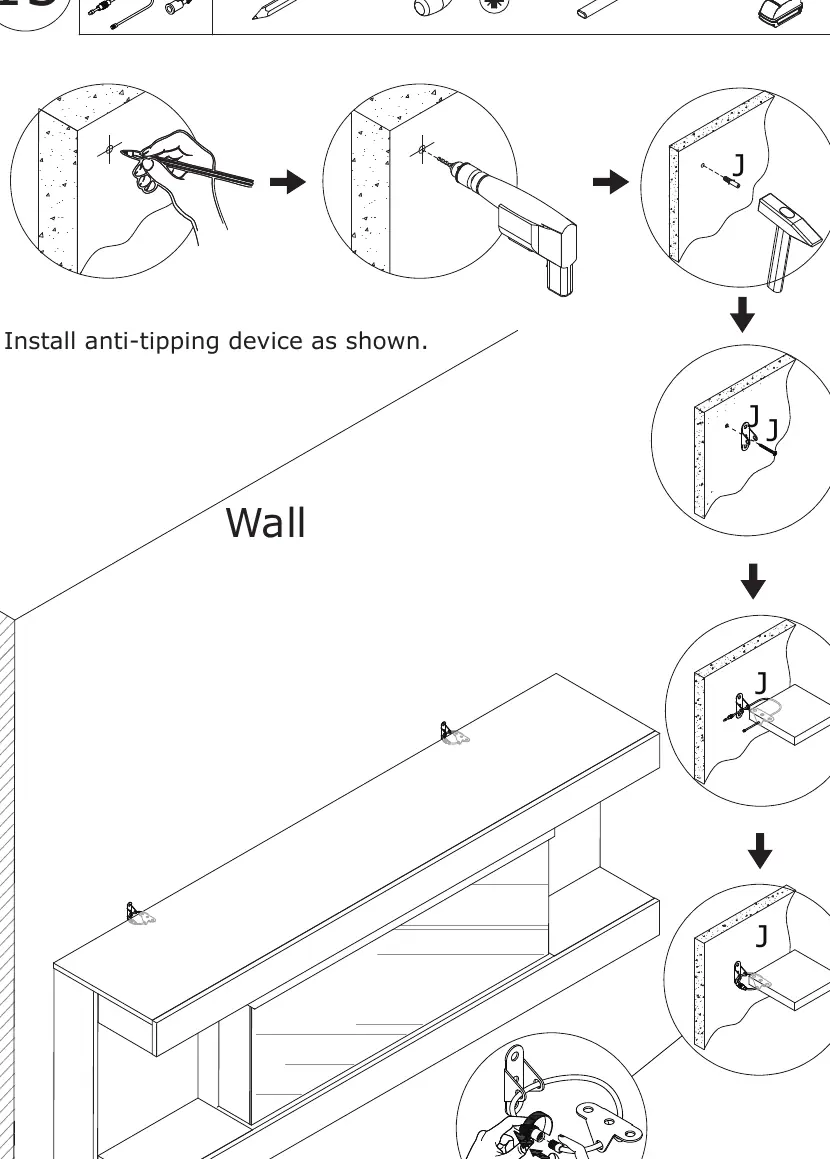
Anti-Topple Warning: Overturned furniture can cause serious or fatal crush injuries. You must install the anti-tipping device provided. If the attachment does not fit your wall, purchase a suitable alternative and seek professional advice if unsure.
For regular maintenance, wipe the frame with a rag dipped in neutral detergent and dry with a clean cloth. For glass materials, use a water glass cleaner and dry thoroughly.
Warranty and contact
The product includes a 30-day warranty for defects. For after-sales support, contact the manufacturer via email at [email protected] or call 208-820-0068.
Practical help
Common problems
Furniture feels unstable or wobbly
Re-tighten all screws 2 weeks after assembly and every 3 months.
Board breakage during assembly
Do not use an electric screwdriver; use manual tools and avoid applying excessive force.
Scratches on furniture surface
Assemble the unit on a soft surface, such as a rug or carpet.
Risk of tipping
Mandatory installation of the anti-tipping device is required to prevent injury.
Before use
- Verify all parts (A-K) against the parts list.
- Prepare necessary tools: pencil, screwdriver, hammer, drill.
- Find a partner to assist with assembly.
- Clear a workspace and lay down a rug or soft mat.
- Read the entire manual before starting.
Specs in practice
- A (Eccentric rod)
- Primary connector for structural panels.
- C (Wooden dowel)
- Used for alignment and stability between boards.
Images and diagrams
- Exploded view (Page 4) identifies all numbered panels for easy reference.
- Step-by-step diagrams illustrate the correct orientation for cam locks and dowels.
Model compatibility
- Wall attachment is required; if the included hardware is not compatible with your wall type, purchase appropriate anchors.

Manual page author
Emily Carter
User documentation editor
Prepares concise manual descriptions and highlights the most useful setup, operation, and maintenance information for readers.