Home Appliances / Small Kitchen Appliances
User Manual for Tzumi GO Cinema Projector
Quick guide for the Tzumi GO Cinema LED projector. Learn how to connect devices via HDMI, AV, or USB, adjust image settings, and operate the menu system.
Table of contents
Quick guide from the manual
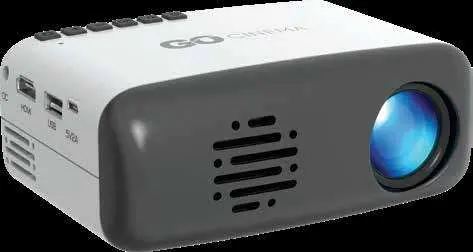
The Tzumi GO Cinema is a compact LED projector designed for home entertainment. This guide covers the essential setup, connection methods, and menu navigation required to operate the device effectively.
Getting started
To begin using the projector, connect the provided DC12V 2A power cable to the side of the unit and plug it into an outlet. The control keys on top of the projector will illuminate. Press the POWER button on the unit or the remote control to turn it on. Note that the remote requires two AA batteries.
Image adjustment
To achieve a clear picture, use the two knobs located above the lens:
- Focus knob: Turn this knob while observing the pixels near the center of the screen until the image is sharp.
- Keystone knob: Located behind the focus knob, use this to correct image distortion if the projector is angled relative to the screen.
Connections
The GO Cinema supports various input sources:
- HDMI: Connect laptops, DTV tuners, DVD players, Blu-ray players, or streaming devices (like Chromecast or Fire TV) using the included HDMI cable. The HDMI port is marked "HD" on the side panel.
- AV/RCA: Use the included AV/RCA cable to connect compatible devices. The female connector is marked "AV" on the side panel.
- USB and Micro SD: Insert a USB stick or Micro SD card into the respective slots. Use the remote or top control keys to select the Media icon and navigate to your photos, music, video, or text files.
- Audio: Connect headphones or external speakers via the 3.5mm jack located on the back of the unit.
Menu settings
Press the MENU key on the remote to access the main menu. Use the LEFT/RIGHT keys to select a submenu and UP/DOWN keys to adjust settings, then press OK to confirm.
- Image menu: Adjust Picture Mode (text, video, picture, user defined), Color Temperature, Aspect Ratio, and Noise Reduction.
- Audio menu: Configure Sound Mode, Balance, Auto Volume, and Surround Sound settings.
- Time menu: Set the Clock, Off/On Time, Sleep Timer, and Auto Sleep functions.
- Option menu: Change the Text Language, restore Factory Default Settings, set Color Range, or update Software/Firmware via USB.
Important safeguards
- Do not look directly into the lens while the projector is operating.
- Ensure the ventilation holes are not covered by cloth or other materials.
- The projector is not waterproof; keep it away from liquids.
- Use and store the device in a dry, clean environment.
- If the unit is not in use for an extended period, power it off and unplug the cord.
- Do not attempt to disassemble or repair the unit yourself.
Technical specifications
- Native Resolution: 320 x 240
- Contrast: 800:1
- HDMI Supported Resolution: 1920 x 1080
- Power Consumption: 10W – 24W
- Projection Size: 24 – 60 inches
- Supported Ports: USB, HDMI, Micro SD, 3.5mm, AV-RCA
For technical support, contact Tzumi at [email protected] or call 1-855-GO-TZUMI.
Manufacturer information
Tzumi
Practical help
Common problems
Image is distorted (trapezoid shape)
Use the Keystone adjustment knob located behind the focus knob to restore the image to a rectangular shape.
Image is blurry
Rotate the focus knob located above the lens until the on-screen pixels are clearly visible.
Projector will not turn on
Ensure the DC12V 2A power cable is firmly connected to the projector and the wall outlet.
Before use
- Insert two AA batteries into the remote control.
- Ensure the projector is placed in a dry, clean, and darkened environment.
- Verify that the ventilation holes are not obstructed.
- Check that all signal cables are firmly inserted into their respective ports.
- Ensure the power source is compatible (DC12V 2A).
Specs in practice
- Native Resolution (320 x 240)
- The actual physical pixel count of the projector's display panel.
- HDMI Supported Resolution (1920 x 1080)
- The maximum resolution of the input signal the projector can accept and downscale for display.
- Projection Size (24-60")
- The recommended range of screen sizes for optimal image quality.
Images and diagrams
- Focus knob: Located above the lens; rotate to sharpen the image.
- Keystone knob: Located behind the focus knob; rotate to correct image distortion.
- Ports: HDMI, USB, Micro SD, and AV/RCA are located on the side/back panels.
Model compatibility
- HDMI supports laptops, DTV tuners, DVD players, Blu-ray players, Chromecast, and Fire TV.
- Supports USB and Micro SD media playback for photos, music, video, and text.

Manual page author
David Miller
Documentation analyst
Organizes user manual content into clear summaries, with attention to model details, product context, and everyday usability.