Furniture / Kitchen Furniture
Installation Manual for 5-Layer Portable Kitchen Cart 210906YH01-1-WP
Step-by-step assembly guide for the 5-Layer Portable Kitchen Cart 210906YH01-1-WP. Includes a complete accessories list, a 9-step installation procedure, and essential usage tips for stability and maintenance.
Quick answers from the manual
Quick answer
- This manual provides assembly instructions for the 5-Layer Portable Kitchen Cart (Model 210906YH01-1-WP). It includes a parts list and a 9-step installation procedure. p. 1, 2
Key actions
- Assemble the base and wheels. p. 2
- Install the rotary tubes and baskets. p. 2
First start
- Verify all accessories are present, then follow the 9-step installation procedure starting with the wheels and base. p. 2
Show 2 more answers Show less
Problems and fixes
Uneven feet
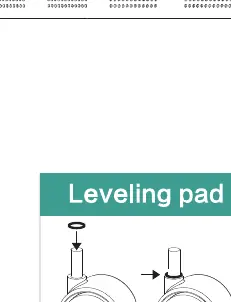
Insert the leveling pad into the wheel.
p. 1Where to find it in the PDF
- Overview and Usage Tips p. 1
- Accessories and Installation p. 2
Table of contents
Manual images
Click an image to enlargeQuick guide from the manual
To ensure the stability and longevity of your 5-Layer Portable Kitchen Cart, please observe the following usage tips:
- Weight Distribution: Always place heavy objects on the bottom basket to prevent tipping.
- Balance: Maintain left and right balance when rotating and opening the baskets.
- Operation: Ensure the basket is closed and returned to its position after taking or placing items.
- Leveling: If the cart feels uneven on the floor, insert the provided leveling pad into the wheel.
Accessories list
Before beginning assembly, verify that all parts are present:
- Bottom Basket (1)
- Upper Section Tube (3)
- Top Cover (1)
- Wheel (4)
- Top Screw (3)
- Screw (8)
- Wrench (1)
- Basket (4)
- Rotary Tube (4)
- Magnet Clip (4)
- Fixed Clip (4)
- Butt joint (3)
Installation procedure
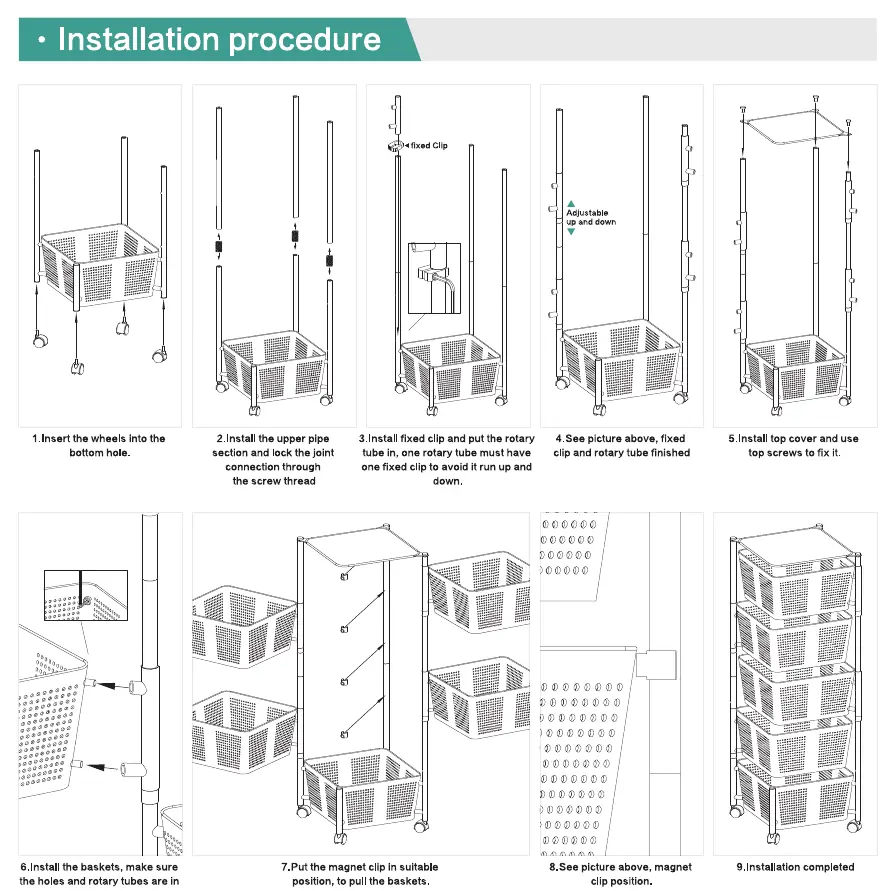
- Insert the wheels into the bottom hole of the base.
- Install the upper pipe section and lock the joint connection using the screw thread.
- Install the fixed clip and insert the rotary tube. Ensure one rotary tube has one fixed clip to prevent it from sliding up and down.
- Adjust the fixed clip and rotary tube position as needed.
- Install the top cover and secure it using the top screws.
- Install the baskets, ensuring the holes and rotary tubes are aligned correctly, then lock the screws tightly.
- Attach the magnet clip in a suitable position to secure the baskets.
- Verify the magnet clip position.
- Installation is complete.
Practical help
Common problems
The cart is unstable or wobbling.
Ensure the cart is on a flat surface and insert the provided leveling pad into the wheel if the feet are uneven.
The cart tips over when baskets are opened.
Ensure heavy objects are placed in the bottom basket to lower the center of gravity.
Before use
- Check that all accessories (baskets, tubes, clips, screws, wheels) are present.
- Ensure you have the provided wrench for assembly.
- Identify a flat, level area for assembly.
Show more Show less
Images and diagrams
- The installation procedure diagrams illustrate the sequence of connecting the base, central tubes, and attaching the baskets using the provided clips and screws.

Manual page author
David Miller
Documentation analyst