Lighting / Fixtures
User Manual for Uolfin 1-Light Pendant Light
Quick guide for the Uolfin 1-Light Pendant Light. Includes installation steps, wiring instructions, safety warnings, and maintenance tips for your fixture.
Table of contents
Manual images
Click an image to enlargeImportant Information
Before starting, ensure the main power is turned off at the circuit breaker or fuse box. We strongly recommend installation by a licensed electrician. This fixture is designed for 120V systems and supports a maximum of 60W per bulb (Type A). Ensure the mounting surface is clean, dry, and capable of supporting the lamp's weight. Keep the lamp away from acidic and alkaline substances to prevent surface damage.
Tools Required
Before beginning assembly, ensure you have the following tools available:

- Ladder
- Philips Head or Flat Blade Screwdriver
- Electrical Tape
- Pliers
- Wire Cutter/Stripper
Parts List
Ensure all parts are included before starting:
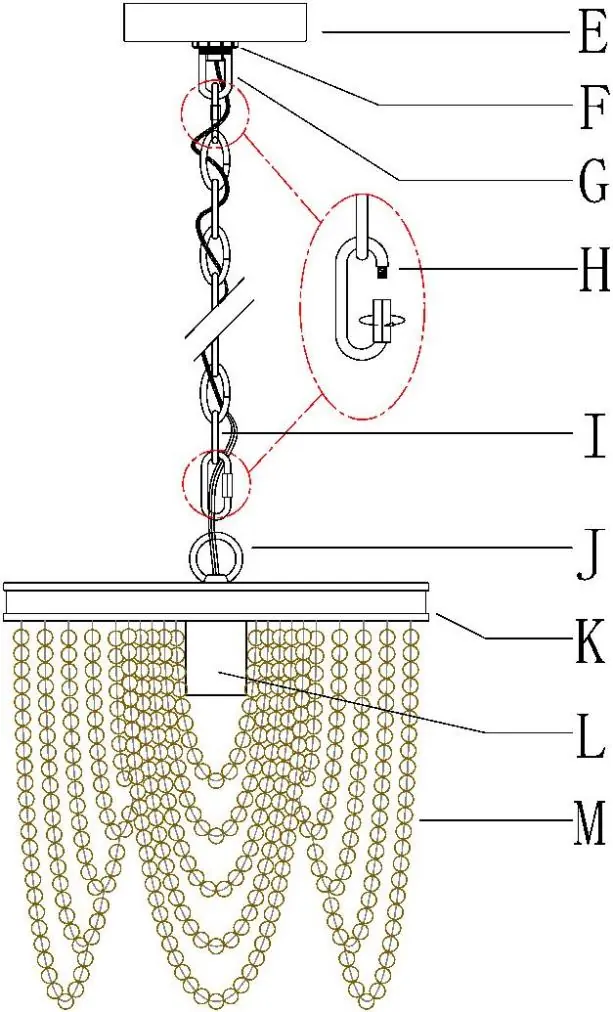
- Single bar (C)
- Green ground screw (D)
- Canopy (E)
- Collar ring (F)
- Collar loop (G)
- Quick link (H)
- Chain (I)
- Loop (J)
- Iron ring (K)
- Socket (L)
- Wood bead strand (M)
- Wire connectors (A)
- Mounting screws (B)
Assembly and Installation
Chain Preparation:
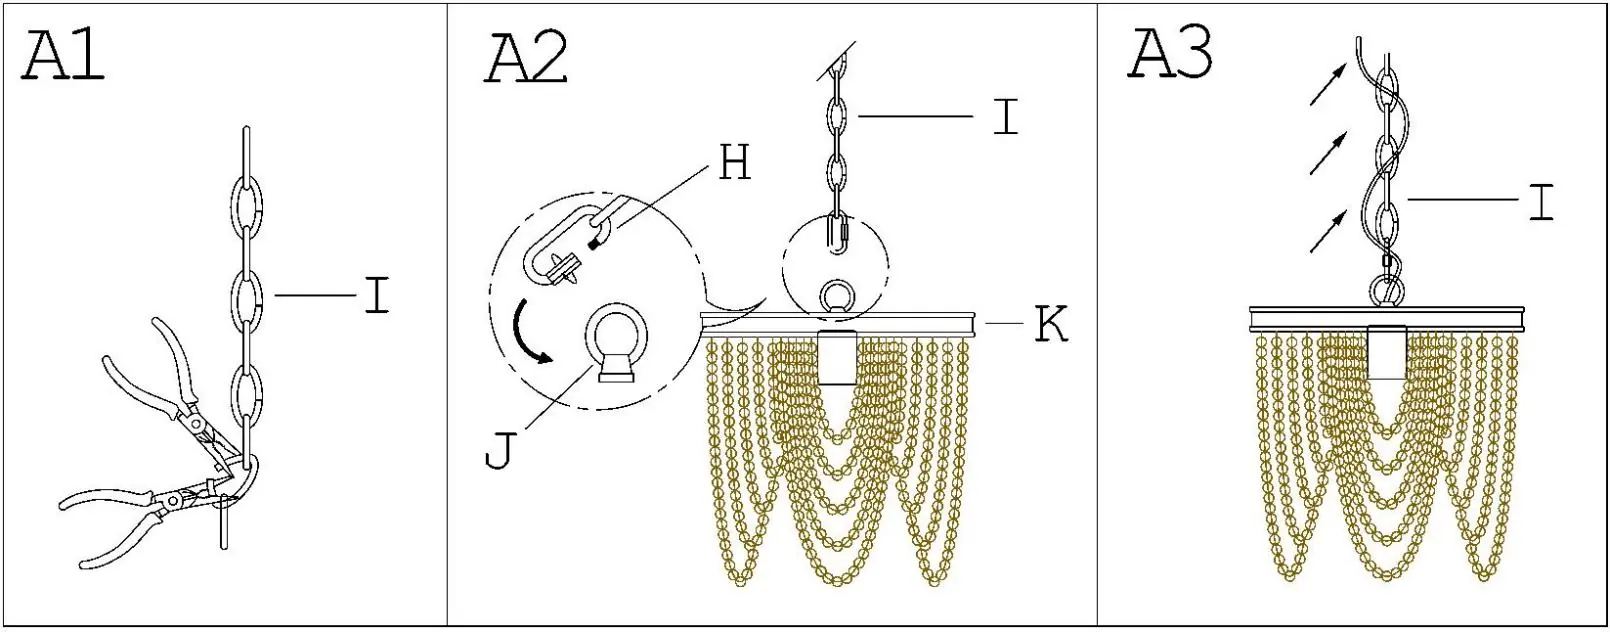

- Determine the correct number of chain links needed for your desired hanging height. Use chain pliers to disconnect and discard unwanted links.
- Attach the quick link (H) to the chain (I) and the loop (J) on top of the iron ring (K).
- Weave the fixture wires through the chain (I), passing through every other link. Stop at the top of the chain and gently pull to ensure wires are not stressed.
Mounting:
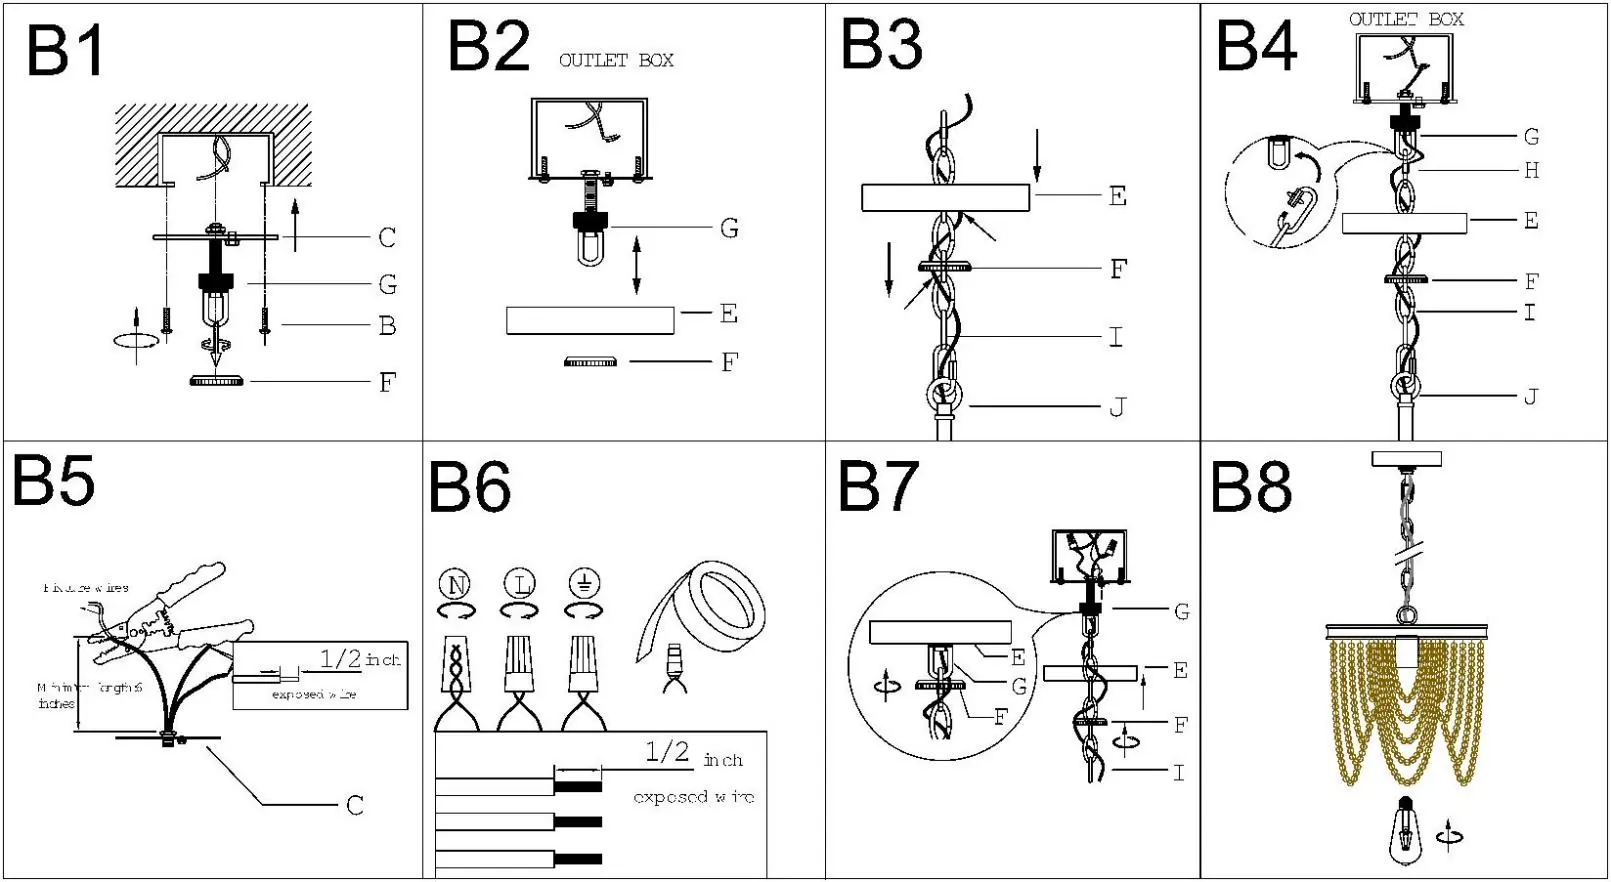
- Remove the collar ring (F) from the collar loop (G). Attach the single bar (C) to the outlet box using mounting screws (B). Ensure the side marked "GND" faces out.
- Raise the canopy (E) over the collar loop (G) and screw on the collar ring (F) to find the proper position. The canopy should be snug against the ceiling. If necessary, adjust the collar loop (G) on the single bar assembly until the secure length is achieved.
- Pass the chain (I) through the collar ring (F) and canopy (E).
- Open the quick link (H), attach it to the collar loop (G), and close it. Pass fixture wires through the collar loop and the threaded nipple.
Wiring Instructions
Note: The ground wire is bare copper. Never connect other wires to ground wires.
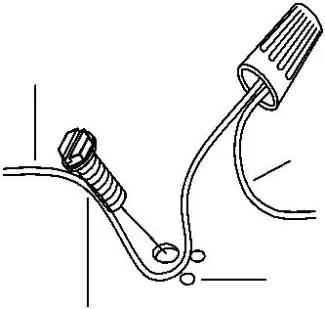
- Connect the fixture ground wire to the outlet box ground wire using a wire connector.
- Connect the black or red supply wire to the black fixture wire.
- Connect the white supply wire to the white fixture wire.
- Twist wires together with plastic wire connectors until tightly joined.
- Wrap each connector with electrical tape.
- Ensure no wire strands are exposed and tuck all wires into the outlet box.
Cleaning and Maintenance
To clean the fixture, use a soft cloth. Do not use abrasive materials such as scouring pads, powders, steel wool, or abrasive paper, as these will damage the finish.
Practical help
Common problems
Canopy is not flush with the ceiling
Adjust the collar loop (G) on the single bar assembly (C) by screwing it in or out until the secure length is achieved.
Wires feel stressed or tight
Gently pull the wires through the chain and collar loop to ensure they are not stressed before final connection.
Before use
- Turn off main power at the circuit breaker or fuse box.
- Ensure mounting surface is clean, dry, and flat.
- Verify the ceiling can support the weight of the lamp.
- Check that all parts and accessories are included.
- Ensure you have the required tools (ladder, screwdriver, pliers, etc.).
Show more Show less
Images and diagrams
- A1-A3: Steps for preparing the chain and weaving the wires.
- B1-B8: Steps for mounting the fixture to the outlet box and making electrical connections.
Model compatibility
- Requires 120V power supply.
- Use Type A bulbs only.

Manual page author
Michael Turner
Technical manual editor