Industrial / Agricultural Equipment
User Manual for VEVOR 2-Tier Stainless Steel Dish Rack WK810478
Quick guide for the VEVOR 2-Tier Stainless Steel Dish Rack (Model WK810478). Includes assembly instructions, weight capacity, safety precautions, and cleaning tips.
Quick answers from the manual
Quick answer
- This manual provides assembly instructions and safety guidelines for the VEVOR 2-Tier Stainless Steel Dish Rack (Model WK810478). p. 1, 2
Key actions
- Assemble the rack by following the 5-step process, starting with the base and brackets. p. 4, 5, 6
Problems and fixes
Product instability
Place on a stable, horizontal table.
p. 3Show 3 more answers Show less
Maintenance and reset
- Clean the surface with a damp (not wet) cloth or a clean lint-free cotton cloth. Window cleaning liquid can also be used. p. 8
Technical specifications
| Parameter | Value | Meaning | Pages |
|---|---|---|---|
| Max load per layer | 10.0 kg | Maximum weight capacity for each shelf | p. 3 |
Where to find it in the PDF
- Assembly Steps p. 4, 5, 6
Table of contents
Manual images
Click an image to enlargeQuick guide from the manual
This document provides assembly and maintenance instructions for the VEVOR 2-Tier Stainless Steel Dish Rack (Model WK810478). Users should follow the assembly steps carefully to ensure stability and safety. The product is designed for indoor use on stable, horizontal surfaces.
Product Description
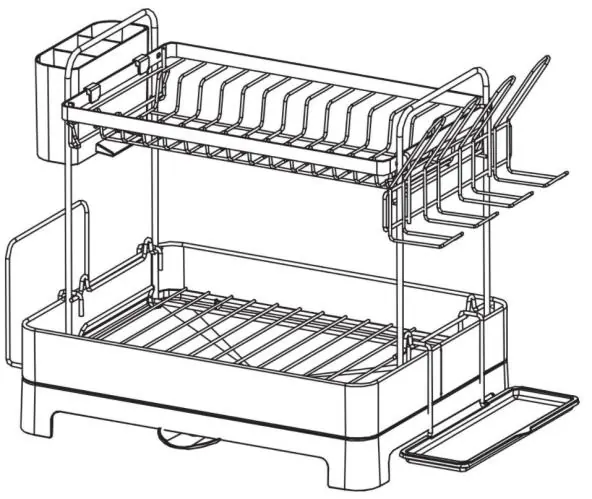
The VEVOR 2-Tier Stainless Steel Dish Rack is a kitchen organization solution. It includes a base, brackets, lower and upper shelves, and various accessories such as a cup holder, drip plate support, chopping board support, side drain pan, and a plastic cylinder for utensils.
Assembly Instructions
Preparation: Ensure the assembly area is clean and well-lit. Wear safety goggles and heavy-duty work gloves during assembly.

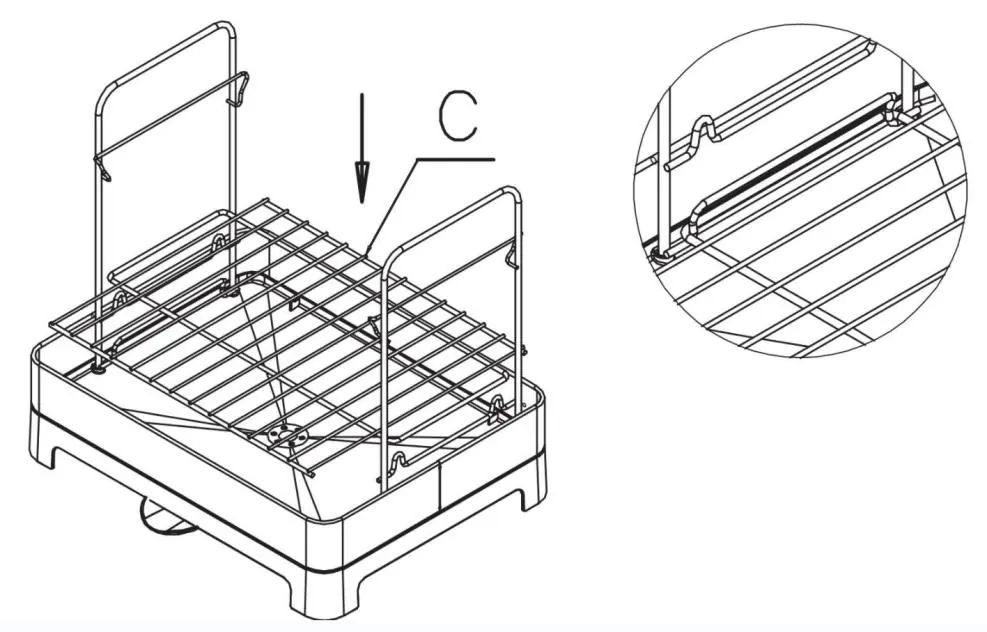
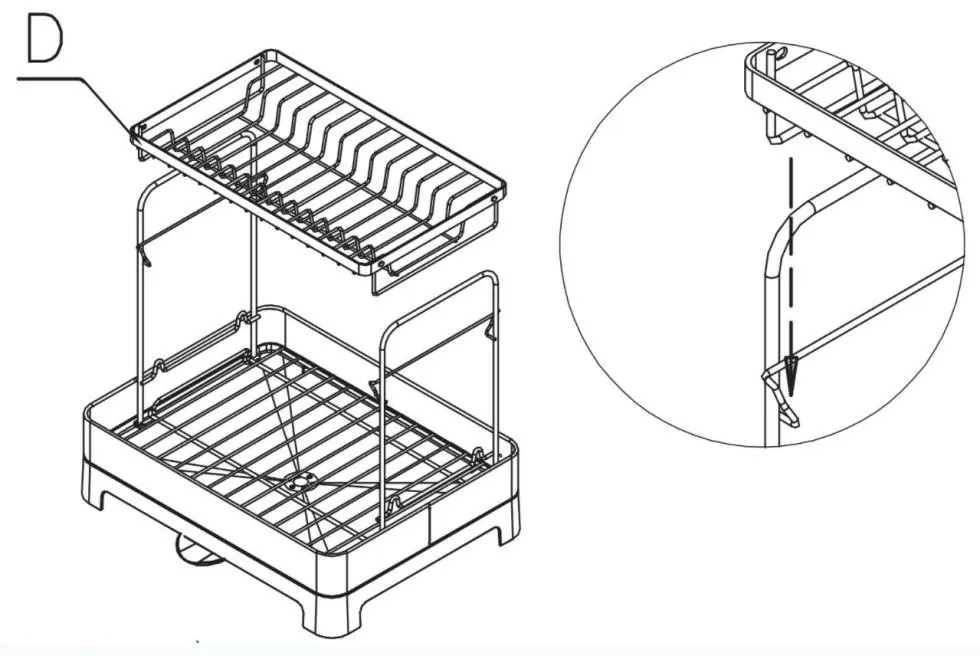
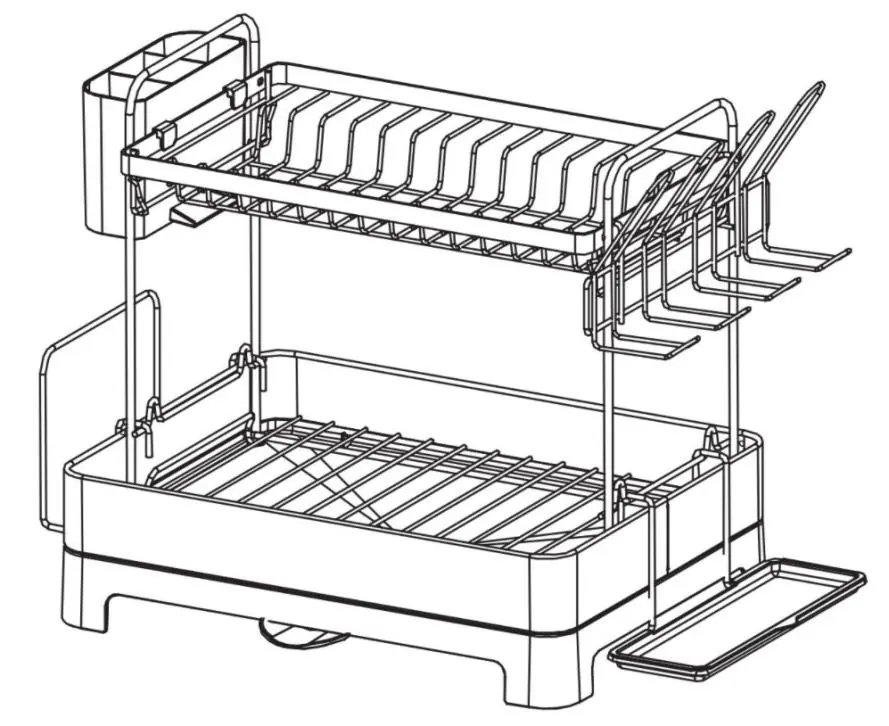
- Step 1: Insert the brackets (B) into the base (A).
- Step 2: Place the lower shelf (C) onto the brackets.
- Step 3: Attach the upper shelf (D) to the top of the brackets.
- Step 4: Install the cup holder (E), drip plate support (F), and side drain pan (H) onto the frame. Attach the plastic cylinder (I) and chopping board support (G).
- Step 5: Ensure all parts are securely fitted and the rack is stable.
Safety and Use Precautions
- Tipping Hazard: This product is not a toy. Keep children away from the item.
- Stability: Place the product on a stable, horizontal table. Avoid placing it on edges or unstable surfaces.
- Weight Limits: Do not exceed the listed weight capacity. Be aware of dynamic loading, as sudden movements can cause product failure.
- Usage: Do not sit or stand on the product. Use only as intended.
Cleaning and Maintenance
To maintain the product, wipe the surface with a damp (not wet) cloth or a clean, lint-free cotton cloth. Window cleaning liquid or similar mild cleaning agents can be used to clean the surface. Regularly clean up accumulated water to avoid odors.
Technical Specifications
- Model No: WK810478
- Product Size: 583 x 410 x 320 mm
- Load of each layer: Max 22 lb (approx. 10.0 kg)
- Left and right load: Max 13.2 lb (approx. 6.0 kg)
Manufacturer information
VEVOR
Practical help
Common problems
Product instability
Ensure the rack is placed on a stable, horizontal table and not on an edge or uneven surface.
Unpleasant odor
Clean up accumulated water from the drip tray regularly.
Before use
- Check that the product is clean and free of dust.
- Wear safety goggles and heavy-duty work gloves during assembly.
- Ensure the assembly area is clean and well-lit.
- Verify all parts (A-I) are present according to the parts list.
- Ensure the surface where the rack will be placed is stable and horizontal.
Show more Show less
Specs in practice
- Product size
- 583 x 410 x 320 mm
- Load of each layer
- Maximum weight capacity of 10.0 kg per shelf.
- Left and right load
- Maximum weight capacity of 6.0 kg for side attachments.
Images and diagrams
- The assembly involves connecting the base (A) with brackets (B), then adding the lower shelf (C), upper shelf (D), and accessories (E, F, G, H, I).
Model compatibility
- For indoor use on stable, horizontal surfaces.

Manual page author
Emily Carter
User documentation editor