Garden / Garden Structures
User Manual for VEVOR 3×6×2.25M(6)G Tunnel Greenhouse
Comprehensive assembly and safety guide for the VEVOR 3×6×2.25M(6)G Tunnel Greenhouse. Includes parts list, step-by-step installation instructions, and safety precautions for proper setup and anchoring.
Quick answers from the manual
Quick answer
- The VEVOR Tunnel Greenhouse requires two people for assembly. Use power tools for the large number of screws, and do not fully tighten screws until the entire frame is assembled. For stability, dig a 20cm trench around the base and secure with the included spiral nails and ropes. p. 6, 13
Key actions
- Assemble the frame p. 7, 8, 9, 10
- Secure the greenhouse p. 13, 14
First start
- Prepare parts and assemble with two people p. 6
Show 3 more answers Show less
Problems and fixes
Greenhouse is unstable
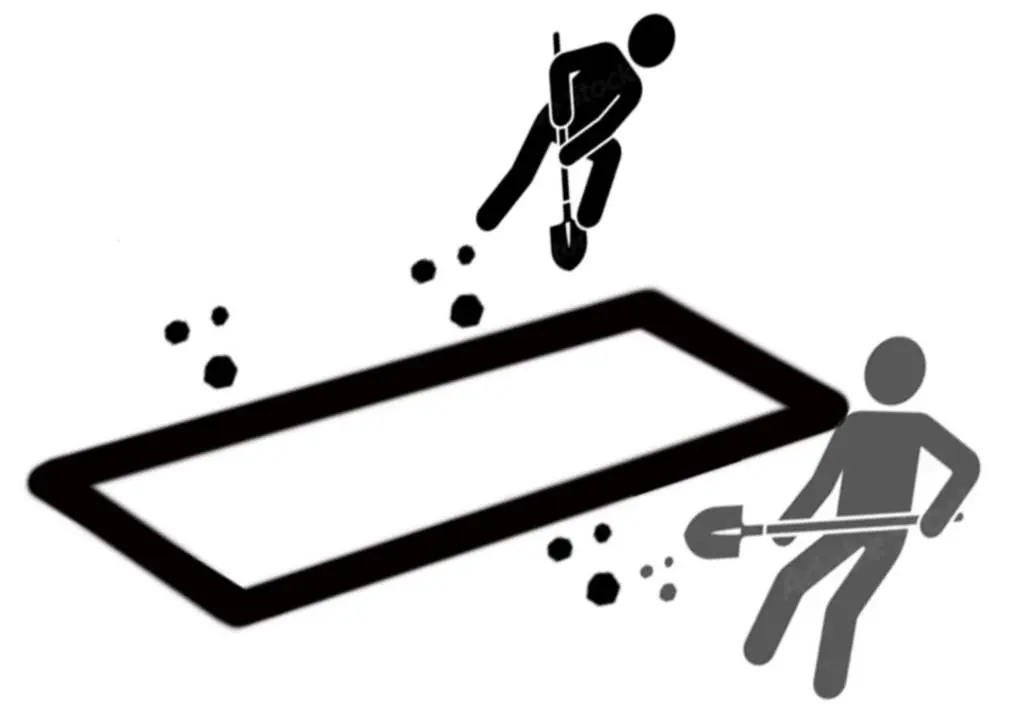
Dig a 20cm trench around the base and secure with spiral nails and ropes.
p. 13Technical specifications
| Parameter | Value | Meaning | Pages |
|---|---|---|---|
| Product Size | 20x10x7.5ft (590*295*220cm) | Dimensions of the assembled greenhouse | p. 6 |
Where to find it in the PDF
- Parts List p. 4, 5
- Assembly Instructions p. 7, 8, 9, 10
- Anchoring p. 13, 14
Table of contents
Manual images
Click an image to enlargeQuick guide from the manual
The VEVOR Tunnel Greenhouse is designed for outdoor plant protection. Assembly requires two people and the use of power tools is recommended due to the large number of screws. Do not fully tighten screws until the entire frame is assembled to ensure proper alignment. For maximum stability, it is recommended to dig a 20cm trench around the base and secure the structure using the provided spiral nails and ropes.
Parts List
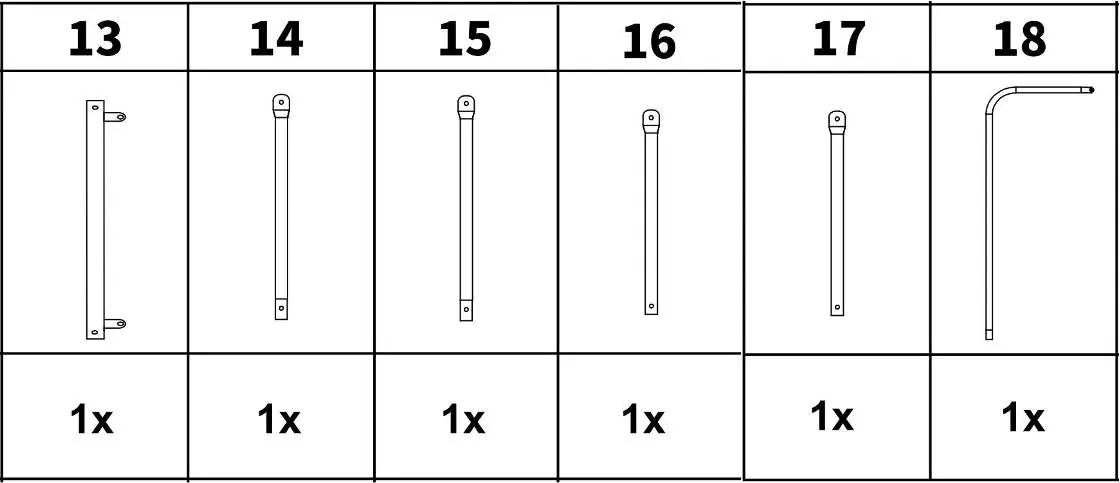
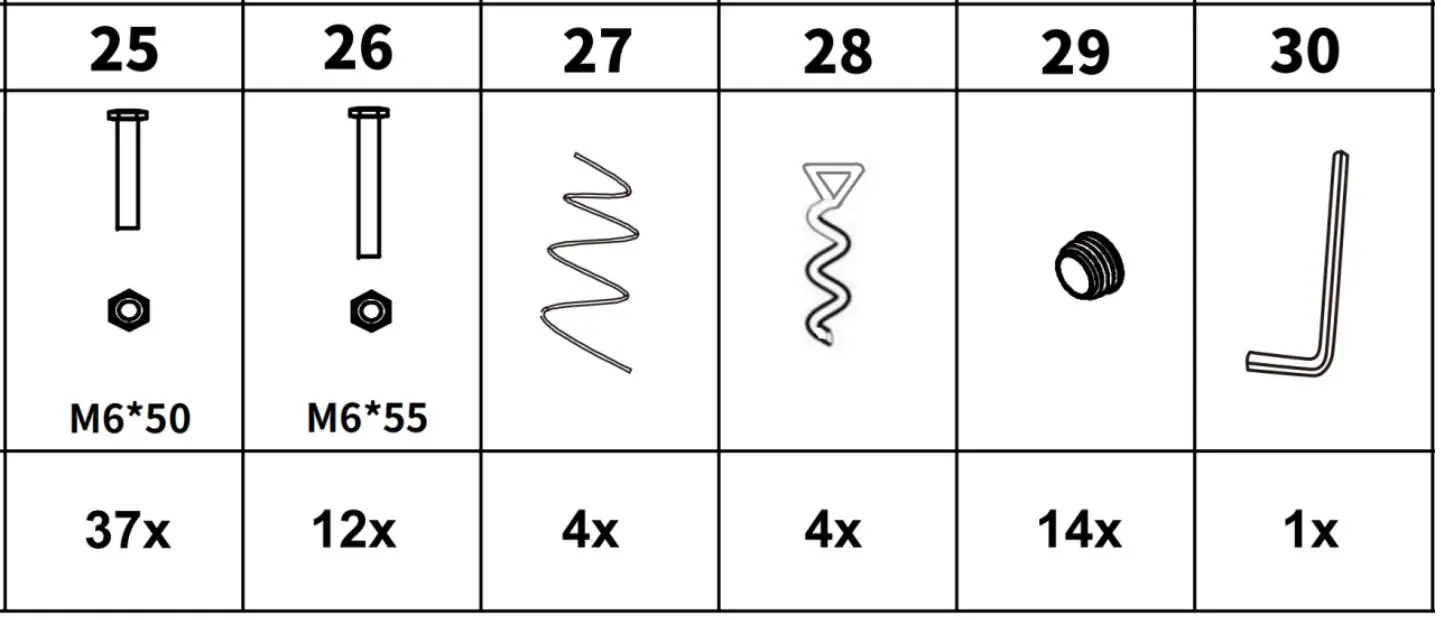
Before beginning assembly, unpack all components and verify them against the parts list provided in the manual. The kit includes various poles, brackets, screws (M6*16, M6*25, M6*30, M6*50, M6*55), plastic stoppers, spiral nails, and ropes.
Assembly Instructions
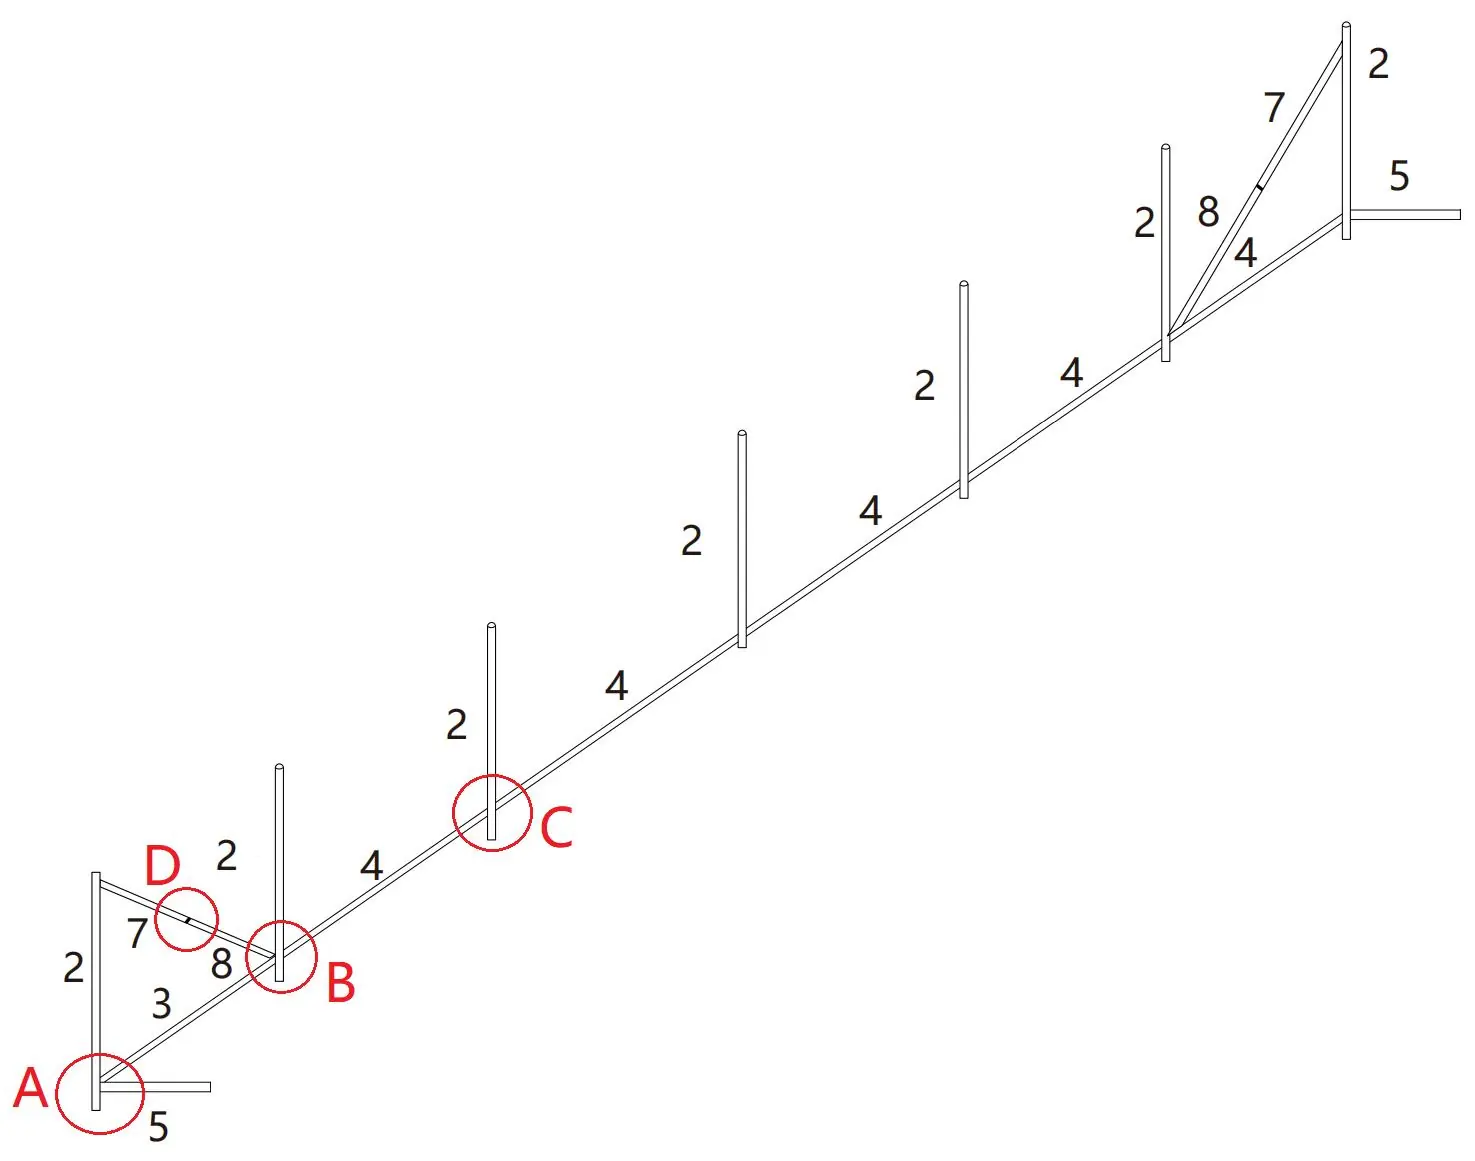
1. Left and Right Brackets: Lay out the parts according to the diagrams. Connect the poles and secure them with the specified screws. Do not fully tighten the screws at this stage.
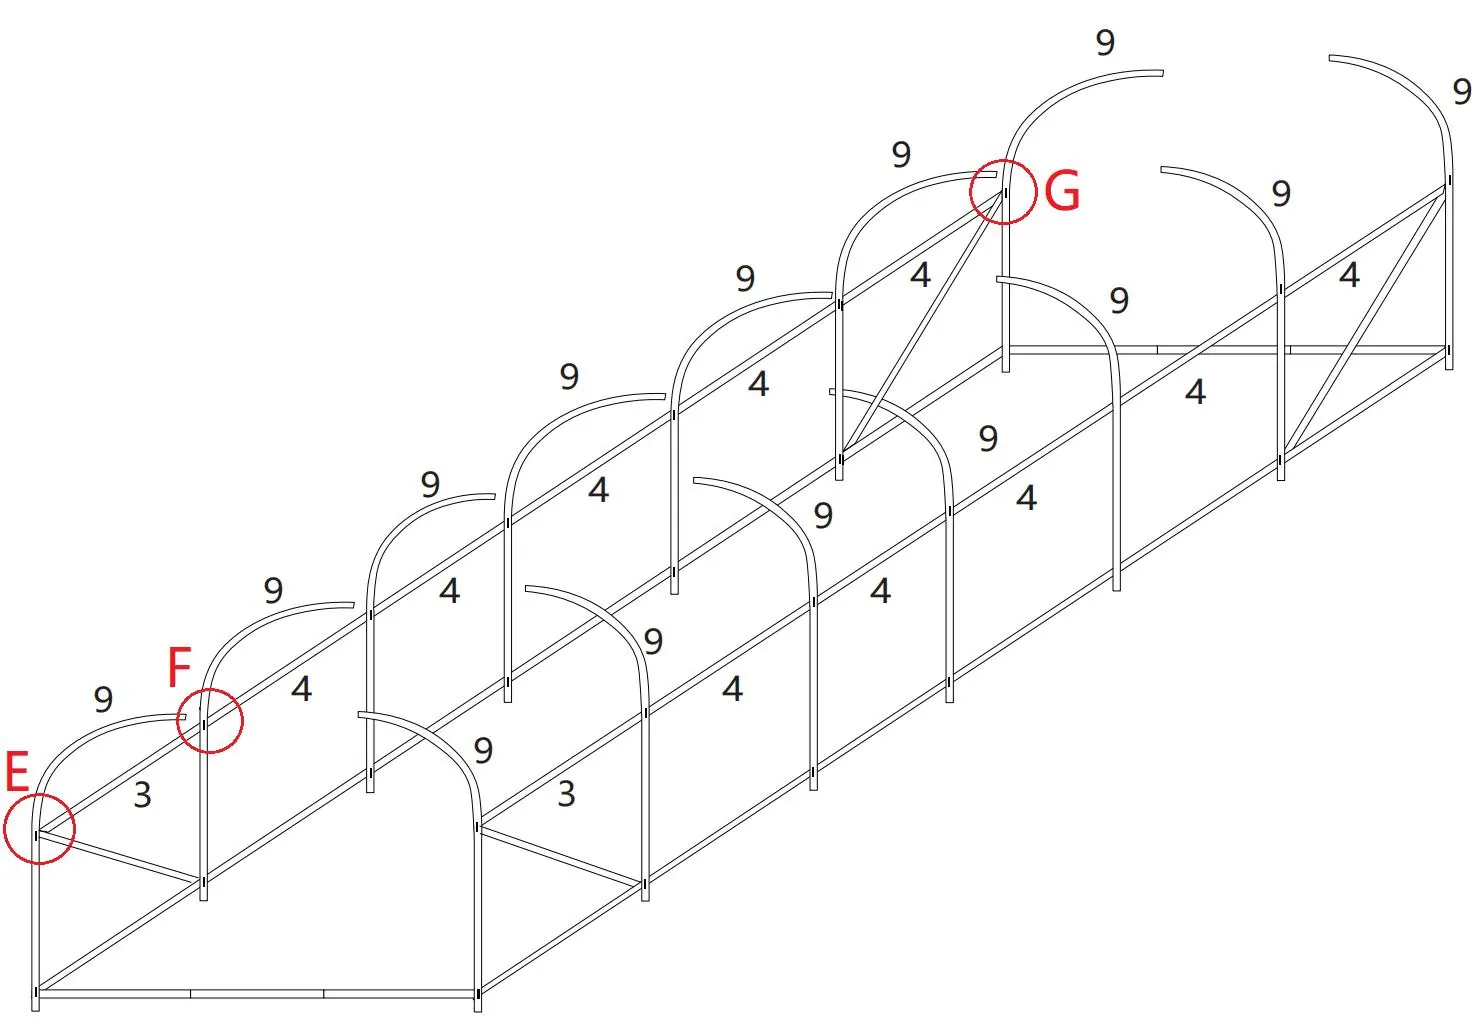
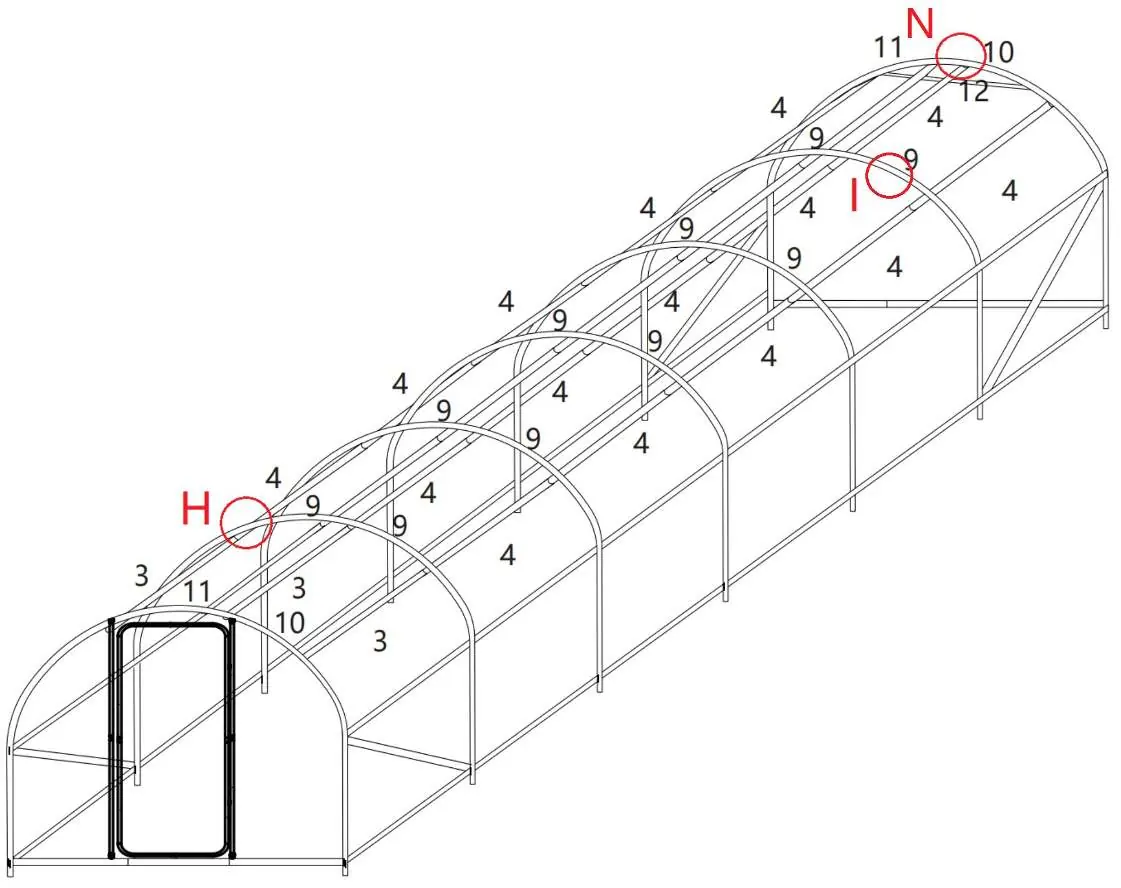
2. Top Brackets: Assemble the top arch brackets and connect them to the side structures.
3. Front and Back Doors: Assemble the door frames using the specified poles and screws.
4. Final Assembly: Once the frame is fully assembled, tighten all bolts and nuts completely.
Anchoring and Stability
For maximum stability, dig a 20cm wide trench around the base of the greenhouse. Place the assembled frame into the trench. Cover the edges of the tarpaulin with dirt and compact it. Use the provided spiral nails and ropes to anchor the greenhouse firmly to the ground.
Safety Precautions
- Do not use or store the greenhouse in hazardous areas.
- Check the structure for proper working order before use.
- Use only as intended; do not store corrosive substances inside.
- Keep children supervised around the greenhouse.
- Do not use during severe weather conditions such as rainstorms, hail, heavy snow, or high winds.
Manufacturer information
VEVOR
Practical help
Common problems
Unstable structure
Dig a 20cm trench around the base and use the provided spiral nails and ropes for anchoring.
Difficult assembly
Use power tools for the large number of screws and ensure two people are working together.
Before use
- Check all parts against the product list
- Ensure you have a second person to help
- Prepare power tools
- Select a safe, non-hazardous location
Show more Show less
Images and diagrams
- Parts list shows 32 components
- Assembly steps show sequential bracket installation
- Anchoring diagram shows trenching and spiral nail usage
Model compatibility
- Not for use in hazardous areas
- Not for use in extreme weather (storm, heavy snow, high wind)

Manual page author
Emily Carter
User documentation editor