Electronics / Security Cameras
Vivitar IPC 112N High Definition Capture Cam
Quick setup and operation guide for the Vivitar IPC 112N High Definition Capture Cam. Learn how to install the SD card, connect to Wi-Fi, use the Vivitar Smart Home Security app, and configure motion detection.
Table of contents
Manual images
Click an image to enlargeQuick Start Guide
To begin using your Vivitar IPC 112N, follow these essential steps:

- Insert a Class 4 or higher Micro SDHC memory card (up to 32GB) into the camera slot.
- Connect the camera to power using the provided Micro USB cable and AC charger.
- Download and install the Vivitar Smart Home Security app from the Google Play Store or Apple App Store.
- Ensure your mobile device is connected to a 2.4GHz Wi-Fi network.
- Launch the app, create an account, and follow the in-app instructions to add your camera.
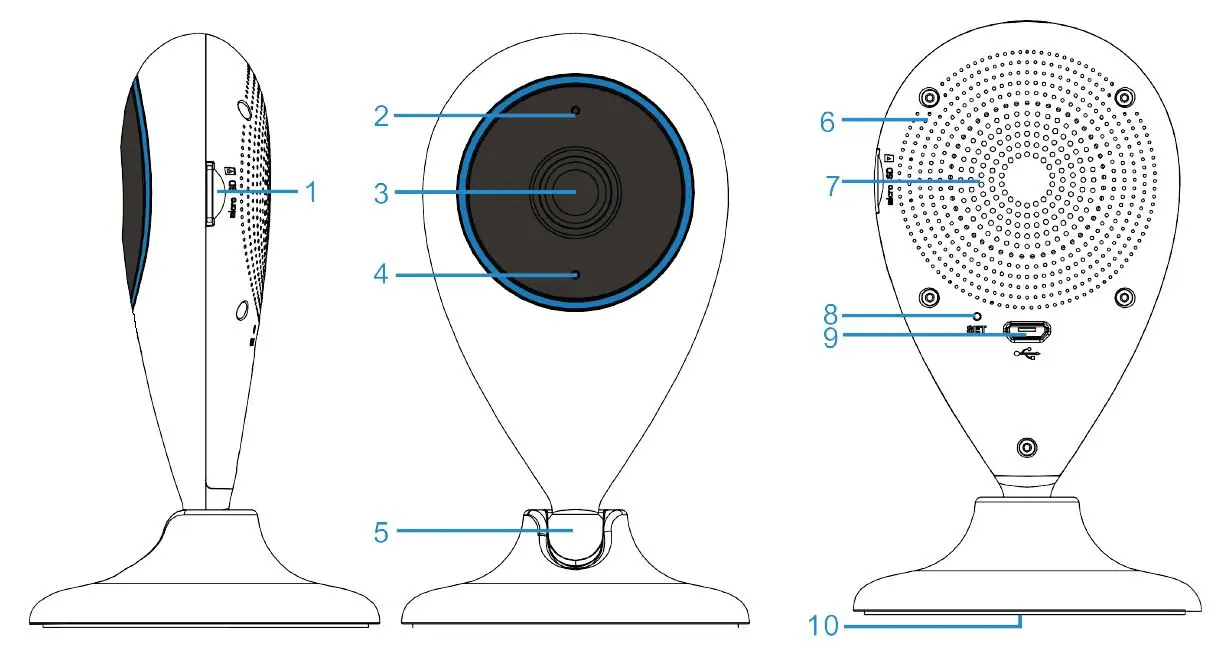
Camera Parts
The camera features include a Micro SD card slot, LED status indicator, lens, microphone, speaker, reset button, and a magnetic base for mounting.
Initial Setup
Before plugging in the device, insert the Micro SD card until you hear a click. Once powered, the red indicator light will turn on. If the light blinks blue, the camera needs to be reset. To reset, use the provided setup tool to press and hold the reset button on the back until the LED turns red and the system reboots.
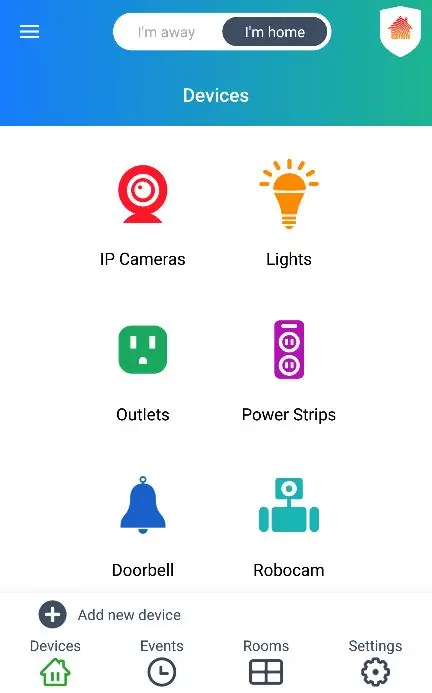
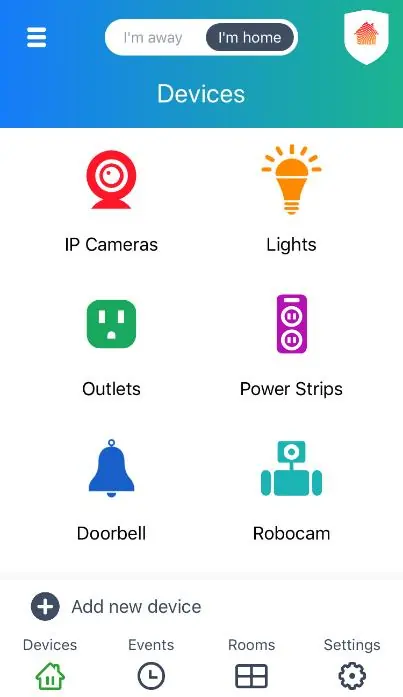
App Configuration
The Vivitar Smart Home Security app is required for operation. After installing, register a new account or sign in. To add the camera, tap 'Add New Device' in the app, select 'IP Cameras', and follow the prompts to configure your Wi-Fi network. The camera will emit a voice prompt once successfully connected.
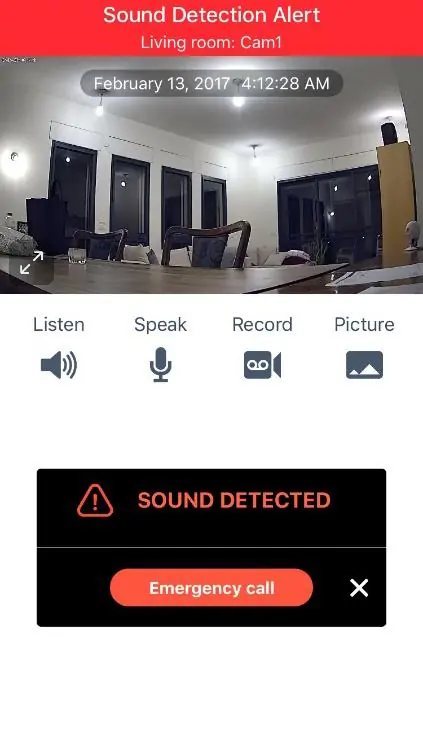
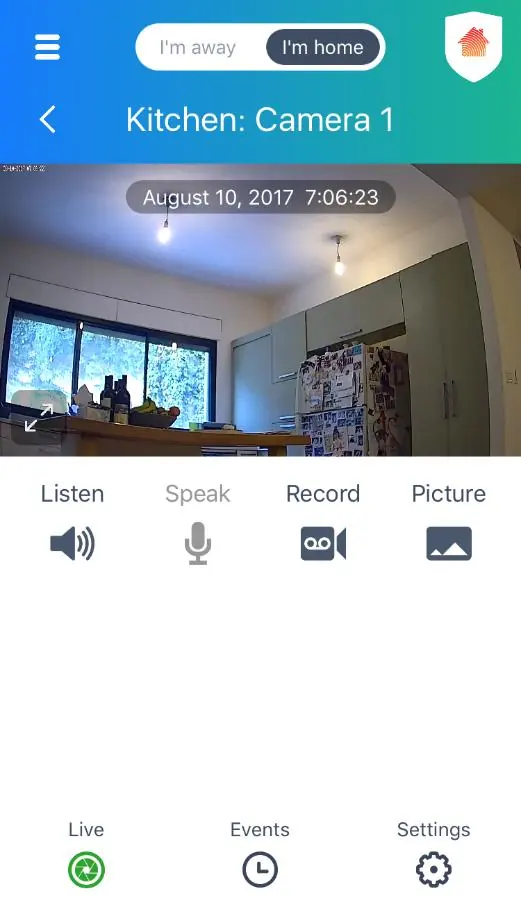
Using the Camera
The app provides a Live IP Camera view where you can listen, speak (two-way intercom), record video, and take pictures. You can toggle between 'Home' and 'Away' modes to adjust security settings. Motion and sound detection can be configured to trigger automatic recordings and alerts.
Troubleshooting
If you cannot connect to the camera, ensure you are using a 2.4GHz Wi-Fi network. If the camera is offline, try resetting it using the 'Long Reset' procedure: plug in the camera, wait 5 seconds, then press and hold the reset button for approximately 30 seconds until you hear 'Please use mobile phone for Wi-Fi configuration'.
Technical Specifications
- Image Sensor: 1.3MP
- Video Resolution: 720p
- Lens: Fixed Focus, f=2.8mm, F2.5
- External Memory: Micro SD Card up to 32GB (Class 4 or higher)
- Connectivity: Wireless Wi-Fi (2.4GHz)
Practical help
Common problems
Camera indicator is blinking blue
The camera needs to be reset. Use the setup tool to press the reset button on the back.
Cannot reconnect to camera after changing Wi-Fi
Perform a 'Long Reset' by holding the reset button for 30 seconds, then re-add the device in the app.
Password error during setup
Ensure you have entered the correct Wi-Fi password in the 'Configure Network' screen. Use the 'Show password' option to verify.
Device is offline
Check if the camera is powered on. If it remains offline, remove the device from the app and add it again.
Before use
- Micro SD card (Class 4 or higher, up to 32GB)
- 2.4GHz Wi-Fi network connection
- Vivitar Smart Home Security app installed
- User account created and logged in
Specs in practice
- 2.4GHz Wi-Fi
- Required frequency for camera connectivity; 5GHz networks are not supported.
Images and diagrams
- The camera features a Micro SD slot on the side and a reset button on the back.
- The app interface allows switching between Home and Away modes using the top toggle.
- Emergency alerts allow calling pre-configured contacts directly from the notification.
Model compatibility
- Requires Android 4.4 or higher.
- Requires iOS 9.0 or higher.
- Only supports 2.4GHz Wi-Fi networks.

Manual page author
Emily Carter
User documentation editor
Prepares concise manual descriptions and highlights the most useful setup, operation, and maintenance information for readers.