Electronics / Security Cameras
Urmet 1099/212B WiFi 1080P IP Camera User Manual
Quick guide and setup manual for the Urmet 1099/212B WiFi 1080P IP Camera. Learn how to install, configure network settings, use the web interface, and set up 4G/WiFi router features.
Table of contents
Manual images
Click an image to enlargeQuick Start Guide
The Urmet 1099/212B is a wireless/LTE IP camera. Before starting, ensure you have the necessary accessories. The default IP address of the camera is 192.168.100.101. The default username and password are admin (lowercase). To avoid IP conflicts, configure one camera at a time on your network.
Installation
Follow these steps for correct installation:
- Attach the two antennas (black for LTE, white for Wi-Fi) to the camera connectors.
- Insert a nano-SIM card (not included) into the slot while the device is powered off. Disable the SIM PIN on a mobile phone before insertion.
- Insert a micro-SD card (not included) into the slot if recording is required.
- Place the camera in a location with good 4G signal reception and power it on.
- Connect your PC or mobile device to the camera's Wi-Fi network (SSID: MIFI_..., Password: 1234567890) or via cable to the network connector.
Web Interface Configuration
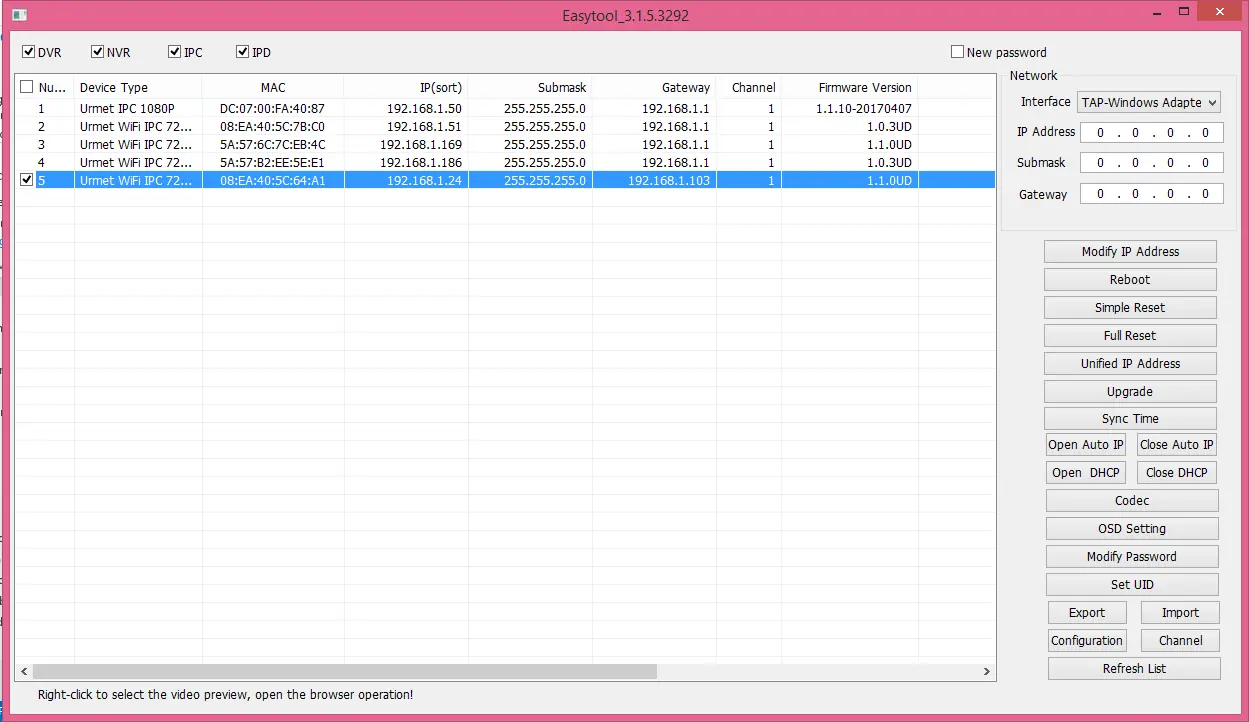
Use the EasyTool software (included on CD) to detect the camera's IP address on your LAN. Once detected, you can access the web interface via Internet Explorer. Note that full functionality, including live video controls, requires Internet Explorer with ActiveX controls enabled.
Remote Settings
The web interface allows detailed configuration of the camera:
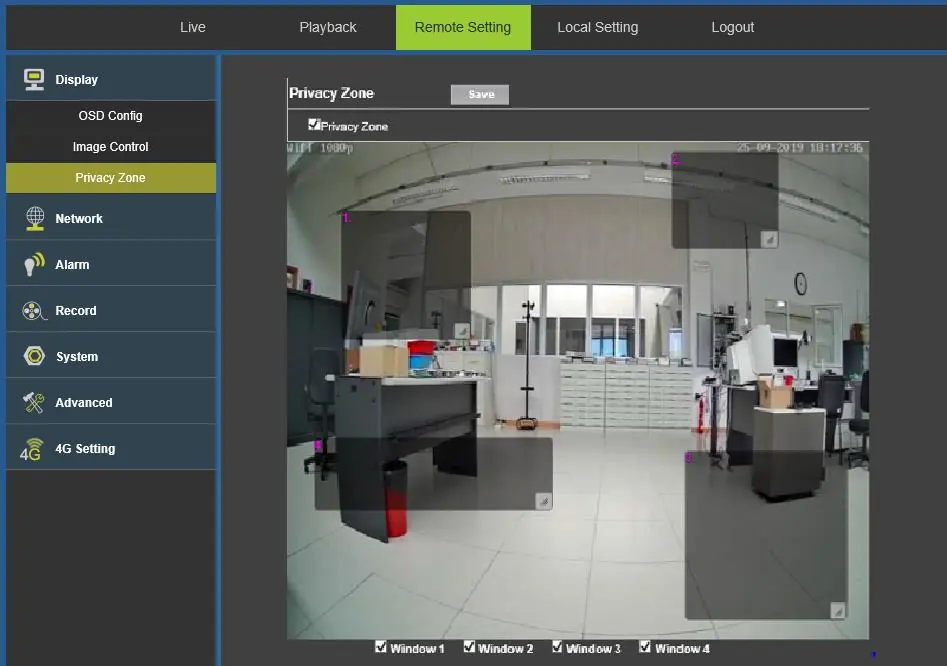
- Display: Configure OSD settings, image control (brightness, contrast, WDR, etc.), and privacy zones.
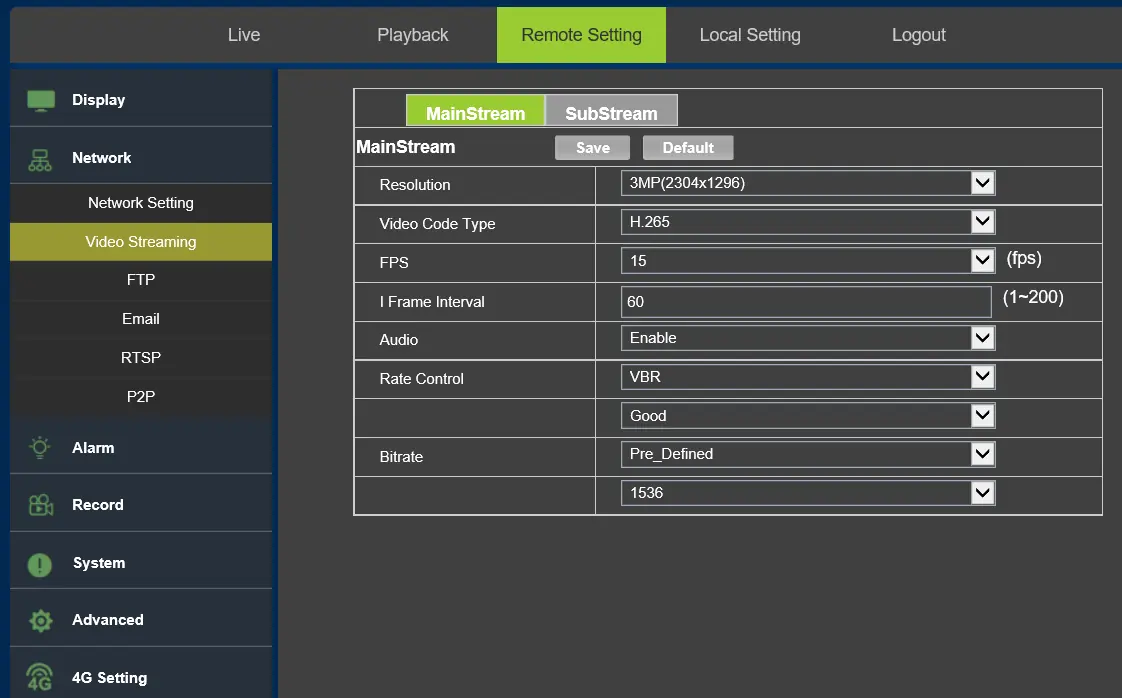
- Network: Set IP address (DHCP/Static), video streaming parameters, FTP, Email alerts, RTSP, and P2P settings.
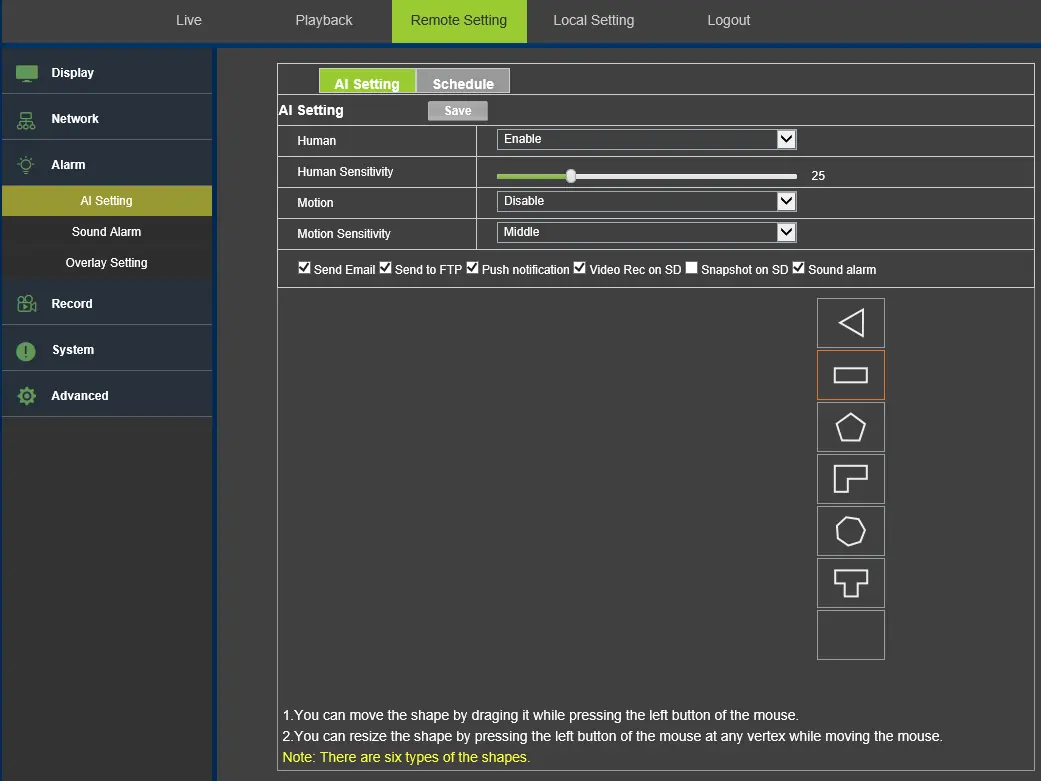
- Alarm: Configure AI settings for human/motion detection, scheduling, sound alarms, and overlay settings.
- Record: Set weekly recording schedules for the SD card.
- System: Manage date/time, user accounts, device info, and PTZ settings.
- Advanced: Adjust audio settings, firmware updates, factory resets, and maintenance (auto-reboot).
Viewing from App
Download the V-Stream app. After configuring the camera in 4G, connect your smartphone to the camera's Wi-Fi network. Use the app to scan for the camera, add it using the default password (admin), and start live viewing. You can also connect by scanning the QR code on the camera.
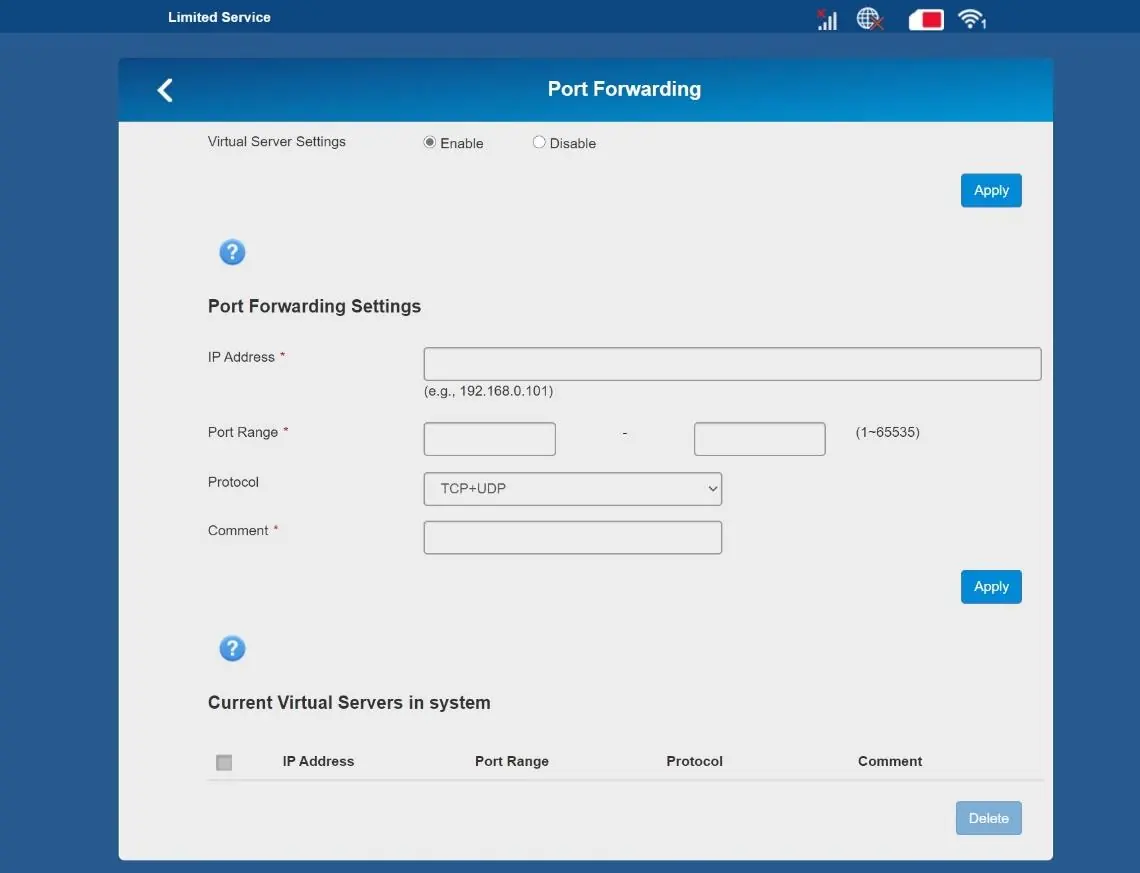
Router 4G/WiFi Settings
The camera features an integrated 4G/WiFi router. Access its management page by entering http://192.168.100.1/ in a browser. Use the default password admin to log in. This interface allows you to manage:

- Device Status: View LTE connection status and system info.
- Firewall: Configure port filtering, mapping, forwarding, URL filtering, UPnP, and DMZ.
- Network Settings: Manage WAN connection, APN profiles, and LTE band locks.
- Wi-Fi Settings: Configure SSID, security, and advanced transmission parameters.
Troubleshooting
If you encounter issues:
- IE Plug-in issues: Set IE protection to the minimum level.
- Cannot inspect camera via IE: Flush IE cache, check for network/IP conflicts, or verify the web port.
- Cannot see remote video: Ensure the device is searchable via PC software and parameters are set correctly.
Manufacturer information
Urmet S.p.A.
Practical help
Common problems
IE does not load or install the plug-ins
Set IE protection to the minimum level.
Cannot inspect the IP camera using IE after updating
Flush the IE cache (Delete temporary internet files) and reconnect.
Cannot inspect the IP camera using IE
Check network connection, ensure no IP address conflict, verify subnetwork/gateway settings, or check if the web port has changed.
Cannot see the remote device video on the PC
Verify the camera can be displayed in IE, is searchable via PC software, and that PC client parameters are correct.
Before use
- Check package contents for damage
- Insert nano-SIM card (if using 4G)
- Insert micro-SD card (if recording)
- Attach antennas
- Power on the device
- Connect PC/mobile to camera Wi-Fi or LAN
Specs in practice
- 192.168.100.101
- Default IP address of the camera
- 192.168.100.1
- Default IP address of the 4G/WiFi router
Images and diagrams
- Installation diagram showing SIM and SD card slots
- Web interface layout for network and alarm settings
- 4G router status dashboard
Model compatibility
- Supports iOS and Android via V-Stream app
- Supports ONVIF protocol
- Requires Internet Explorer for full ActiveX control functionality

Manual page author
David Miller
Documentation analyst
Organizes user manual content into clear summaries, with attention to model details, product context, and everyday usability.