Electronics / Security Cameras
User Manual for Vivitar IPC 113v2 Smart Security Wi-Fi Camera
Quick guide for the Vivitar IPC 113v2 Smart Security Wi-Fi Camera. Learn how to set up your camera, connect to the app, manage cloud subscriptions, and troubleshoot common issues.
Table of contents
Manual images
Click an image to enlargeQuick Start Guide
To get started with your Vivitar Smart Security Camera, follow these essential steps:
- Ensure you have a 2.4GHz Wi-Fi network available.
- Download the Vivitar Smart Home Security app from the Google Play Store or Apple App Store.
- Insert a Class 4 or higher Micro SD card (up to 32GB) into the camera slot before powering on.
- Connect the camera to power using the provided USB cable and AC charger.
- Wait for the camera to power on and follow the in-app instructions to register your account and connect the camera to your Wi-Fi network.
What's Included
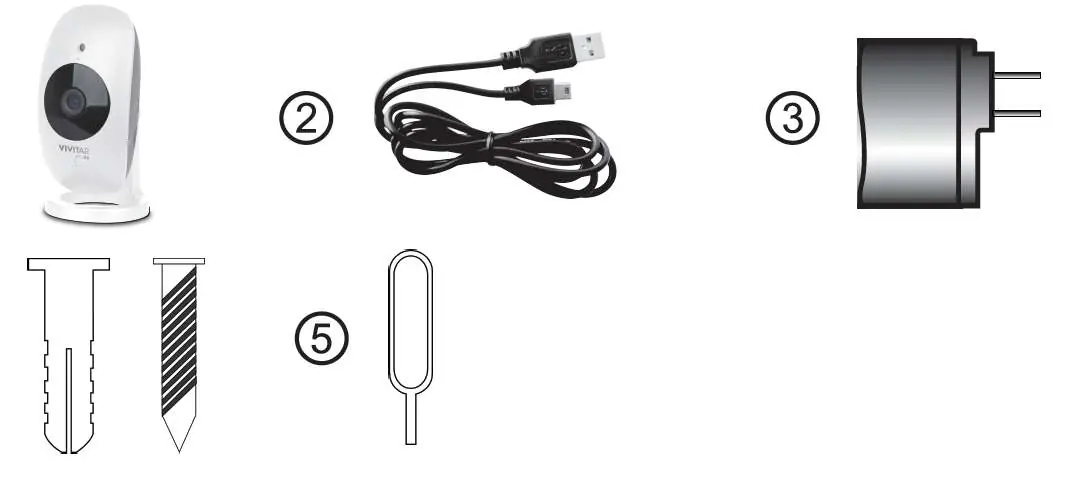
- IP Camera
- Micro USB cable
- AC Charger
- Screws
- Setup Tool
Parts of the Camera
The camera features the following components:

- Micro USB Port: For power connection.
- Micro SD Memory Card Slot: For local storage.
- Light Sensor & Microphone: For environmental sensing and audio.
- Lens: Fixed focus camera lens.
- LED Status Light: Indicates connection status (Red/Blue).
- Speaker: For two-way audio.
- Reset Button: Located on the back, used for factory resets.
Initial Setup
Before connecting, ensure your mobile device is connected to a 2.4GHz Wi-Fi network. Launch the Vivitar Smart Home Security app, create an account, and follow the on-screen prompts to add your device. The camera must be in pairing mode (blinking red LED) to connect.
Using the App
The app allows you to monitor your home, view live streams, and manage recordings. Key features include:

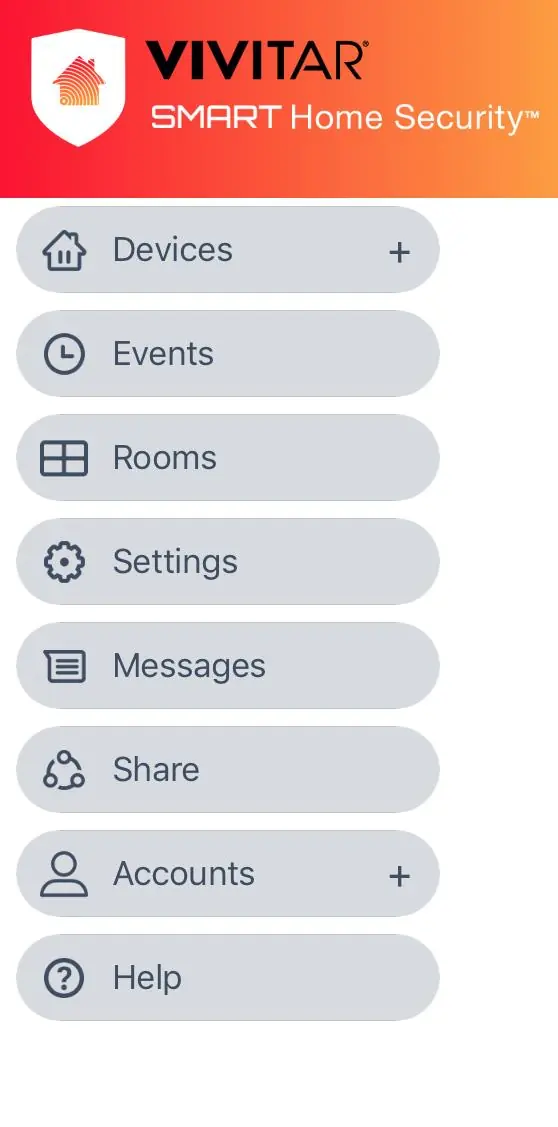
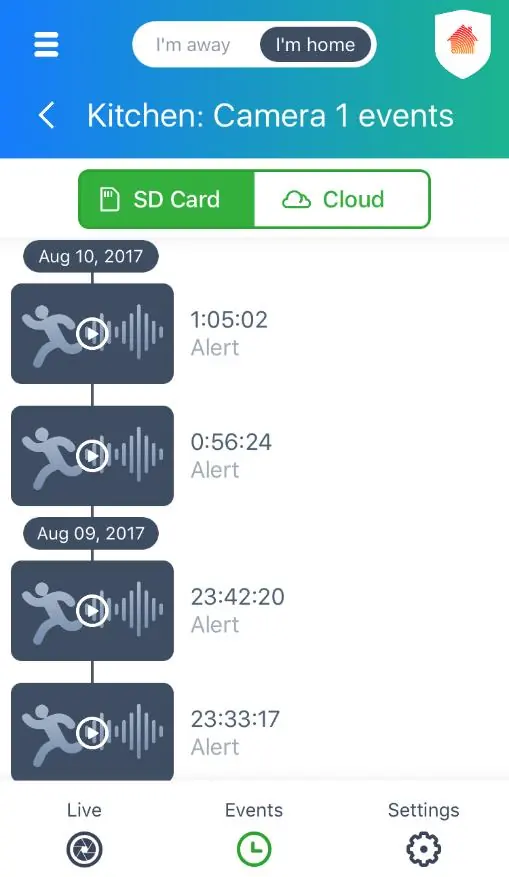
- Live View: Stream video in real-time.
- Events: View recorded motion or sound detection events (requires Cloud Subscription or SD card).
- Home & Away Modes: Automatically adjust security settings based on your presence.
- Two-Way Intercom: Use the Listen and Speak buttons to communicate through the camera.
- Sharing: Share camera access with other users via the app.
Advanced Settings
Access advanced settings to configure:
- Frequency: Adjust between 50Hz and 60Hz.
- Flip & Mirror: Adjust video orientation if the camera is mounted upside down.
- Video Quality: Select resolution up to 1080p.
- SD Card Management: Format the card or schedule recordings.
Troubleshooting
If you encounter issues:
- Camera Offline: Check power and Wi-Fi connection. Try restarting the app or the camera.
- Connection Failed: Ensure you are using a 2.4GHz network and the correct password.
- Resetting: If the camera fails to connect, use the setup tool to press and hold the Reset button on the back until the LED changes color or the camera emits a reset success sound.
Technical Specifications
- Image Sensor: 2.0MP
- Video Resolution: 1080P
- External Memory: Micro SD Card (up to 32GB) - Class 4 or higher
- Lens: Fixed Focus, f=2.4mm
- Interface: Micro USB
Practical help
Common problems
Camera is offline
Verify power connection and Wi-Fi stability. If it persists, perform a reset and re-add the device.
Cannot connect to Wi-Fi
Ensure your phone is connected to a 2.4GHz network. The camera does not support 5GHz networks.
SD card not recognized
Ensure the card is inserted before powering on the camera and launching the app.
Cannot hear sound from camera
Ensure the 'Listen' option is enabled in the app and your phone is not on silent mode.
Before use
- Ensure 2.4GHz Wi-Fi network is available
- Download Vivitar Smart Home Security app
- Insert Class 4+ Micro SD card (up to 32GB)
- Power on camera and wait for red LED
- Have Wi-Fi password ready
Specs in practice
- Video Resolution
- 1080P high-definition streaming
- External Memory
- Supports Micro SD cards up to 32GB for local storage
Images and diagrams
- Parts of the camera showing ports and buttons
- App interface navigation
- Reset button location
Model compatibility
- Requires 2.4GHz Wi-Fi network
- Android 4.4+ or iOS 9.0+ required for the app

Manual page author
Emily Carter
User documentation editor
Prepares concise manual descriptions and highlights the most useful setup, operation, and maintenance information for readers.