Furniture / Storage Cabinets
Assembly Instructions for Wayfair 2-Door Shoe Storage Cabinet
A comprehensive, step-by-step visual assembly guide for the Wayfair 2-Door Shoe Storage Cabinet. This manual details the parts list and the 12-step assembly process required to build the unit.
Quick answers from the manual
Quick answer
- This document provides visual assembly instructions for the 2-Door Shoe Storage Cabinet, detailing the connection of base, side, and door panels. p. 1, 7
Key actions
- Assemble the main frame by connecting panels C and D, then attaching base B. p. 2, 3
- Install internal dividers E and top panel J. p. 3, 4
- Attach doors A with handles. p. 6
Where to find it in the PDF
- Parts List p. 1
- Assembly Steps p. 2, 7
Table of contents
Manual images
Click an image to enlargeQuick guide from the manual
This document provides visual assembly instructions for the Wayfair 2-Door Shoe Storage Cabinet. The assembly process is entirely visual, relying on interlocking components. Ensure you have a clear, flat workspace before beginning. Identify all parts listed in the parts list before starting to ensure no components are missing.
Parts List
Before beginning assembly, verify that you have all the following components:
- A (x2): Door panels
- B (x2): Base/Top frame components
- C (x1): Large side/back panel
- D (x1): Large side/back panel
- E (x2): Internal divider panels
- F (x2): Back panels
- J (x1): Top panel
- Hardware: 4x pins, 2x caps, 2x handles, 4x M4x19mm screws
Assembly Instructions
Follow these steps in order to assemble the cabinet:
- Frame Connection: Connect panels C and D by snapping them together.
- Base Assembly: Attach base component B to the bottom of the C/D frame.
- Top Frame: Attach the second B component to the top of the frame.
- Internal Dividers: Insert the internal divider panels E into the designated slots on the base.
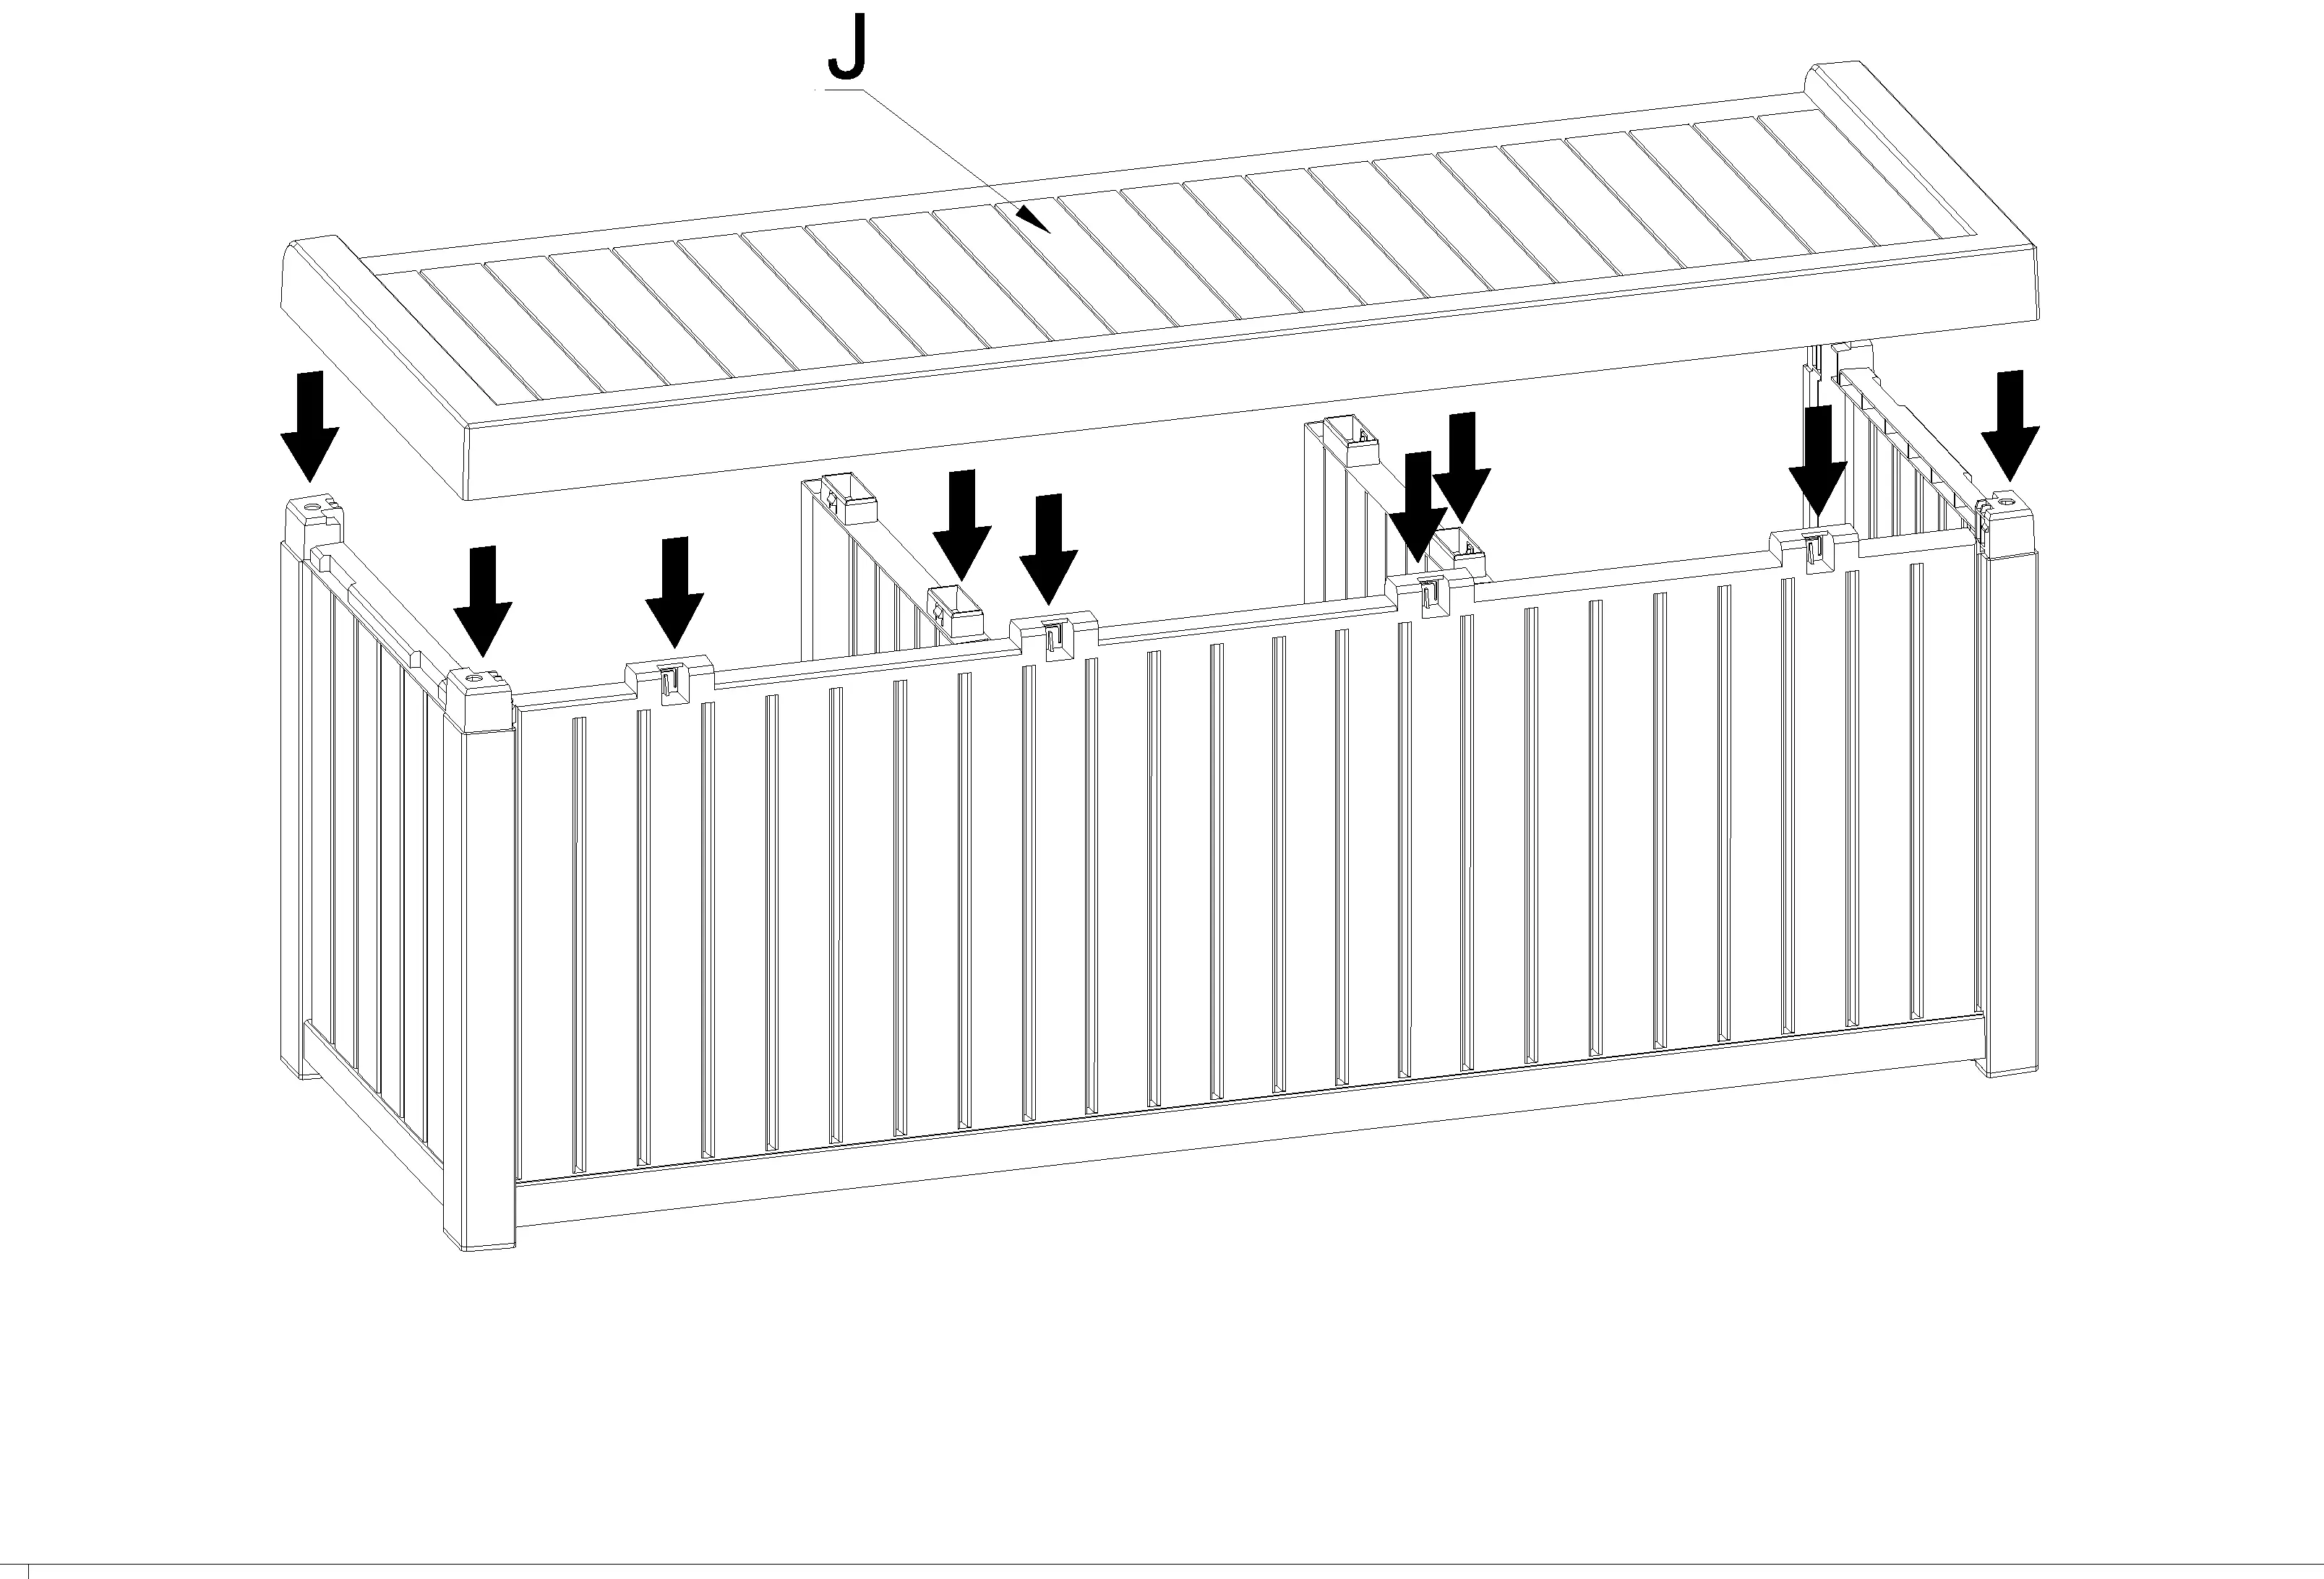
- Top Panel: Place the top panel J onto the assembled frame.
- Back Panels: Slide the back panels F into position.
- Securing: Secure the internal dividers E using the provided pins and caps.
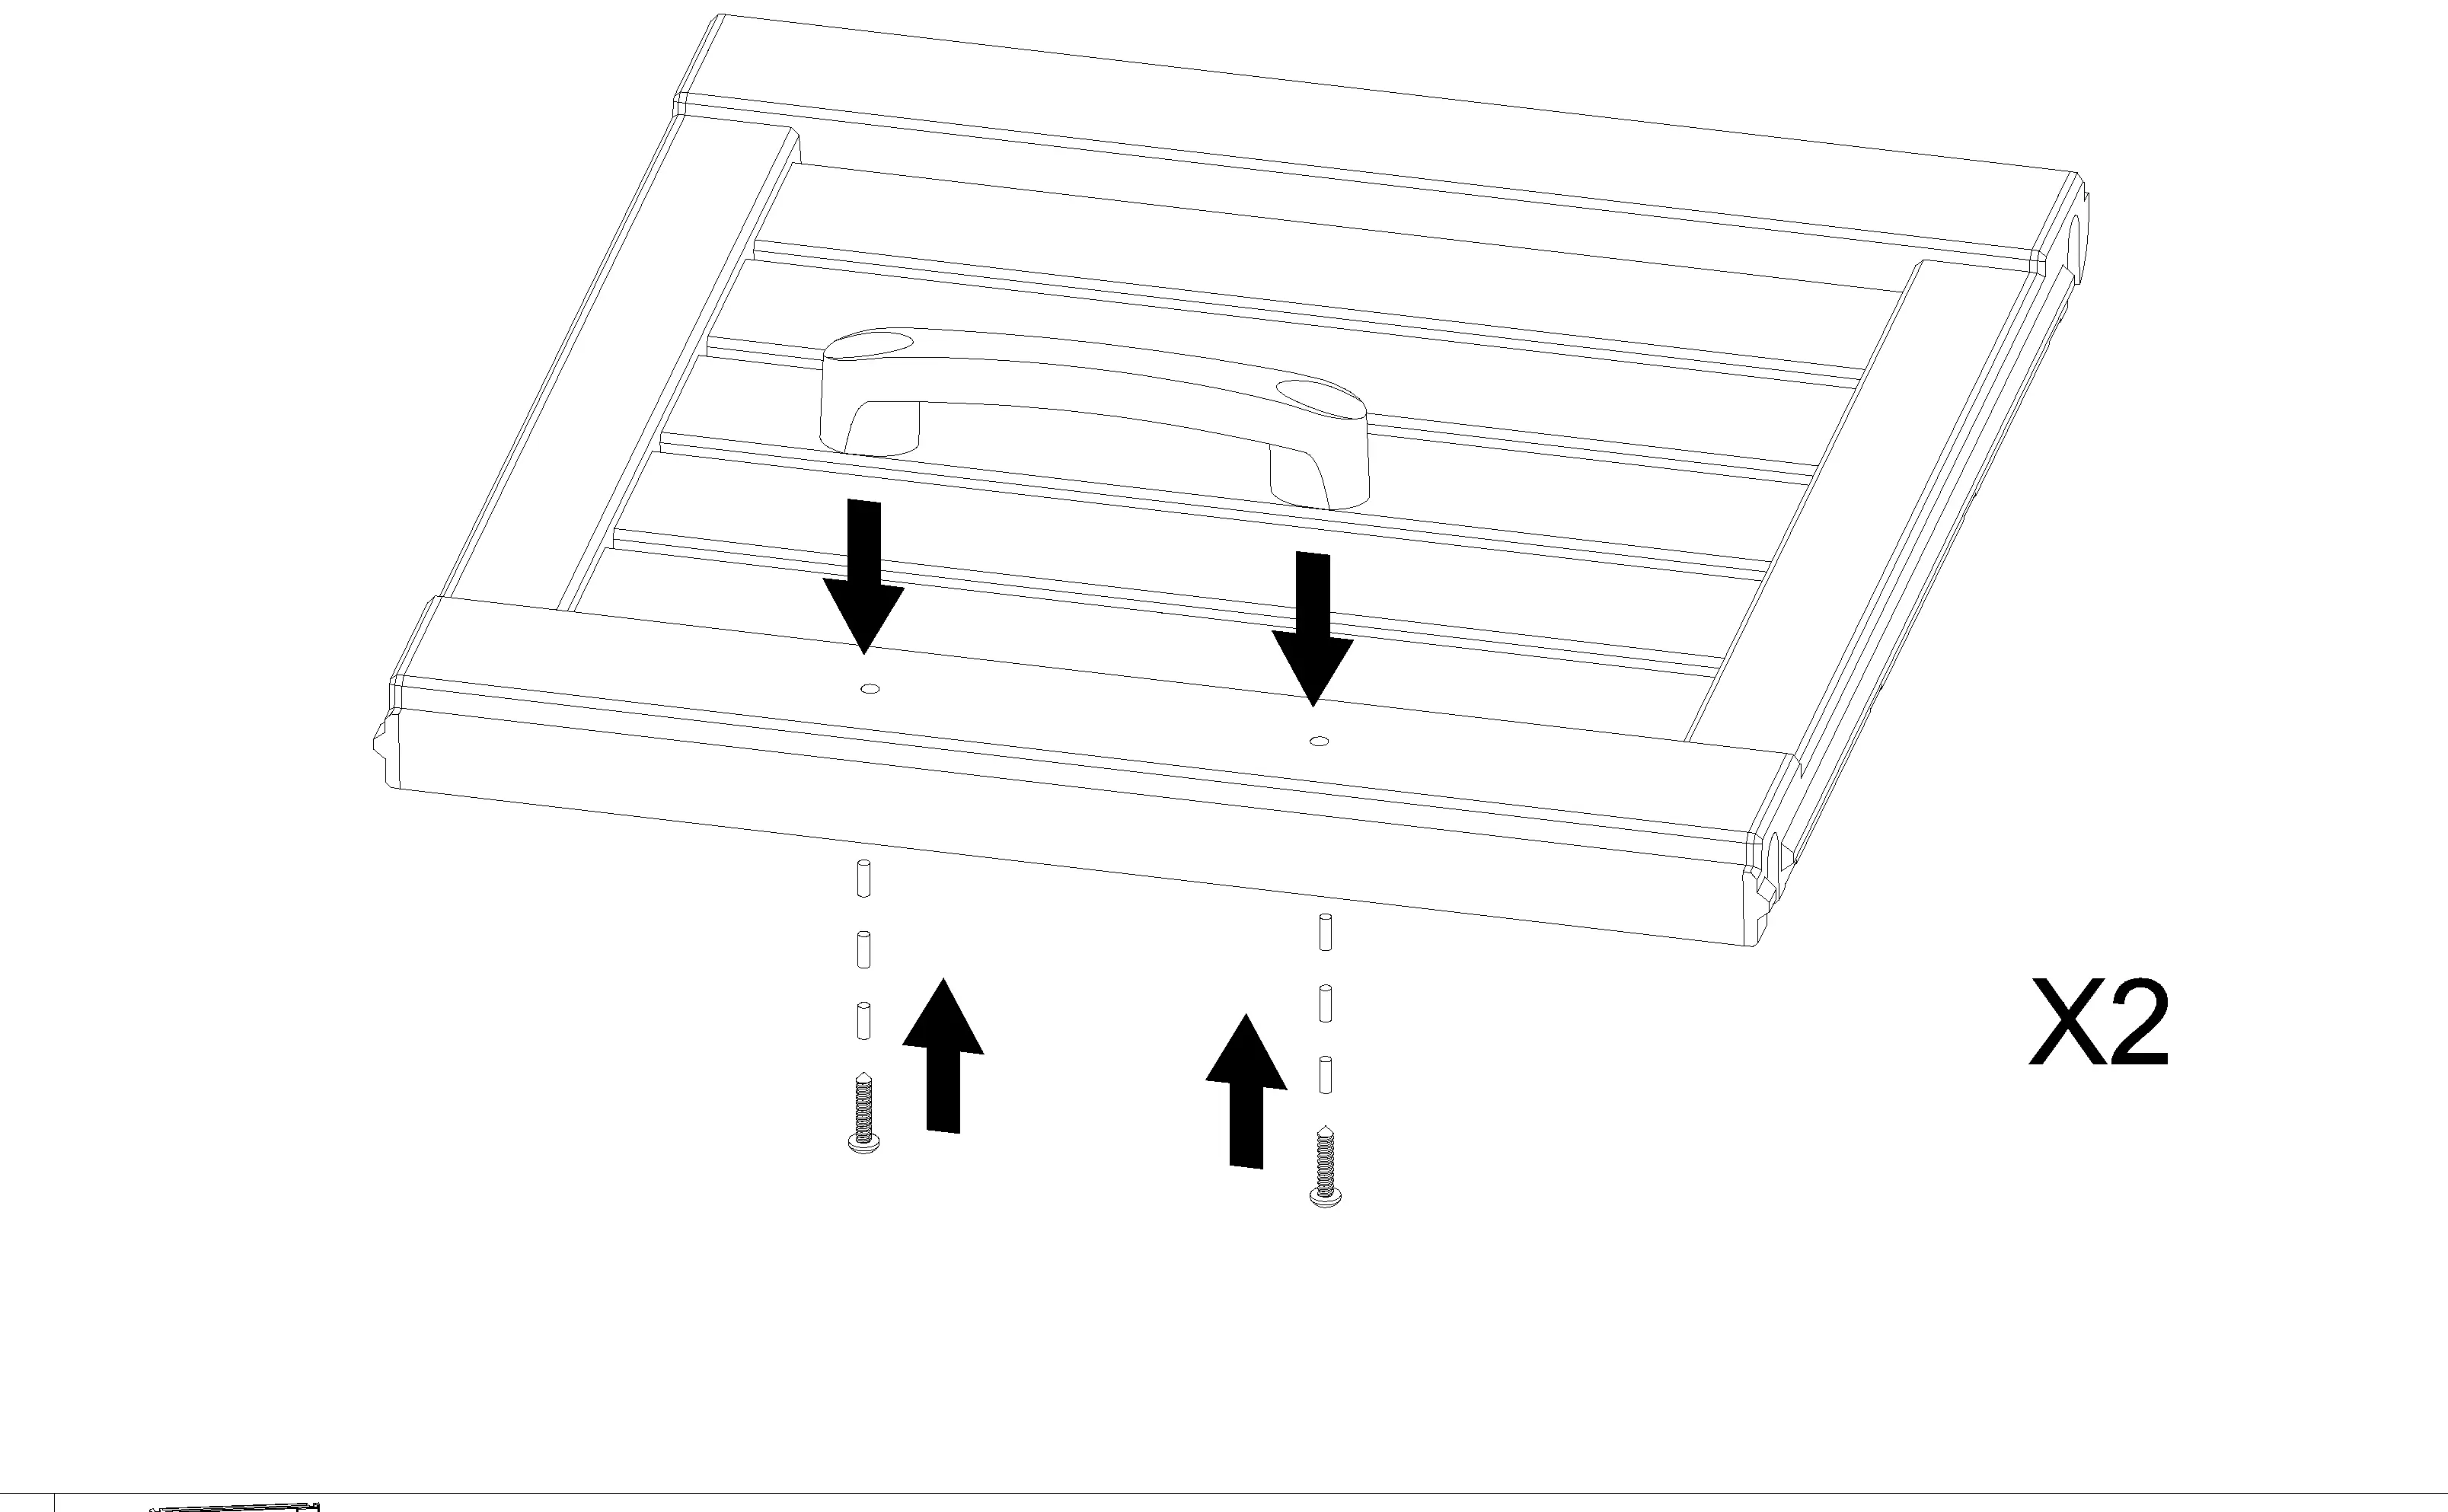
- Handles: Attach the handles to the door panels A using the M4x19mm screws.
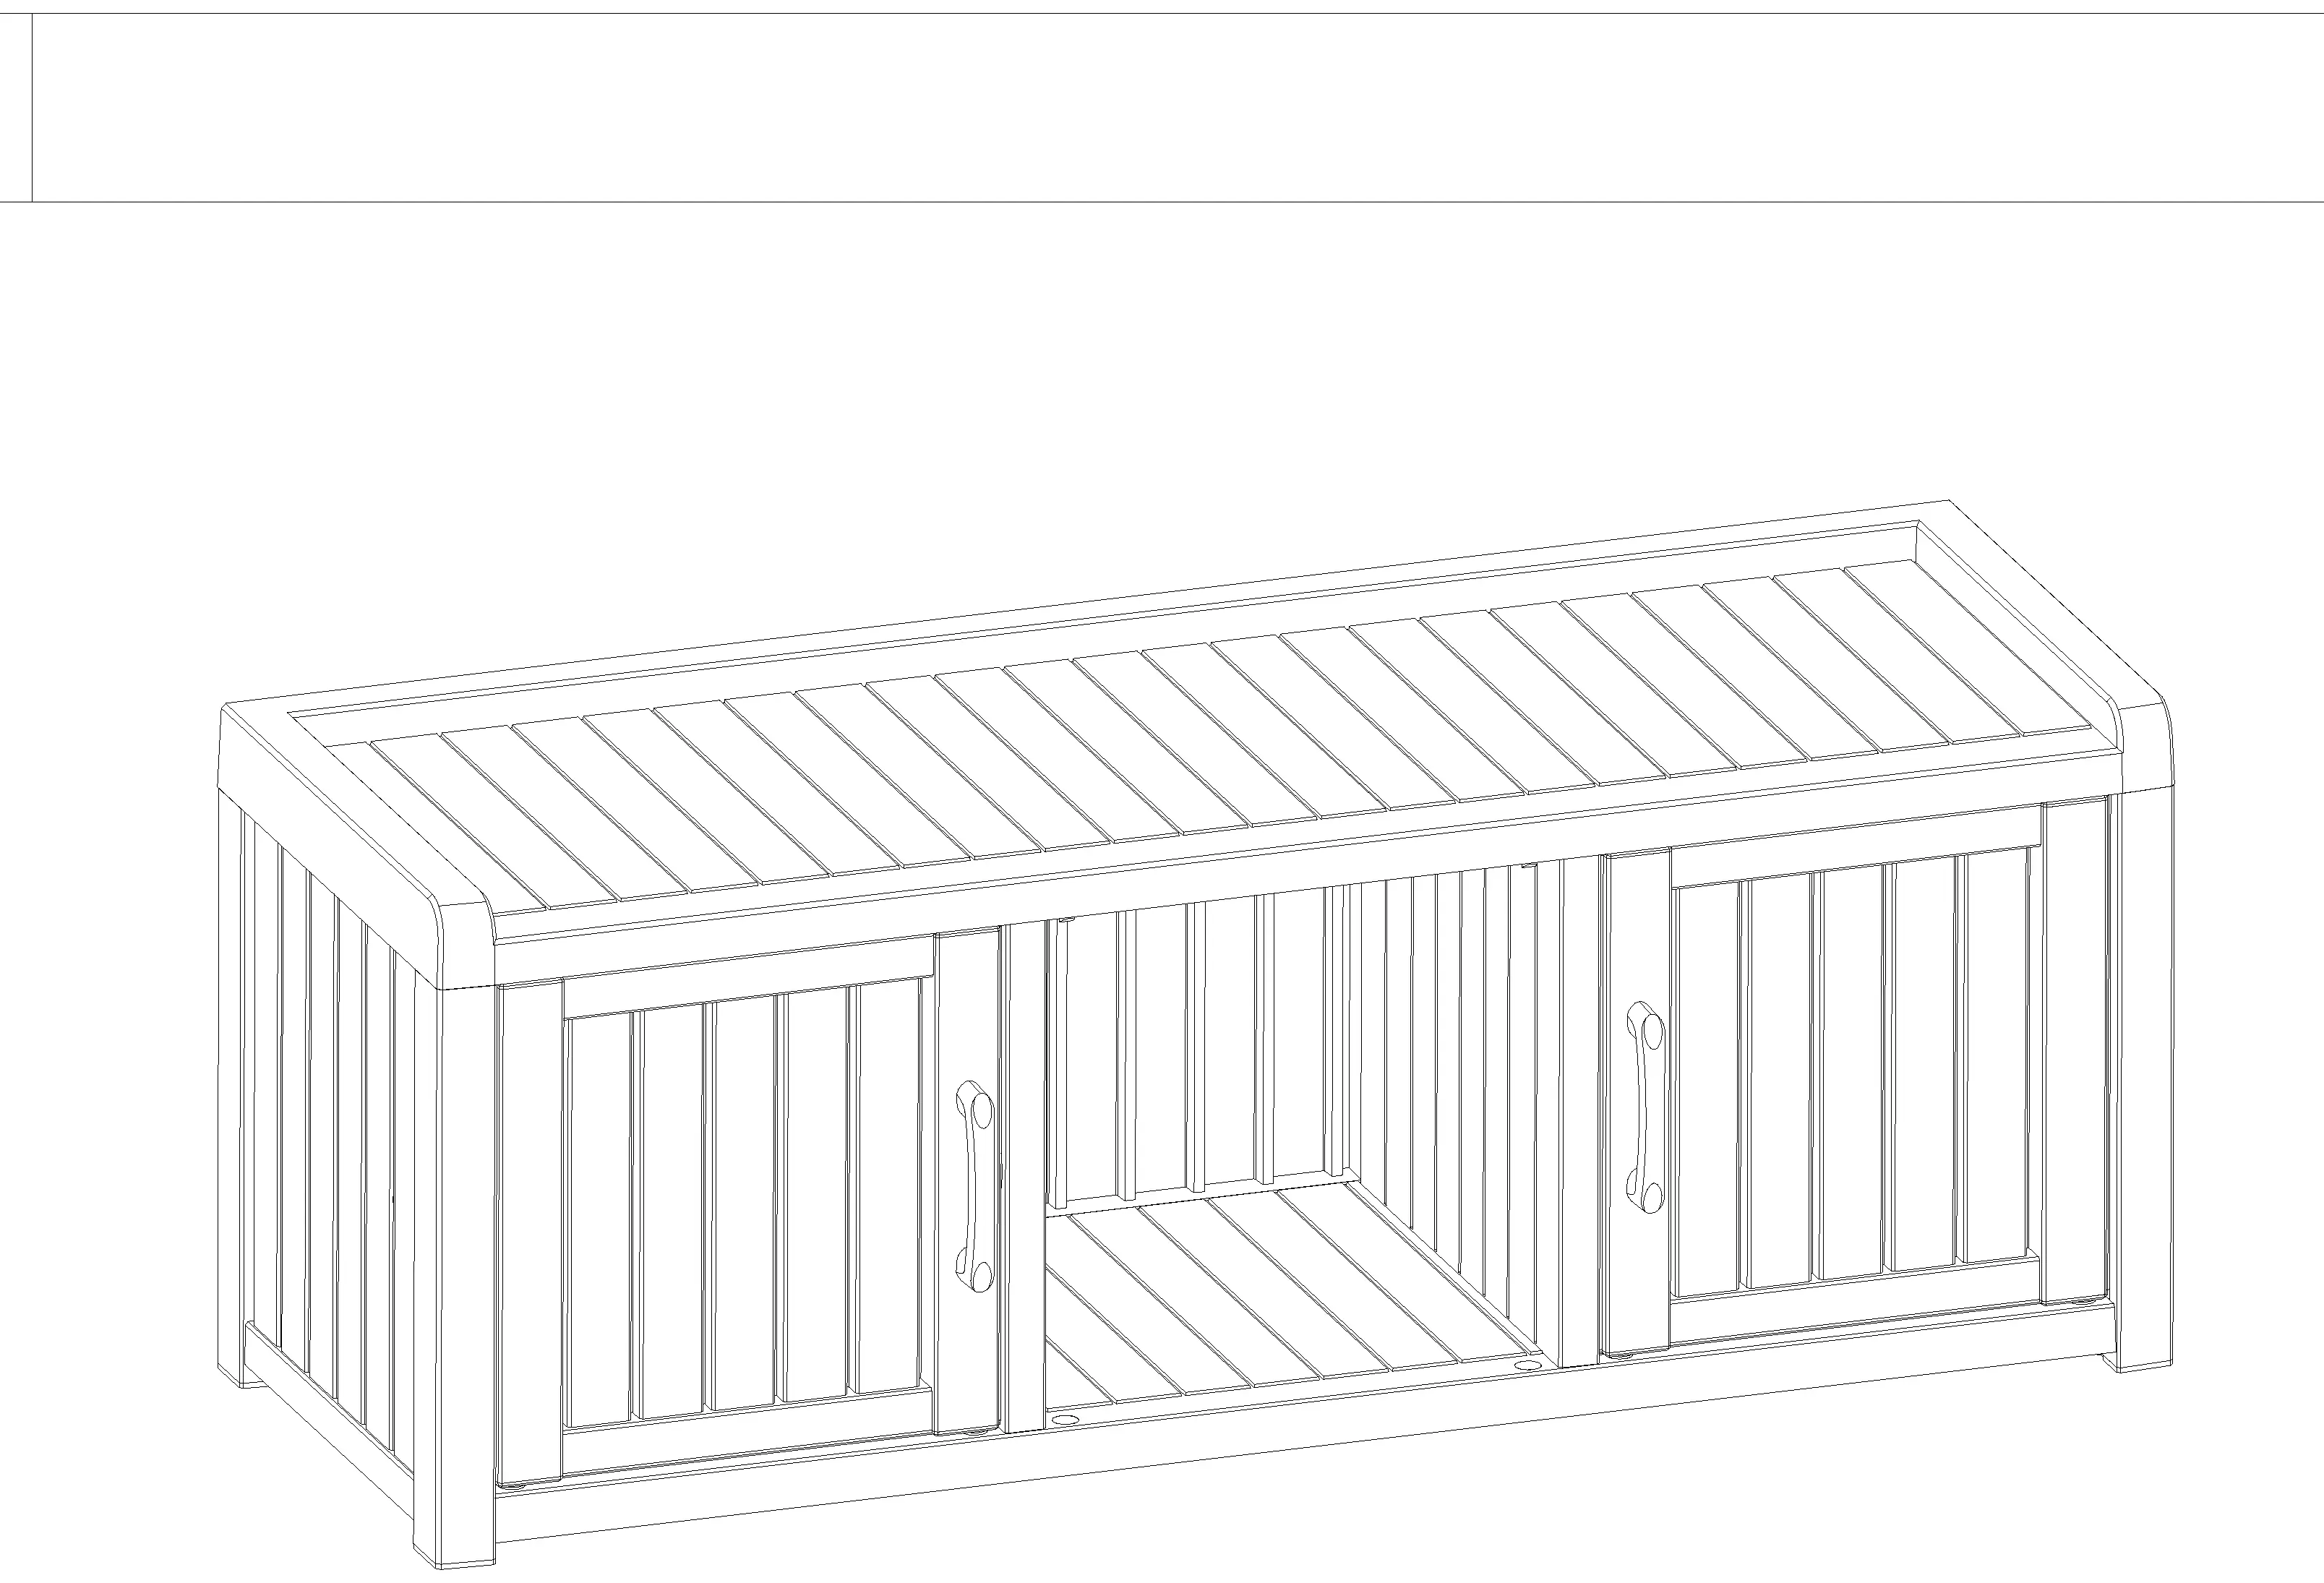
- Door Installation: Attach the assembled doors A to the main frame.
- Final Check: Ensure all panels are clicked securely into place and the doors open and close smoothly.
Manufacturer information
Wayfair LLC
Practical help
Common problems
Panels not clicking into place
Ensure the panels are aligned correctly with the slots. Apply firm, even pressure until you hear a 'click'.
Missing hardware
Check the parts list on page 1. If hardware is missing, contact Wayfair customer support.
Before use
- Clear a large, flat area for assembly.
- Identify all parts (A, B, C, D, E, F, J) against the parts list.
- Ensure you have a screwdriver for the M4x19mm screws.
- Do not overtighten screws to avoid damaging the plastic material.
Images and diagrams
- The manual uses a 'CLICK' indicator to show where panels should snap together.
- Arrows indicate the direction of insertion for panels and screws.

Manual page author
Emily Carter
User documentation editor
Prepares concise manual descriptions and highlights the most useful setup, operation, and maintenance information for readers.