Home Appliances / Commercial Kitchen Equipment
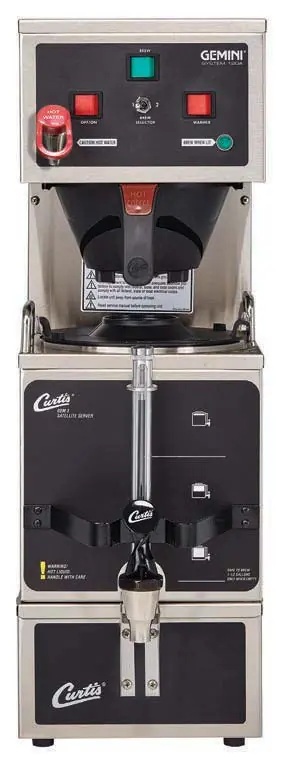
User Manual for Wilbur Curtis Gemini 120A Series Coffee Brewing System
Quick guide for the Wilbur Curtis Gemini 120A Series coffee brewer. Includes installation steps, brewing instructions, daily/weekly cleaning procedures, and troubleshooting tips.
Table of contents
Manual images
Click an image to enlargeQuick Guide from the Manual
The Wilbur Curtis Gemini 120A Series is a commercial coffee brewing system designed for high-volume use. This guide covers the essential setup, operation, and maintenance procedures. Always ensure the brewer is installed by a qualified technician and that all electrical and plumbing connections comply with local codes.
Installation
Proper installation is critical for safe operation.
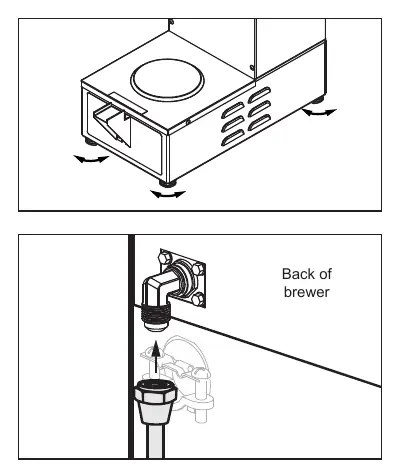
- Leveling: Place the brewer on a secure surface. Level it from left to right and front to back by adjusting the bottom of the legs. Do not use the legs to adjust the height beyond what is necessary.
- Water Supply: Flush the water supply line before installation to remove debris. Connect the water line to the flare fitting on the back of the brewer. Use a shut-off valve. Do not connect to a saddle or needle valve.
- Electrical: Ensure the circuit breaker is off before wiring. For dual voltage units, follow the specific wiring instructions in the manual to configure for 220V operation if required.
- First Power Up: Turn on the water supply and the rear toggle switch. Once the tank is full, turn off the power, adjust the thermostat if necessary (for high elevations), and then power up to heat the water. Purge air from the system by dispensing hot water through the faucet and running a brew cycle.
Operating Instructions
To brew coffee:
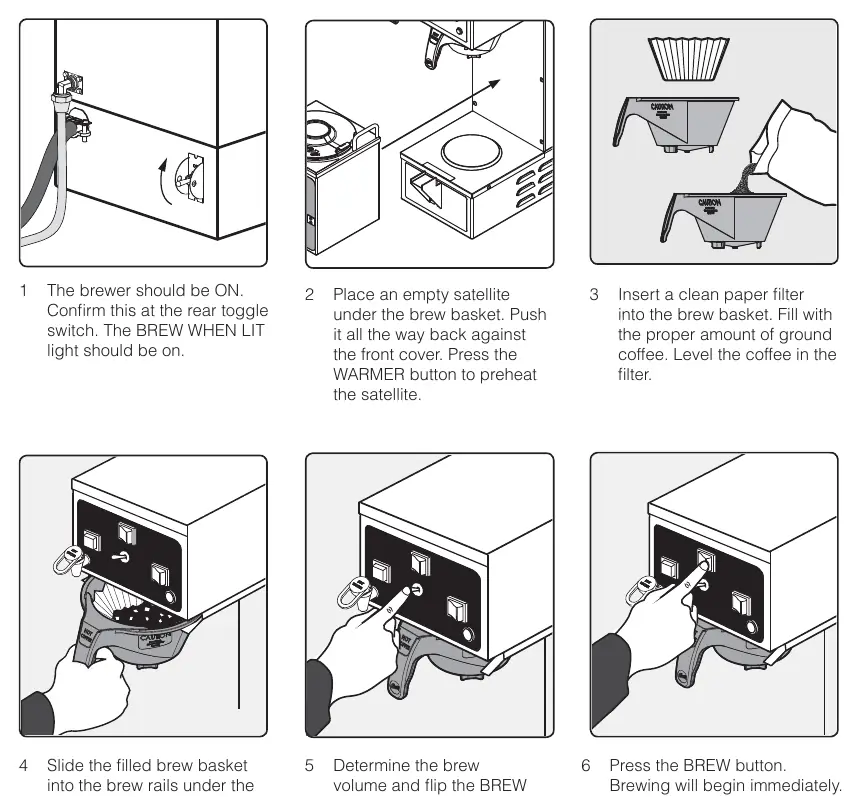
- Ensure the brewer is ON and the BREW WHEN LIT light is illuminated.
- Place an empty satellite server under the brew basket and press the WARMER button to preheat.
- Insert a clean paper filter and add the desired amount of ground coffee.
- Slide the brew basket into the rails until it stops.
- Select the brew volume using the BREW SELECTOR switch (Position 1 = 1/2 gallon, Position 2 = 1 gallon).
- Press the BREW button to start the cycle.
Cleaning and Maintenance
Regular cleaning is essential for coffee quality and equipment longevity.
- Daily Brewer Cleaning: Turn the brewer OFF. Wipe exterior surfaces with a damp cloth. Remove and clean brew baskets in mild detergent. Wipe the spray head area.
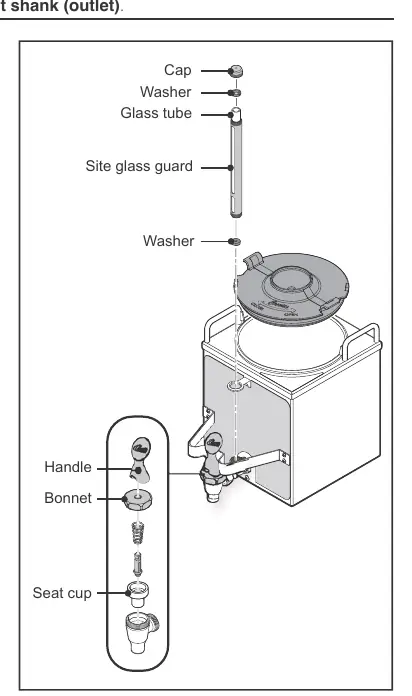
- Daily Satellite Cleaning: Remove the satellite and lid. Wash the liner with detergent and warm water. Sanitize using TABZ Z95 tablets or One-Pro cleaner. Disassemble the faucet and sight gauge to clean parts thoroughly. Air dry all components.
- Weekly Brewer Cleaning: Remove and clean spray heads. Clean the dome plate area and brew basket rails with a mild detergent solution.
Troubleshooting
- Brewer Does Not Start: Check if the tank is full. If the brew light is on but nothing happens, check the dump valve and brew switch wiring.
- Water Not Hot Enough: Verify the thermostat setting. If the setting is correct, the heating element may need replacement.
- Water Tank Does Not Fill: Check the water supply, inlet valve, and liquid level control board.
- Dispenser Overflows: Ensure the dispenser is empty before starting a brew cycle. Check the dump valve for debris.
Practical help
Common problems
Brewer does not start when button is pressed
Check water tank level. If low, the tank may not be filling. If tank is full, check the brew switch and dump valve wiring.
Water not hot enough
Check the thermostat setting. If the setting is correct, test the heating element for high resistance.
Water tank does not fill
Verify water supply is on. Check for plugged water lines, faulty inlet valve, or issues with the liquid level control board.
Dispenser overflows
Ensure the dispenser is empty before brewing. Check if the dump valve is stuck open.
Before use
- Ensure a secure surface capable of supporting the weight of the appliance.
- Flush the water supply line before connecting to the brewer.
- Verify the electrical circuit matches the specifications on the serial plate.
- Ensure the brewer is properly leveled using the adjustable legs.
- Purge air from the tubing by dispensing hot water before the first brew cycle.
Specs in practice
- Water Pressure
- Requires 20-90 psi (138-620 kPa) for proper operation.
- Brew Temperature
- Factory set to 200°F (93°C). Adjust for high elevations.
Images and diagrams
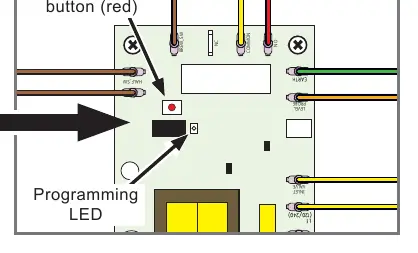
- Exploded view diagrams are provided for the main chassis and tank assemblies to assist with parts identification.
- Electrical schematics are included for different models and voltage configurations.
Model compatibility
- Models GEM-120A-10, 30, and 63 have different voltage and wiring requirements.
- Do not use IntelliFresh satellites on non-IntelliFresh brewers.

Manual page author
Michael Turner
Technical manual editor
Reviews PDF manuals for structure, safety notes, and practical product details so readers can find the right information quickly.