Furniture / Beds & Mattresses
Zinus Metal Bed Frame FSSSB6ZC-14-1 Assembly Instructions
Quick assembly guide for the Zinus metal bed frame model FSSSB6ZC-14-1. Includes step-by-step installation instructions, parts list, and support contact information.
Table of contents
Manual images
Click an image to enlargeQuick guide from the manual
The Zinus metal bed frame is designed for team assembly. Before beginning, ensure you have a clear space and all parts listed in the manual. It is recommended to have at least two people to assist with the assembly process to ensure safety and ease of construction.
Assembly instructions
Follow these steps to assemble your bed frame:
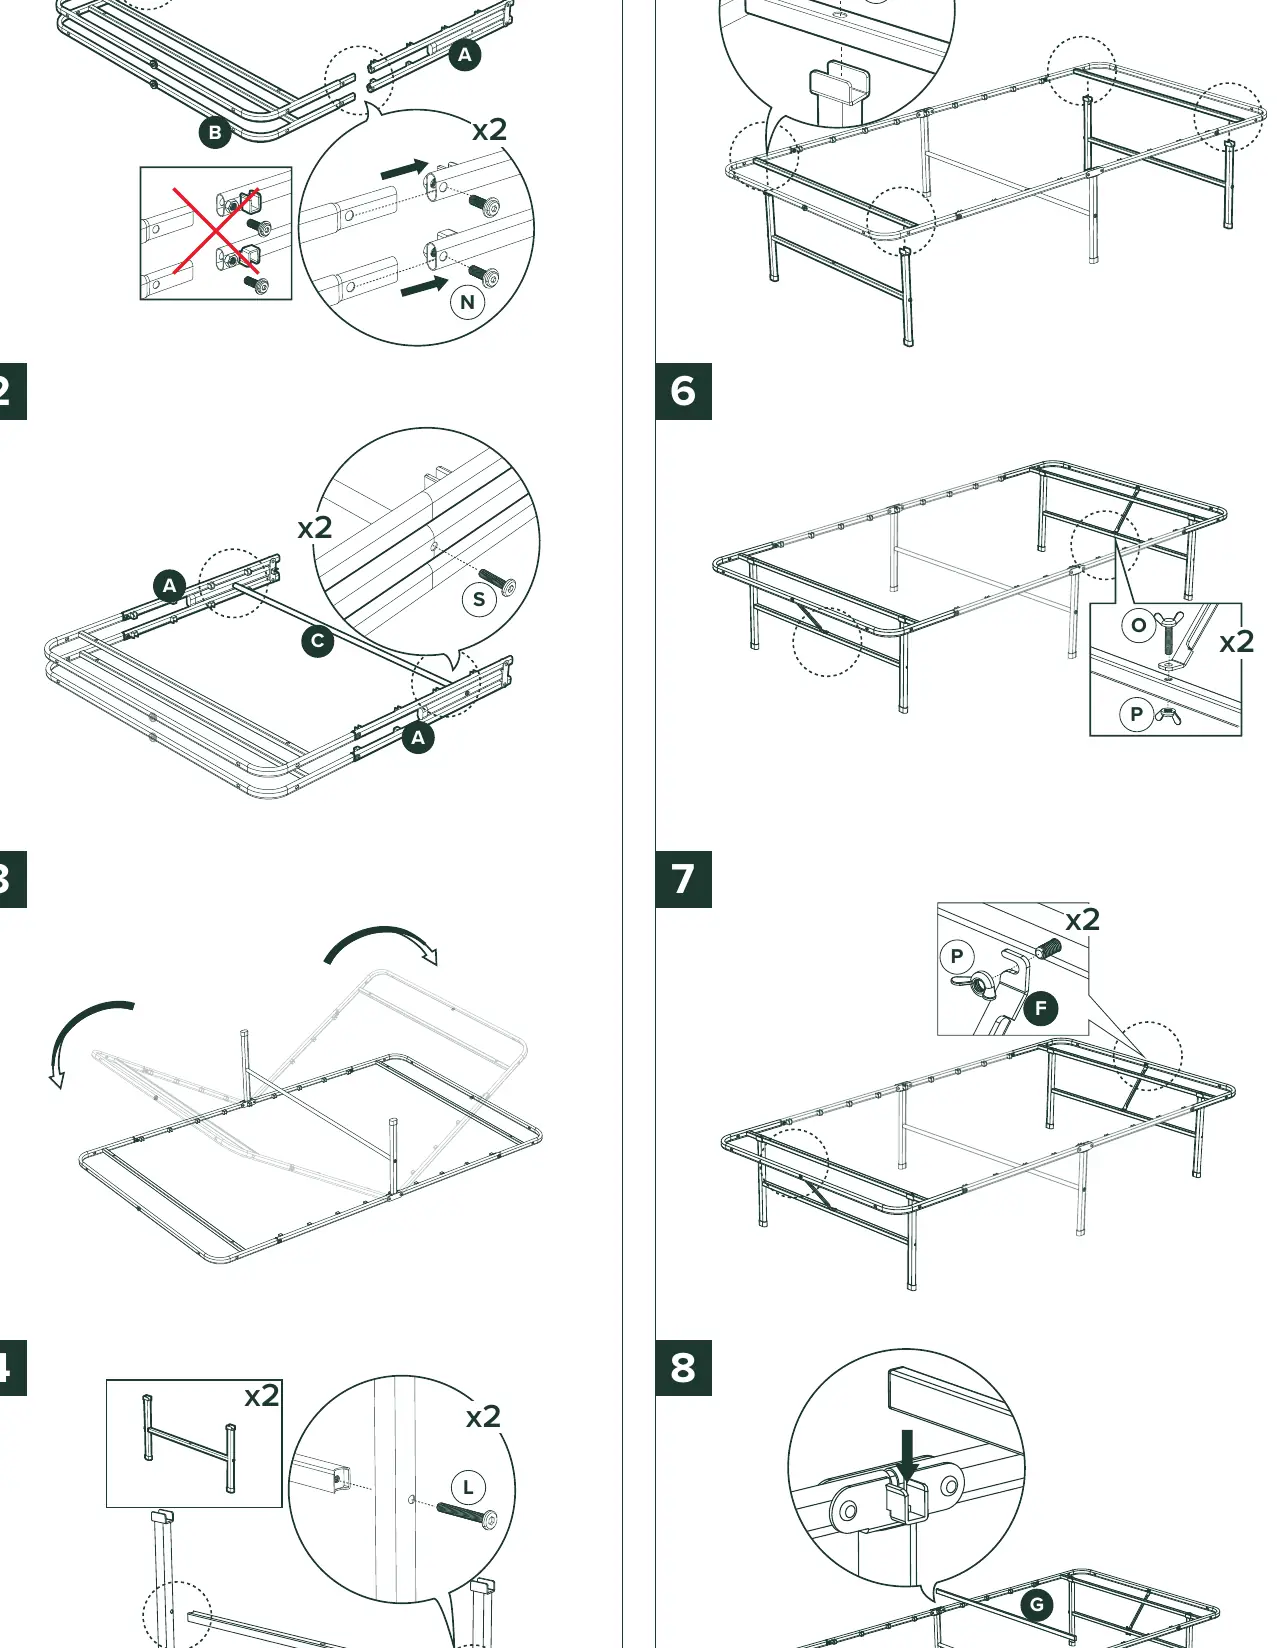
- Frame Connection: Connect frame parts A and B using the provided hardware N. Ensure the orientation matches the diagram.
- Side Attachment: Attach part C to the frame sections A using bolts S.
- Unfolding: Carefully unfold the frame structure as indicated by the arrows in the diagram.
- Leg Assembly: Assemble legs D and E using hardware L.
- Securing the Frame: Secure the frame structure using bolts S and washers Z.
- Hardware Installation: Attach parts O and P to the frame as shown.
- Finalizing Connections: Attach part F using hardware P.
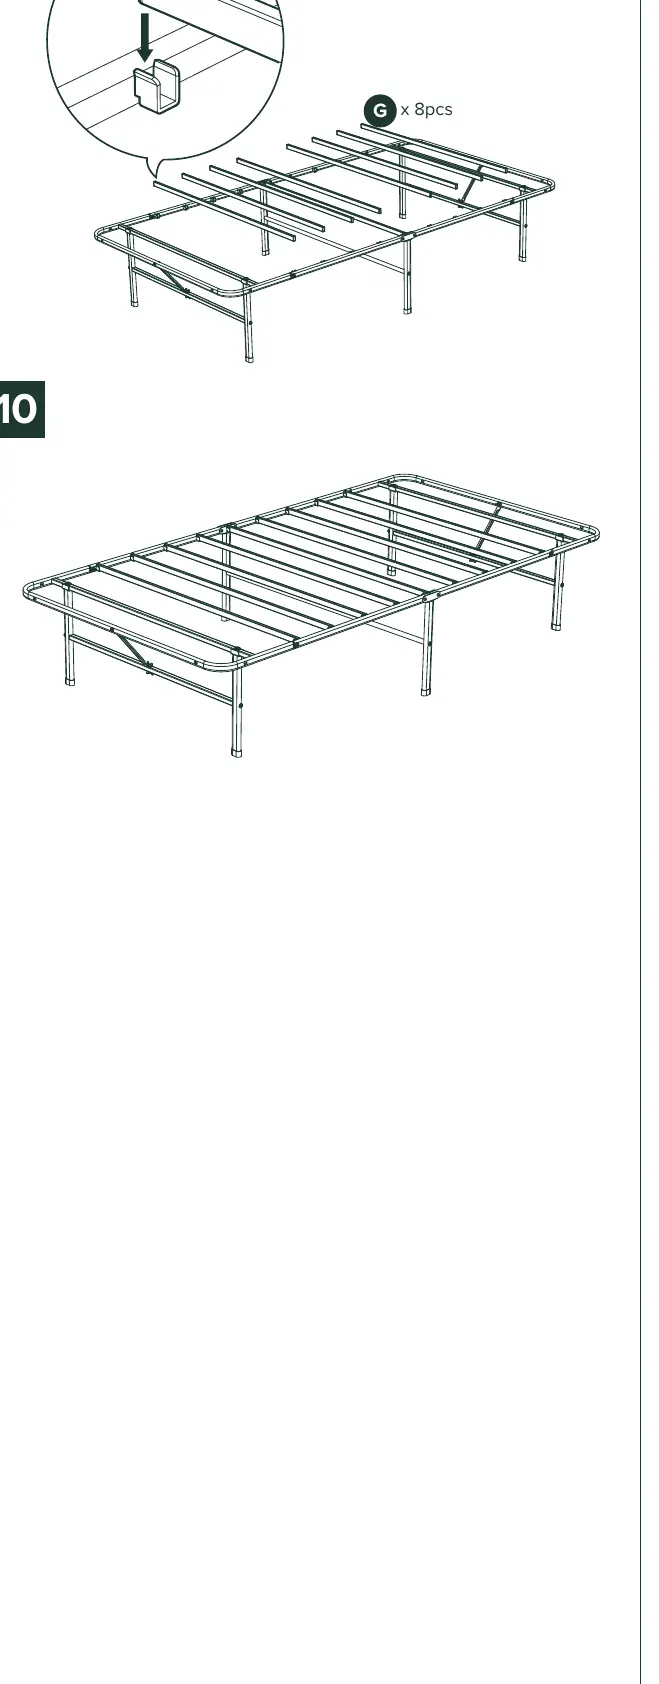
- Slat Installation: Insert the support slats G into the designated slots on the frame.
- Final Placement: Ensure all slats G are securely in place across the frame.
- Completion: Verify all bolts are tightened and the frame is stable before placing a mattress on it.
Return policy
If you need to return the product, please contact Zinus directly at [email protected] before returning it to the retailer. The item must be in good condition, in its original box, with all original proof of purchase, parts, and accessories.
Practical help
Common problems
Missing parts or hardware
Contact Zinus customer service at [email protected] for assistance.
Difficulty during assembly
The manufacturer recommends team assembly; ensure you have a second person to help.
Before use
- Verify all parts (A, B, C, D, E, F, G, L, N, S, O, P, Z) are present.
- Clear a large enough area for assembly.
- Have a second person available to assist with lifting and positioning.
- Ensure all bolts are tightened securely before use.
Images and diagrams
- Steps 1-10 provide a visual sequence for connecting the frame, legs, and slats.
- Pay close attention to the orientation of parts A, B, and C in the first steps.
Model compatibility
- Designed for team assembly.

Manual page author
Michael Turner
Technical manual editor
Reviews PDF manuals for structure, safety notes, and practical product details so readers can find the right information quickly.