Electronics / Monitors
Acurite 00821SBDI Weather Forecaster Instruction Manual
Quick guide for the Acurite 00821SBDI Weather Forecaster, covering battery installation, setup, placement guidelines, learning mode, and troubleshooting.
Table of contents
Manual images
Jump to the sectionQuick guide from the manual
This document provides instructions for setting up and maintaining your Acurite 00821SBDI Weather Forecaster. Key steps include installing batteries in both the display unit and the outdoor sensor, allowing the device to complete its 14-day self-calibration (Learning Mode), and ensuring proper placement to avoid interference and inaccurate readings.
Setup
Install or Replace Batteries:
- Outdoor Sensor: Slide off the battery cover and insert 2 x AA batteries, following the polarity diagram. Use lithium batteries if temperatures are below -4°F / -20°C.
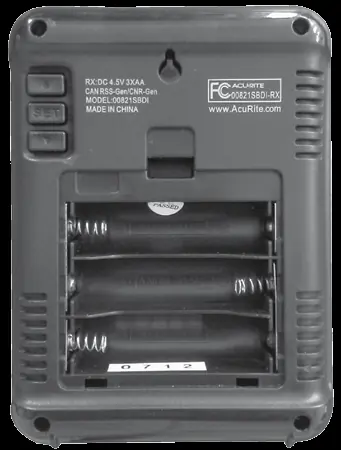
- Display Unit: Slide off the battery cover and insert 3 x AA batteries, following the polarity diagram.
Set Time & Units:
- Press and hold the SET button on the back of the display unit to enter SET MODE.
- Use the up or down arrow buttons to adjust the flashing item.
- Press SET to save and move to the next preference in this order: Clock Hour, Clock Minute, Temperature Scale (°F or °C).
- The unit will automatically exit SET MODE if no buttons are pressed for 30 seconds.
Placement Guidelines
For maximum accuracy, follow these guidelines:
- Distance: The display unit and outdoor sensor must be within 165 ft (50 m) of each other.
- Interference: Place both units at least 3 ft (0.9 m) away from electronics like TVs, microwaves, or computers.
- Environment: Keep units out of direct sunlight and away from heat sources or vents.
- Sensor Placement: Place the sensor outside in a shaded, well-ventilated area, 4 to 8 feet above the ground.
Operation
The device features a 12 to 24-hour weather forecast generated by a self-calibrating algorithm. During the first 14 days, the Learning Mode icon will appear on the screen while the device analyzes pressure changes to calibrate to your specific altitude. Once this icon disappears, the forecast is fully tuned to your location.
Care & Maintenance
Clean both the display unit and the outdoor sensor with a soft, damp cloth. Avoid using caustic cleaners or abrasives. Regularly clean the display unit's ventilation ports with a gentle puff of air.
Troubleshooting
If you experience issues such as no sensor reception or inaccurate readings, ensure batteries are fresh and correctly installed. If the outdoor temperature is flashing, bring both units indoors, remove batteries, and reinstall them to force a new connection. Allow up to 20 minutes for synchronization.
Customer Support
For further assistance, visit www.AcuRite.com or call 877-221-1252.
Official resources from the manual
Manufacturer information
AcuRite
Practical help
Common problems
No outdoor sensor reception (no bars)
Relocate units within 165 ft (50 m), ensure they are 3 ft away from electronics, and check battery type (use alkaline or lithium for cold).
Outdoor temperature flashing or showing dashes
Indicates wireless interference. Bring units indoors, remove batteries, reinstall, and let them sit together for 20 minutes to re-sync.
Inaccurate forecast
Learning Mode must complete (14 days). Ensure the unit runs continuously for 33 days for full calibration.
Before use
- Remove protective film from the LCD screen.
- Register product online at www.AcuRite.com for warranty.
- Install 2 x AA batteries in the outdoor sensor.
- Install 3 x AA batteries in the display unit.
- Set time and temperature scale preferences.
Specs in practice
- Temperature Range (Outdoor)
- -40°F to 158°F (-40°C to 70°C)
- Wireless Range
- 165 ft (50 m) depending on construction materials.
- Operating Frequency
- 433 MHz
- Data Reporting
- Updates every 30 seconds.
Images and diagrams
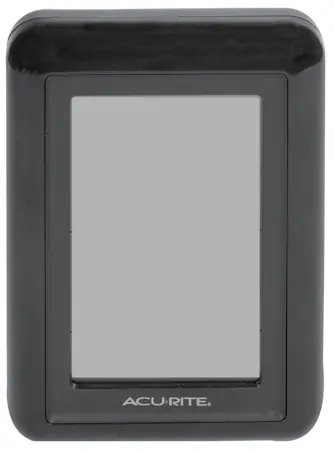
- Display Unit Front: Shows weather forecast, indoor/outdoor temp, humidity, and clock.
- Display Unit Back: Contains SET, up, and down buttons for configuration.
- Outdoor Sensor: Features an integrated hanger and wireless signal indicator.
Model compatibility
- Use lithium batteries in the outdoor sensor for temperatures below -4°F / -20°C.
- Heavy-duty or rechargeable batteries are not recommended.

Manual page author
Michael Turner
Technical manual editor
Reviews PDF manuals for structure, safety notes, and practical product details so readers can find the right information quickly.