Lighting / Fixtures
User Manual for ADJ 12PX HEX LED Par Fixture
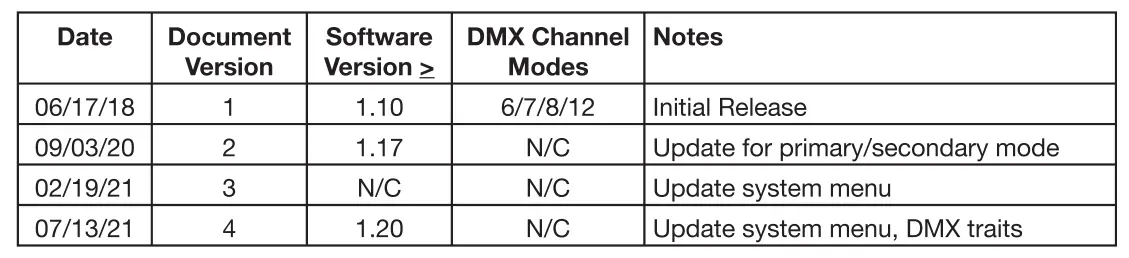
Comprehensive user guide for the ADJ 12PX HEX and 12PX HEX PEARL LED par fixture. Includes installation, DMX setup, operating modes, system menu settings, and maintenance instructions.
Table of contents
Manual images
Click an image to enlargeQuick Guide and Safety Information
The ADJ 12PX HEX is a DMX-intelligent LED par fixture designed for professional lighting applications. Before operation, ensure the unit is inspected for shipping damage. Warning: This fixture emits high-intensity ultraviolet (UV) light. Avoid direct eye and skin exposure at distances shorter than 11 feet (3.3m). Do not operate the unit if the cover is damaged or missing. Always disconnect from main power before making any connections.

Installation and Mounting
The unit must be installed by a professional in a location out of reach of the public. Always ensure the mounting structure is secure and capable of supporting 10 times the weight of the unit. Use a safety cable capable of holding 12 times the unit's weight. Ensure there is at least 6 inches (15cm) of space between the device and any wall for proper ventilation.
DMX Setup and Addressing
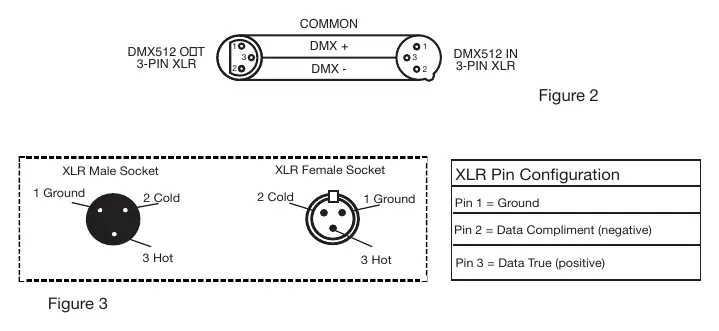
The fixture supports DMX-512 protocol with 3-pin and 5-pin XLR connections. When linking multiple units, use standard 110-120 Ohm shielded DMX cable. The DMX address is set via the digital control display on the back panel. For longer cable runs, use a DMX terminator (120 Ohm resistor) on the last unit in the chain to prevent signal errors.
Operating Modes
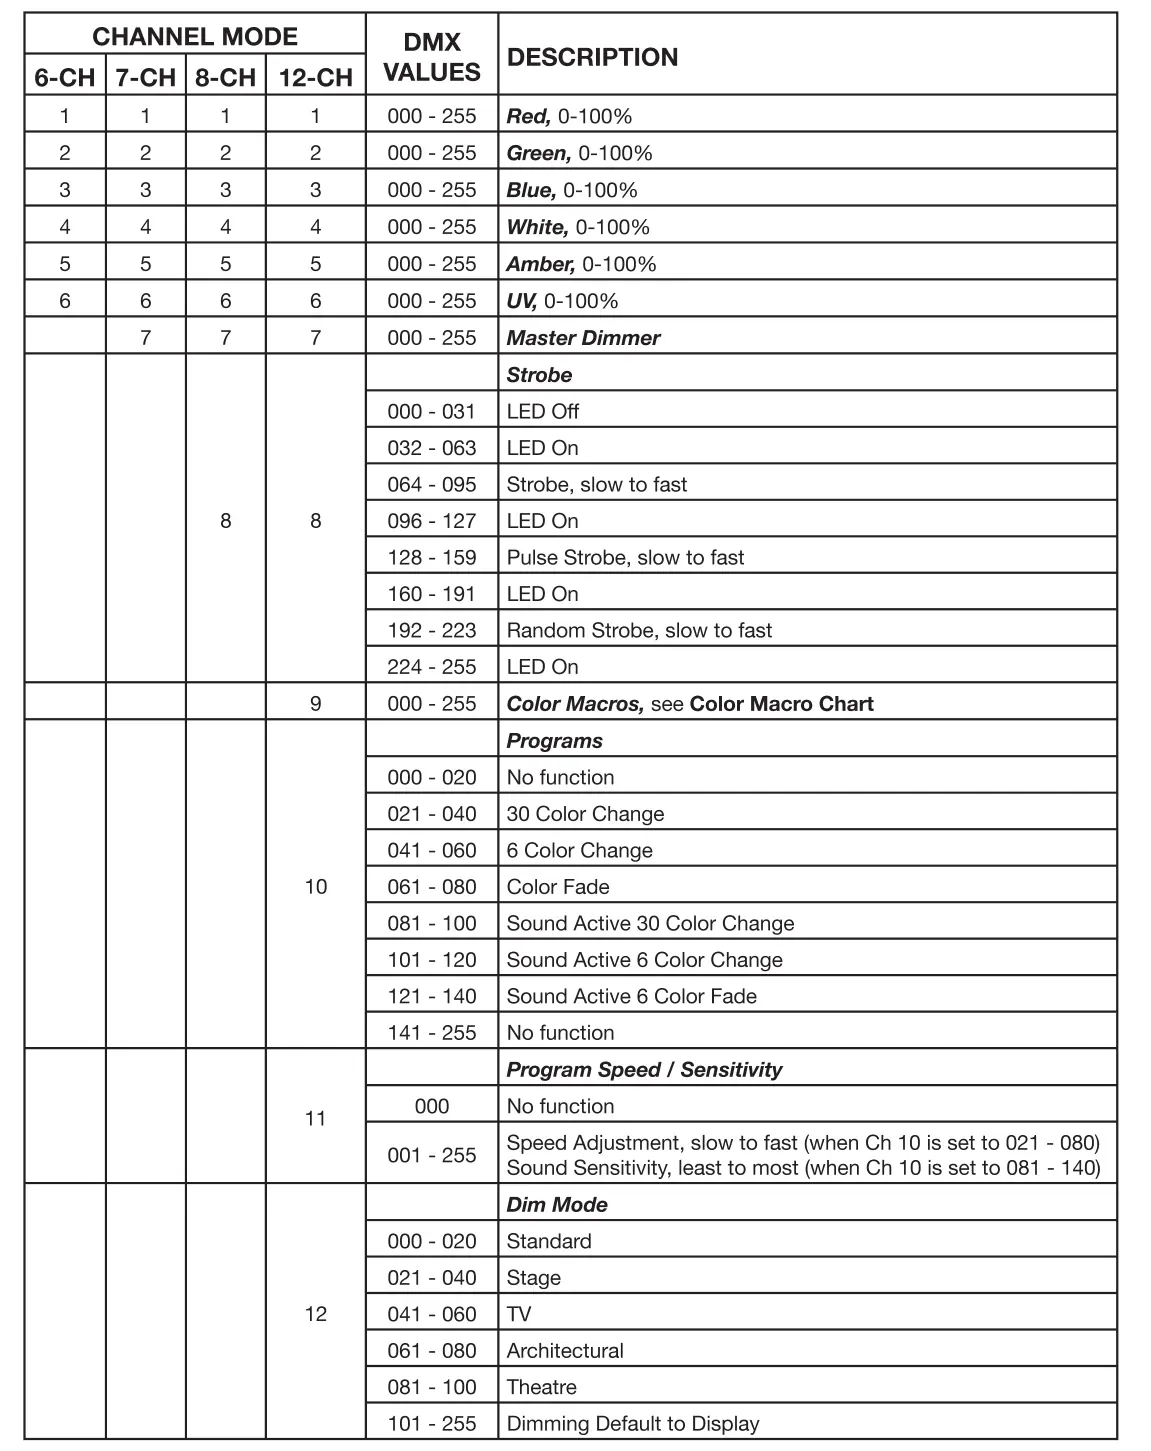
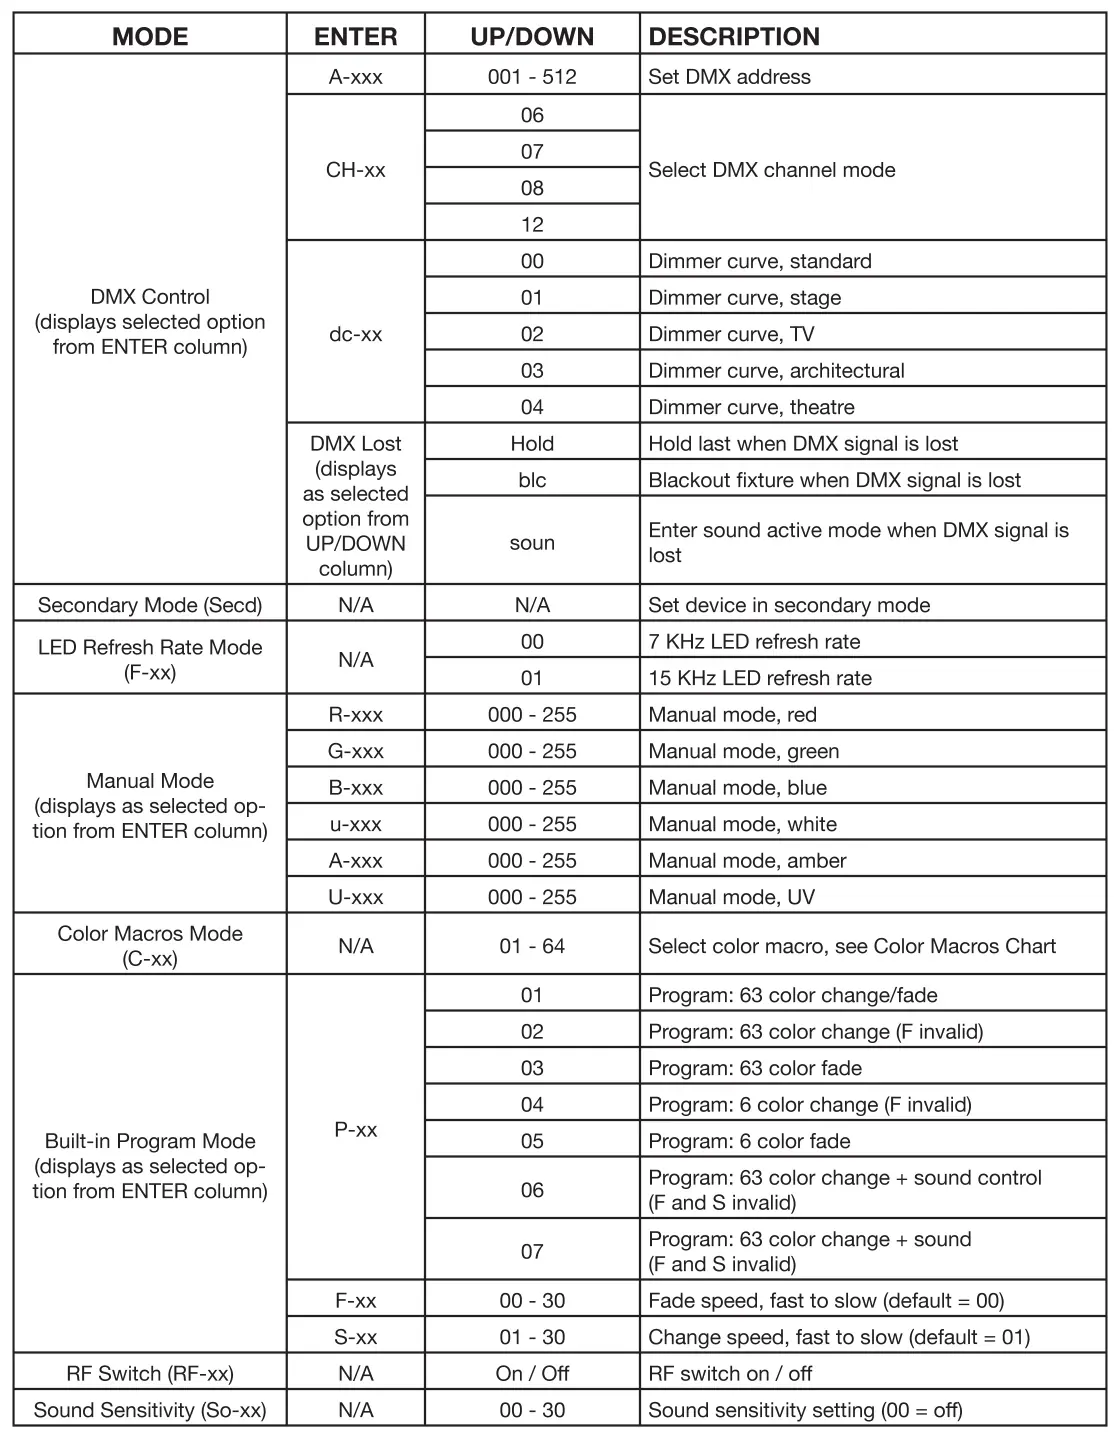
The 12PX HEX offers five operating modes: Sound Active, Program, RGBWA + UV Dimmer, Static Color, and DMX Control. The fixture supports four DMX channel modes: 6, 7, 8, and 12 channels. You can also configure units in a Primary-Secondary setup, where one unit acts as the controller for others.
System Menu Navigation
The control panel locks automatically after 30 seconds of inactivity. To unlock, press and hold the Mode button for 3 seconds. Use the Mode, Enter, Up, and Down buttons to navigate the menu to set DMX addresses, select channel modes, adjust dimmer curves, and configure LED refresh rates.
Maintenance and Troubleshooting
Periodically clean the internal and external optical lenses to optimize light output, especially if the fixture is used in environments with smoke, fog, or dust. Use a soft cloth and glass cleaner. If the unit does not respond to DMX, check cable connections and wiring. If it does not respond to sound, ensure Sound Active mode is enabled and the sound source is not too quiet or high-pitched.
Manufacturer information
ADJ Products, LLC
Practical help
Common problems
Unit not responding to DMX
Check that DMX cables are connected properly and wired correctly (Pin 3 is hot). Ensure inputs and outputs are connected in the correct direction.
Unit does not respond to sound
Ensure Sound Active mode is activated. Note that quiet or high-pitched sounds may not trigger the unit.
Control panel locked
Press and hold the Mode button for 3 seconds to unlock the panel.
Before use
- Inspect shipping carton for damage.
- Ensure mounting structure supports 10x the unit's weight.
- Attach a safety cable capable of holding 12x the unit's weight.
- Verify power source is 100V-240V.
- Ensure proper ventilation (6 inches/15cm clearance).
Specs in practice
- DMX Channels
- Selectable modes: 6, 7, 8, or 12 channels.
Images and diagrams
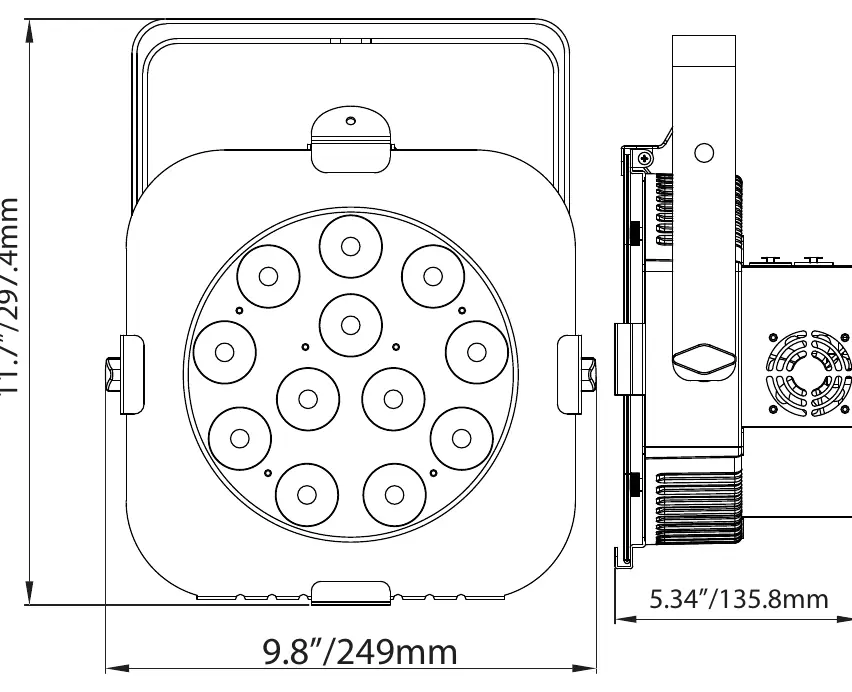
- Layout: Shows location of Power In/Out, DMX In/Out (3-pin and 5-pin), and control buttons.
- DMX Wiring: Illustrates pin configuration for XLR connectors to avoid short circuits.
- Dimmer Curve Chart: Explains the rise and down time for different dimming modes (Standard, Stage, TV, Architectural, Theatre).
Model compatibility
- Compatible with Dotz Par RF remote (sold separately).
- Supports 3-pin and 5-pin DMX connections.
- Can be daisy-chained for power linking (check max amps on silk screen).

Manual page author
Michael Turner
Technical manual editor
Reviews PDF manuals for structure, safety notes, and practical product details so readers can find the right information quickly.