Electronics / Security Cameras
User Manual for Arenti W1 Battery Camera
Get started with your Arenti W1 Battery Camera. This guide covers installation, app connection, status light indicators, troubleshooting, and key features like PIR detection and night vision.
Table of contents
Manual images
Click an image to enlargeQuick Guide
The Arenti W1 is a rechargeable battery-powered camera. Before starting, ensure you have the camera, power adapter, USB cable, mounting bracket, and screws. The device requires the CloudEdge app for operation.
Device Overview
The camera features a status light, microphone, speaker, power button, micro USB port, reset button, and an SD card slot.
Status Light Indicators
- Red light solid: Network is abnormal.
- Red light blinking: Awaiting WiFi connection or currently connecting (faster blinking).
- Blue light solid: Camera is running correctly.
- Red indicator solid (charging): Battery is charging.
- Blue indicator solid (charging): Charging completed.
Installation
The camera comes with a bracket for wall mounting.
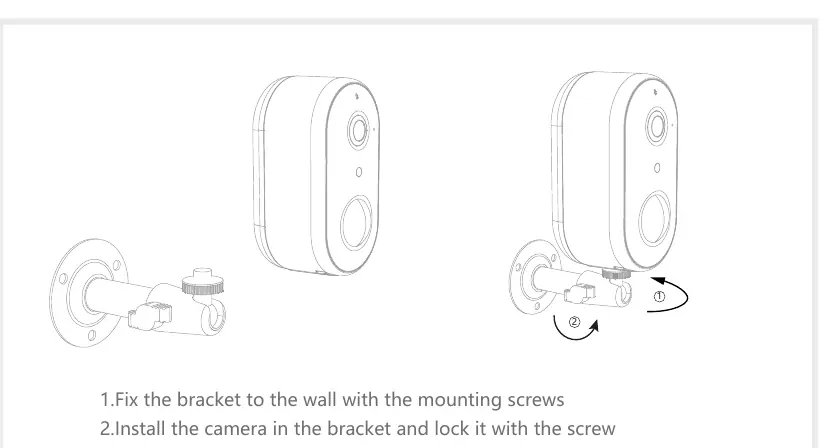

- Fix the bracket to the wall using the provided mounting screws.
- Attach the camera to the bracket and lock it securely with the screw.
Connection
Follow these steps to connect your camera:
- Download the CloudEdge app from the App Store or Android Market.
- Log in to the app and select Add Device.
- Follow the on-screen instructions to configure the camera. Keep the camera close to your router during setup.
If you need to re-select the WiFi network, press and hold the RESET button for 5 seconds. The device will restart, and the indicator will flash red.
Functions
- Remote wake-up: The camera enters sleep mode to save power and can be woken via the app.
- Full-duplex audio: Allows two-way communication through the app.
- PIR Detection: Sends an alarm message to your phone when motion is detected.
- Low battery alarm: Notifies you via the app when the battery is low.
- Recording: Supports local SD card storage (Max 128G) or Cloud-Storage Service.
- Day/Night: Automatic night vision for complete darkness.
Troubleshooting
- Device cannot be previewed: Check network status, place the camera closer to the router, or reset the device.
- Device still in list after reset: The reset only clears network configuration. You must manually remove the device from the App.
- SD card not identified: Insert the SD card after a power cut. Ensure it is formatted as FAT32.
- No notifications: Ensure the App is running in the background and that notification permissions are enabled in your phone settings.
Manufacturer information
Arenti
Practical help
Common problems
Device cannot be previewed properly
Check if the network is normal, move the camera closer to the router, or reset the device and add it again.
Device remains in the device list after resetting
The reset only clears network settings. You must manually remove the device from the CloudEdge App.
SD card is not identified
Insert the SD card after a power cut. Ensure the card is formatted as FAT32.
Not receiving notifications
Ensure the App is running on your phone and that notification permissions are enabled in your mobile system settings.
Before use
- Charge the camera fully before first use
- Download the CloudEdge App
- Ensure you have a 2.4GHz WiFi network available
- Insert a compatible SD card (up to 128GB, FAT32 format) if local recording is desired
Specs in practice
- Battery Capacity
- 6700mAh (Two 18650 lithium-ion batteries)
Images and diagrams
- The camera features a PIR sensor, status light, and microphone on the front.
- The reset button and SD card slot are located on the device (refer to the diagram on page 2 of the manual).
Model compatibility
- Requires CloudEdge App
- Compatible with iOS and Android devices

Manual page author
Michael Turner
Technical manual editor
Reviews PDF manuals for structure, safety notes, and practical product details so readers can find the right information quickly.