Lighting / Outdoor Lighting
User Manual for Arlux Lighting FLOODY LED Floodlight
Quick guide for the Arlux Lighting FLOODY LED floodlight. Includes installation steps, safety warnings, technical specifications, and wiring instructions.
Quick answers from the manual
Quick answer
- The Arlux Lighting FLOODY is an outdoor LED floodlight. Installation must be performed by a qualified electrician. It is not compatible with dimmers, and the light source is non-replaceable. p. 1, 2, 3
Key actions
- Installation p. 3
Problems and fixes
Damaged cable
The cable cannot be replaced; the luminaire must be recycled.
p. 2Technical specifications
| Parameter | Value | Meaning | Pages |
|---|---|---|---|
| Power | 20W / 30W / 50W | Power consumption variants | p. 1 |
| IP Rating | IP66 | Protection against dust and water | p. 1 |
Where to find it in the PDF
- Specifications and Overview p. 1
- Safety Instructions p. 2
- Installation Guide p. 3
Table of contents
Manual images
Click an image to enlargeQuick guide from the manual
The Arlux Lighting FLOODY is an outdoor LED floodlight. Installation must be performed by a qualified electrician in accordance with local regulations. The product is not compatible with dimmers, and the LED light source and power supply are non-replaceable.
Technical Specifications
The FLOODY series is available in three power variants:
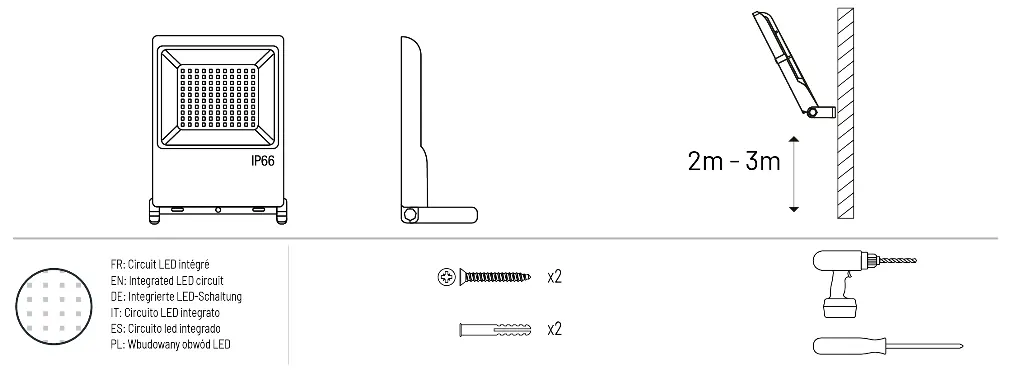
- 20W: 17x14x3 cm
- 30W: 19x16x3 cm
- 50W: 21x18x3 cm
All models feature a CRI > 80, IP66 protection rating, and operate on 220-240V.
Installation
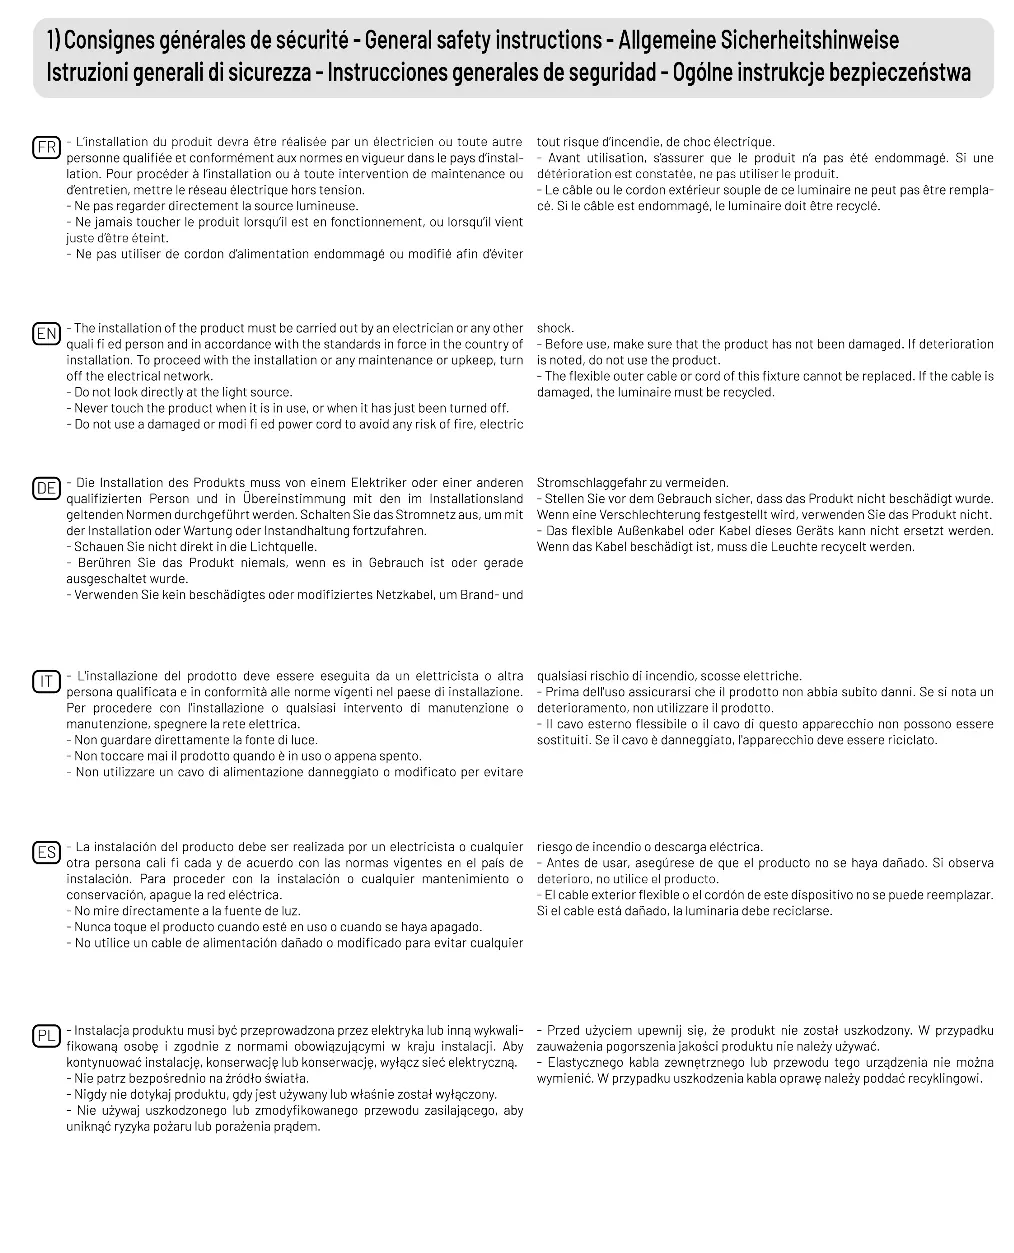
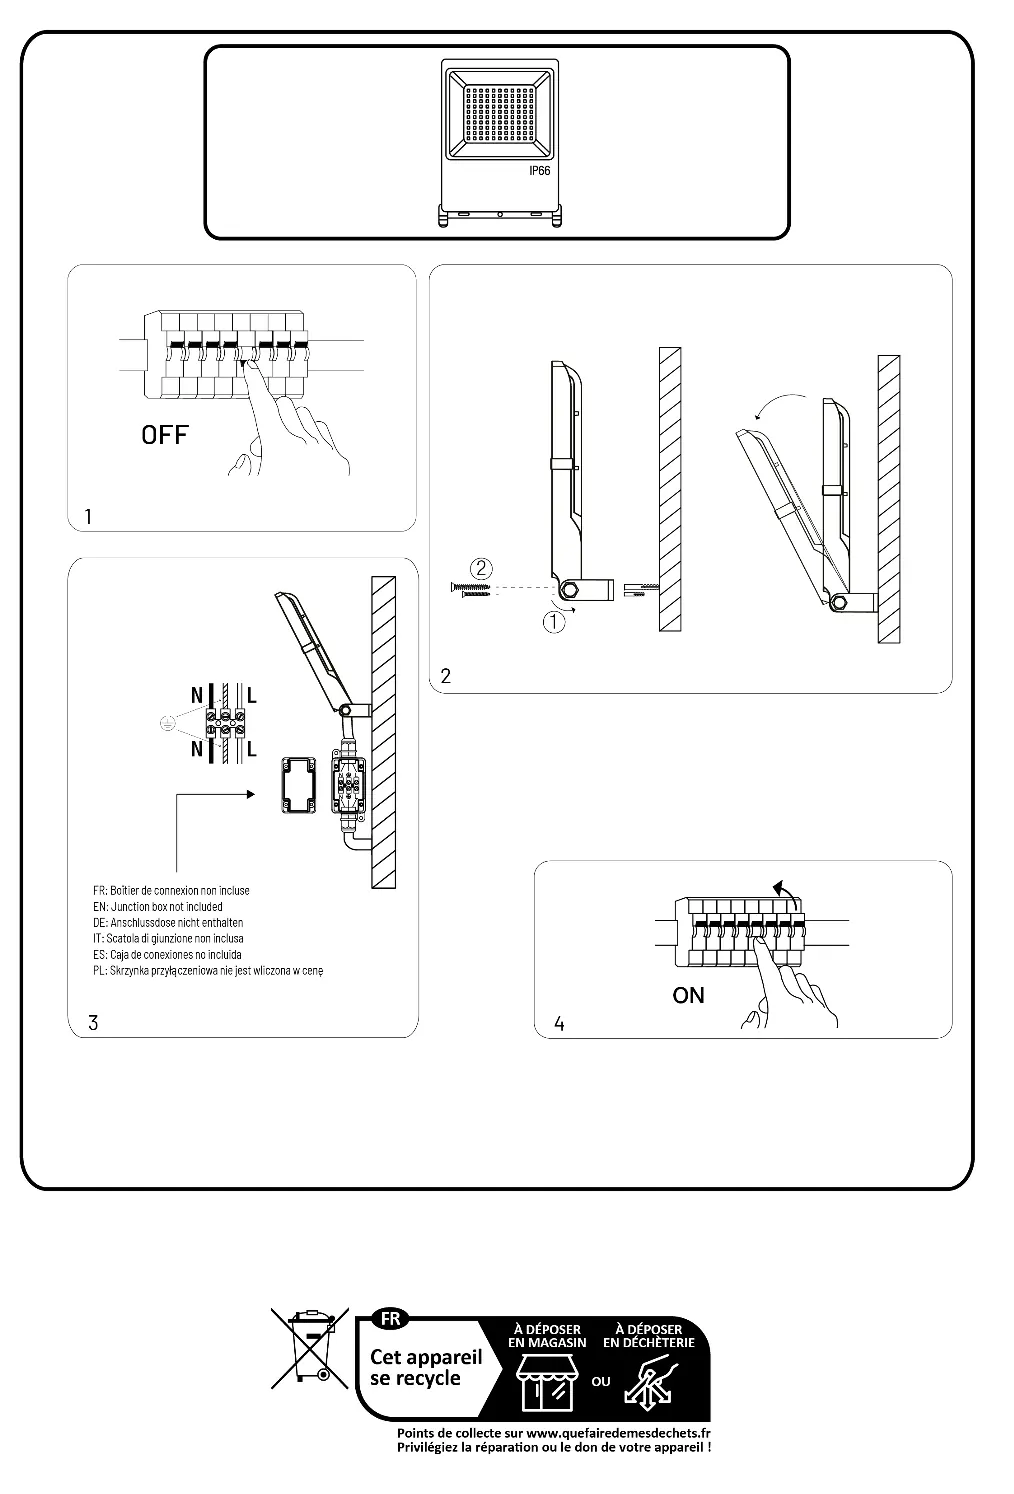
- Safety First: Ensure the electrical network is switched off before starting any work.
- Mounting: Secure the floodlight to the wall using the provided bracket and screws.
- Wiring: Connect the wires to a junction box (not included). Follow the color coding:
- Brown: Live (L)
- Blue: Neutral (N)
- Green/Yellow: Earth
- Completion: Once wiring is secure, switch the power back on.
Safety and Maintenance
Important Warnings:
- Do not look directly at the light source.
- Do not touch the product while it is in use or immediately after it has been turned off.
- Do not use the product if the cable or cord is damaged.
- This product is intended for outdoor use only.
- If the product reaches the end of its life, it must be recycled according to local regulations.
Practical help
Common problems
Light does not turn on
Ensure the power supply is switched on and the electrical connection is correctly made.
Can I use a dimmer?
No, this product is not compatible with dimmers.
What if the cable is damaged?
The flexible outer cable cannot be replaced. If damaged, the entire luminaire must be recycled.
Before use
- Ensure the product is not damaged before installation.
- Verify that the installation is performed by a qualified electrician.
- Ensure you have a junction box (not included) for wiring.
- Confirm the power is switched off at the mains.
Images and diagrams
- Step 1: Turn off the power at the circuit breaker.
- Step 2: Mount the floodlight bracket to the wall.
- Step 3: Connect the wires (Live, Neutral, Earth) to a junction box.
- Step 4: Turn the power back on.
Model compatibility
- Not compatible with dimmers.
- For outdoor use only.
- LED source and power supply are non-replaceable.

Manual page author
Emily Carter
User documentation editor
Prepares concise manual descriptions and highlights the most useful setup, operation, and maintenance information for readers.