Lighting / Fixtures
User Manual for Artika Dryad 15 LED Ceiling Light
Quick guide for the Artika Dryad 15 LED Ceiling Light (15FM-WO). Includes installation steps, wiring instructions, safety warnings, and hardware list.
Table of contents
Manual images
Click an image to enlargeQuick Guide
This document provides installation and safety instructions for the Artika Dryad 15 LED Ceiling Light. Before beginning, ensure the main power is turned off at the circuit breaker. This product is intended for indoor, residential use only. If you plan to use a dimmer switch, it must be LED compatible.
Included Hardware
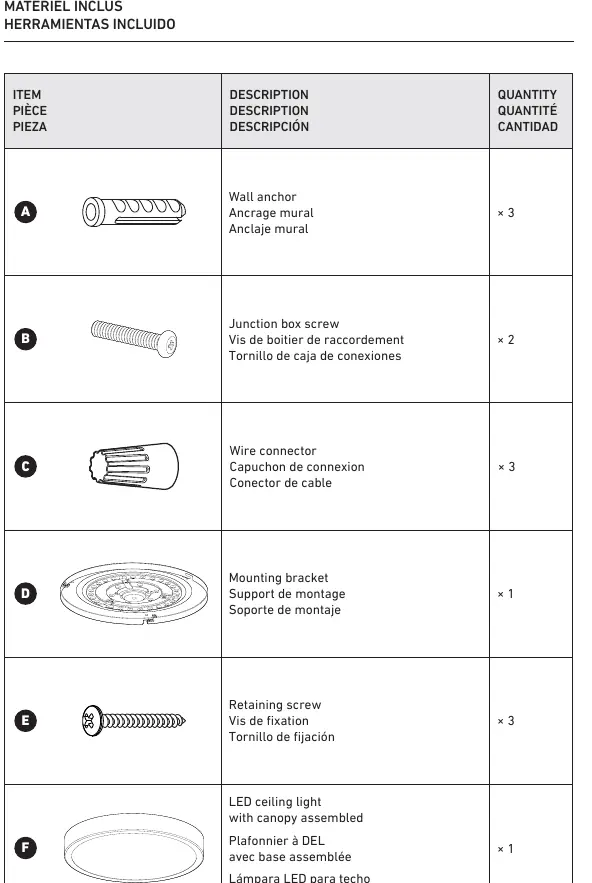
- Wall anchors (x3)
- Junction box screws (x2)
- Wire connectors (x3)
- Mounting bracket (x1)
- Retaining screws (x3)
- LED ceiling light with canopy assembled (x1)
Safety Warnings
Risk of electrical shock: Always turn off the main electrical supply from the fuse box or circuit breaker before installing the unit or performing any maintenance. Failure to follow these instructions may void the warranty and cause product malfunction. We recommend installation by a certified electrician, as required by local building codes in some regions.
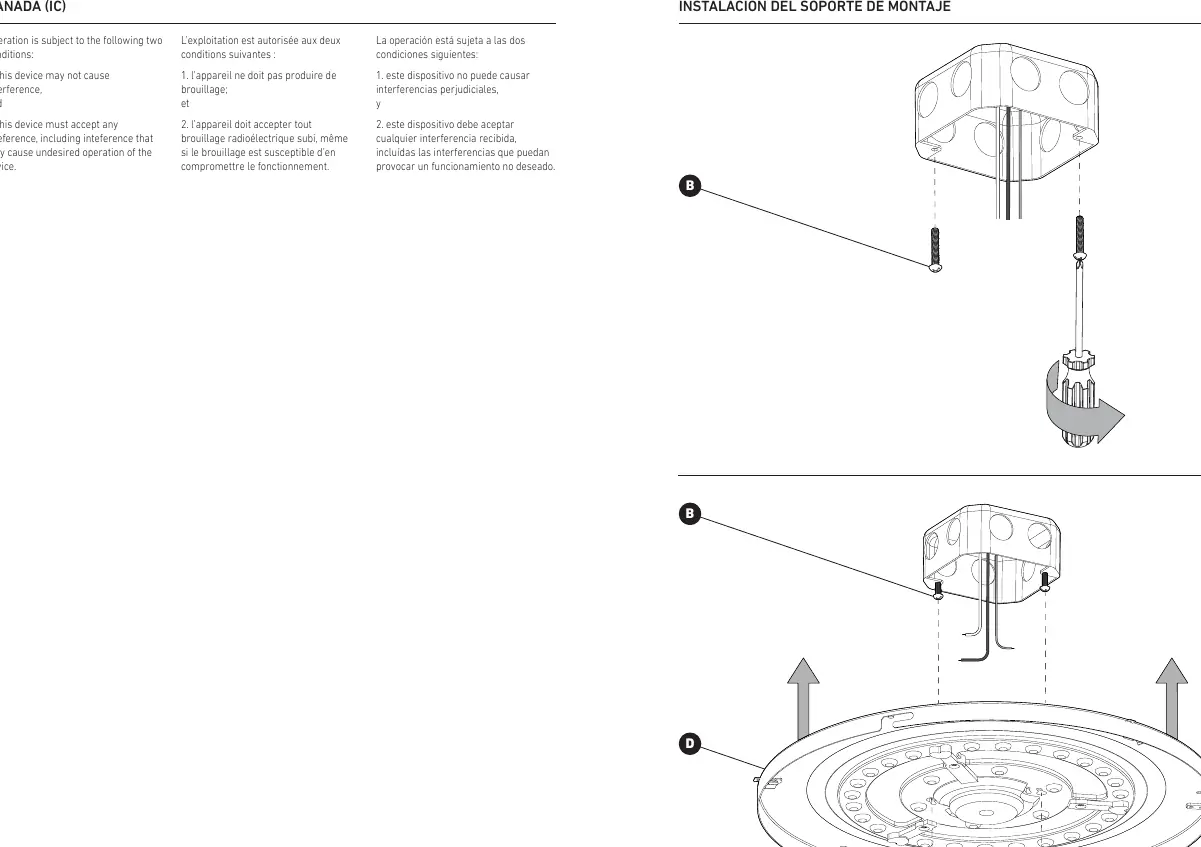
Installation
1. Mounting Bracket: Secure the mounting bracket to the junction box using the provided junction box screws. If necessary, use the wall anchors for additional support.
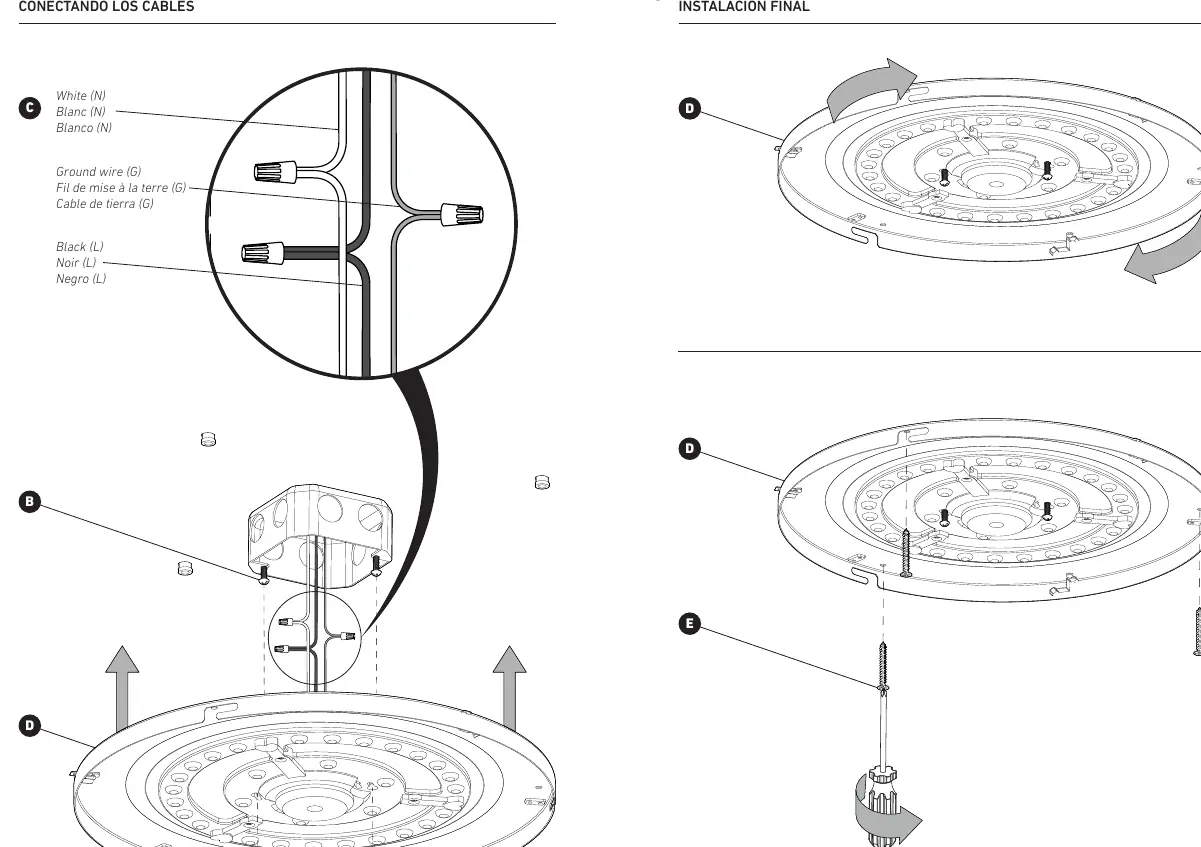
2. Wiring: Connect the wires from the ceiling to the light fixture wires using the provided wire connectors. Match White (N) to White, Black (L) to Black, and the Ground wire (G) to the ground wire.
3. Final Assembly: Align the LED ceiling light canopy with the mounting bracket. Secure the fixture in place using the retaining screws.
Warranty
Artika For Living Inc. offers a five (5) year limited warranty on manufacturing defects from the date of purchase for residential use. The warranty is non-transferable and applies only to the original owner in the USA and Canada. Proof of purchase is required for all claims. The warranty does not cover improper installation, misuse, normal wear and tear, or damage caused by improper cleaning agents.
Manufacturer information
Artika
Practical help
Common problems
Light does not turn on
Ensure the main power is switched on at the circuit breaker and verify that all wire connections are secure.
Flickering or dimming issues
Verify that the dimmer switch being used is specifically LED compatible.
Before use
- Turn off the main electrical supply at the fuse box or circuit breaker.
- Ensure the dimmer switch is LED compatible.
- Gather necessary tools: 1/4-inch drill bit, pencil, screwdriver, and drill.
- Verify all included hardware (anchors, screws, connectors) is present.
Specs in practice
- LED Compatible
- Required for dimmer switches to prevent flickering or damage to the light fixture.
Images and diagrams
- Wiring diagram: Shows connecting White (N) to White, Black (L) to Black, and Ground (G) to the ground wire using wire connectors.
- Mounting bracket installation: Illustrates securing the bracket to the junction box using screws and anchors.
Model compatibility
- For indoor use only.
- For residential use only.

Manual page author
Michael Turner
Technical manual editor
Reviews PDF manuals for structure, safety notes, and practical product details so readers can find the right information quickly.