Home Appliances / Commercial Kitchen Equipment
User Manual for Avantco 194CDIM50 Countertop Dry Ice Machine
Quick guide for the Avantco 194CDIM50 Countertop Dry Ice Machine. Learn how to set up, operate, replace CO2 cylinders, and troubleshoot common issues safely.
Quick answers from the manual
Quick answer
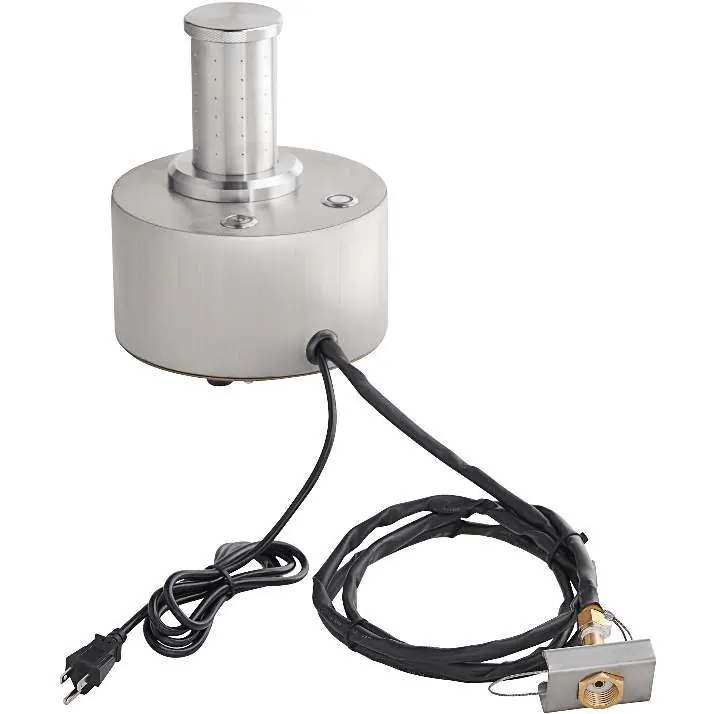
- The Avantco 194CDIM50 is a countertop dry ice machine. It requires a liquid CO2 cylinder, a 120V power supply, and proper PPE (gloves) for operation. p. 1, 2
Key actions
- Setup the machine p. 2
- Replace CO2 cylinder p. 2
First start
- Connect the CO2 tank, plug into 120V outlet, screw in ice tube, open CO2 tank, press red power button, then press blue operation button. p. 2
Problems and fixes
Not producing a full block of dry ice
Replace the CO2 tank with a full tank.
p. 2Where to find it in the PDF
- Cover and Setup p. 1
- Operation and Troubleshooting p. 2
Table of contents
Quick guide from the manual
The Avantco 194CDIM50 is a countertop dry ice machine designed for commercial use. It requires a liquid CO2 cylinder for operation. Always ensure the area is well-ventilated and wear protective gloves (PPE) when handling dry ice to prevent burns.
Warning and Safety
- Liquid CO2 Only: This machine works with liquid CO2. Do not use other compressed gas cylinders. A cylinder with a siphon tube is recommended. If using a non-liquid CO2 cylinder, the tank must be inverted.
- Ventilation: Install the unit in a well-ventilated area to assist in venting excess CO2.
- Personal Protection: Dry ice can cause burns. Always use PPE, such as gloves, when handling the product.
- Moisture: Do not use the machine if any part of it is wet.
Set-up & Operation
- Place the unit on a level surface at a comfortable working height.
- Place the steel wire for the connection hose around the CO2 tank.
- Add rubber seal rings to the inside of the connection hose nut and connect it to the CO2 tank. Tighten by hand, then use a wrench. Note: Do not overtighten.
- Plug the unit into an appropriate 120V 5-15 outlet.
- Screw the ice tube into the unit.
- Slowly open the CO2 tank, check for leaks, then fully open the tank.
- Press and release the red power button to turn the unit on.
- Press and release the blue operation button to start production. Note: Do not press the blue button without the ice tube fully engaged.
- After 2-3 minutes, dry ice will form. Use gloves to unscrew the tube and remove the ice.
- At the end of the day, turn the unit off and close the CO2 tank.
Replacing CO2 Cylinder
If the machine fails to make a complete dry ice block, it is time to change the cylinder:
- Close the shut-off valve of the CO2 cylinder.
- Press the blue operation button until all excess pressure is released.
- Loosen the nut on the CO2 cylinder and remove the cylinder.
- Replace with a full CO2 cylinder.
- Re-attach the connection hose (ensure steel wire is in place and rubber seal rings are used). Tighten by hand, then use a wrench (do not overtighten).
- Slowly open the CO2 tank, check for leaks, then fully open.
- Press the blue operation button to ensure functionality.
Troubleshooting
- Not producing a full block: Replace the CO2 tank with a full one.
- Dry ice not dense or full: Replace the CO2 tank with a full one.
- Not producing dry ice at all: Confirm the unit is plugged into an appropriate outlet and the breaker is not tripped.
Manufacturer information
Avantco Equipment
Practical help
Common problems
Not producing a full block of dry ice
Replace the CO2 tank with a full tank.
Dry ice is not dense or full
Replace the CO2 tank with a full tank.
Not producing dry ice at all
Confirm the unit is plugged into an appropriate outlet and the breaker is not tripped.
Before use
- Ensure you have a liquid CO2 cylinder (siphon tube recommended).
- Verify the installation area is well-ventilated.
- Have protective gloves (PPE) ready for handling dry ice.
- Check that the unit is dry before use.
- Ensure a 120V 5-15 outlet is available.
Model compatibility
- Requires liquid CO2 cylinder.
- Adapter included for non-North American applications.

Manual page author
David Miller
Documentation analyst
Organizes user manual content into clear summaries, with attention to model details, product context, and everyday usability.