Home Appliances / Cookers & Ranges
User Manual for Avantco 177CER200 and 177CER400 Countertop Electric Ranges
Quick guide for Avantco 177CER200 and 177CER400 countertop electric ranges. Includes installation steps, operation instructions, cleaning tips, and troubleshooting.
Quick answers from the manual
Quick answer
- The Avantco 177CER200 and 177CER400 are commercial countertop electric ranges. Installation requires attaching the legs, leveling the unit, and performing a 10-15 minute initial burn-in before first use. p. 1, 4
Key actions
- Perform initial burn-in p. 4
- Cleaning p. 5
First start
- Install legs and perform burn-in p. 4
Problems and fixes
Indicator light does not come on
Check power connection, replace pilot light, or replace selector switch.
p. 6
Unit does not heat
Replace selector switch or heating element.
p. 6Technical specifications
| Parameter | Value | Meaning | Pages |
|---|---|---|---|
| 177CER200 Voltage | 208/240V | Operating voltage | p. 4 |
| 177CER400 Wattage | 5000/7000W | Total wattage | p. 4 |
Where to find it in the PDF
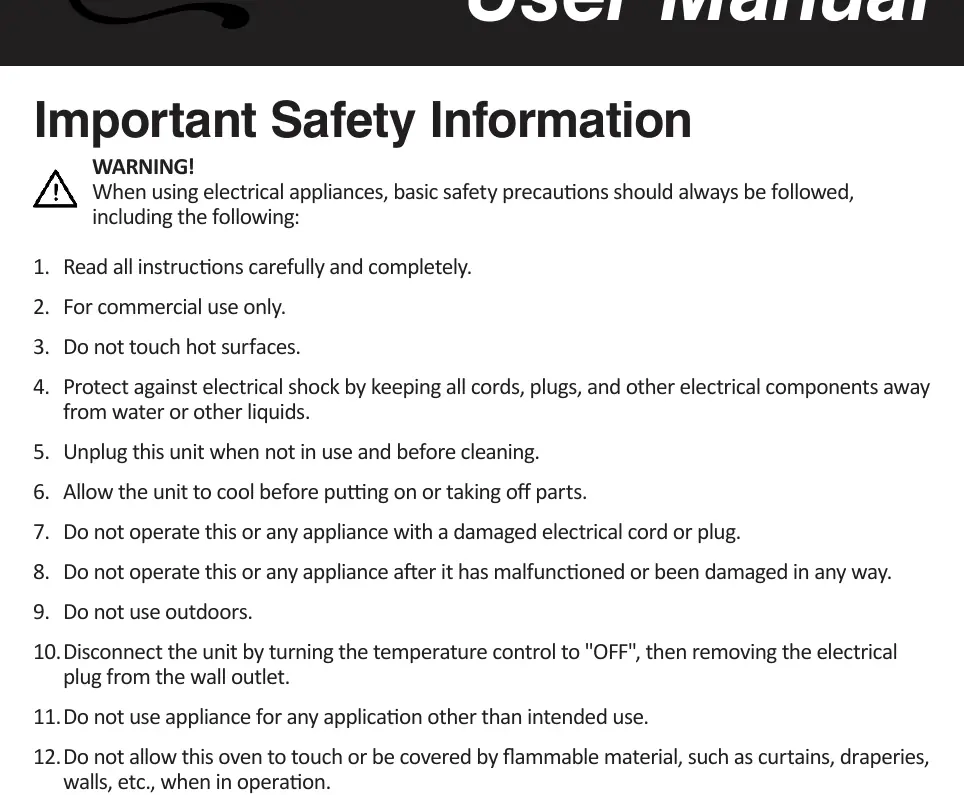
- Safety Information p. 3
- Specifications p. 4
- Parts Diagram p. 7
Table of contents
Manual images
Click an image to enlargeQuick guide from the manual
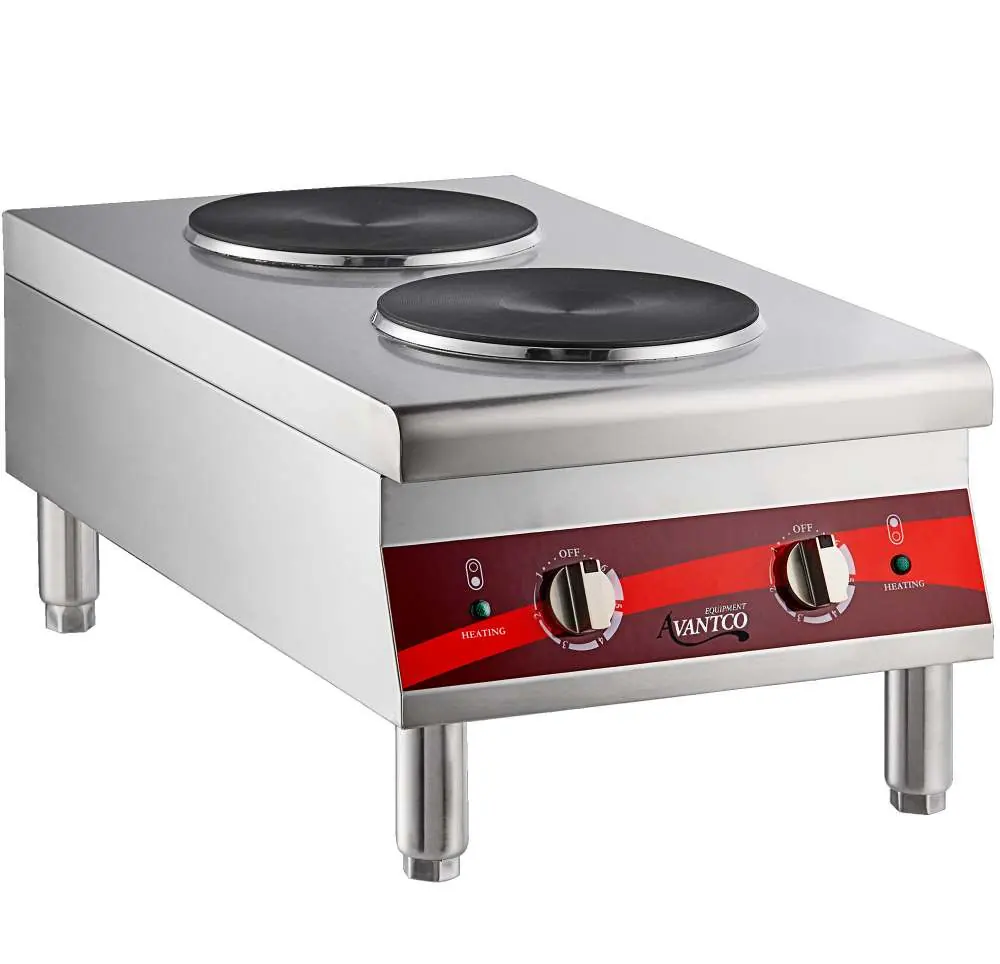
The Avantco 177CER200 and 177CER400 are commercial-grade countertop electric ranges designed for indoor use. Before operating, ensure the unit is placed on a flat, well-ventilated surface. The appliance must be supervised during operation and should never be left unattended while powered on.
Installation
Installation must be performed by qualified personnel to avoid voiding the warranty. Follow these steps to set up the unit:
- Remove the range and all parts from the packaging.
- Turn the unit upside down and install the 4 legs into the threaded inserts.
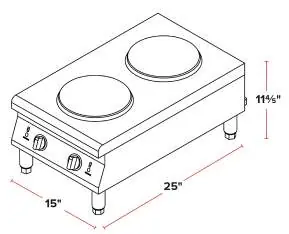
- Turn the unit right side up and place it in the desired location, adjusting the legs to ensure it is level and secure.
- Remove any protective plastic sheeting and wipe down all surfaces.
- Initial Burn-in: Before first use, plug the unit in, turn the temperature control to the maximum setting, and allow it to warm up for 10-15 minutes. Smoke may appear as the cooking surface and elements burn in; this is normal.
Operation
To operate the range:
- Plug the unit into the correct, properly grounded outlet.
- Turn the selector switch to the desired setting for each burner.
- Allow approximately 10-15 minutes for the unit to preheat.
- Cook or warm food as needed.
- After use, turn the selector switch to the OFF position and unplug the unit. Allow it to cool completely before cleaning.
Cleaning and Maintenance
Proper maintenance ensures longevity and safety:
- Always allow the equipment to cool completely before cleaning.
- Unplug the equipment before cleaning.
- Use a damp cloth or sponge with soapy water to clean surfaces.
- Warning: Do not immerse the cord, plug, or equipment in water or other liquids. Do not use highly abrasive objects like steel wool, as pieces can break off and cause electrical shock.
Troubleshooting
If the unit fails to operate, check the following:
- Indicator light does not come on: Ensure the unit is plugged in. If it is, the pilot light or selector switch may be malfunctioning and require replacement.
- Unit does not heat: If the indicator light is on but there is no heat, the selector switch or heating element may be malfunctioning.
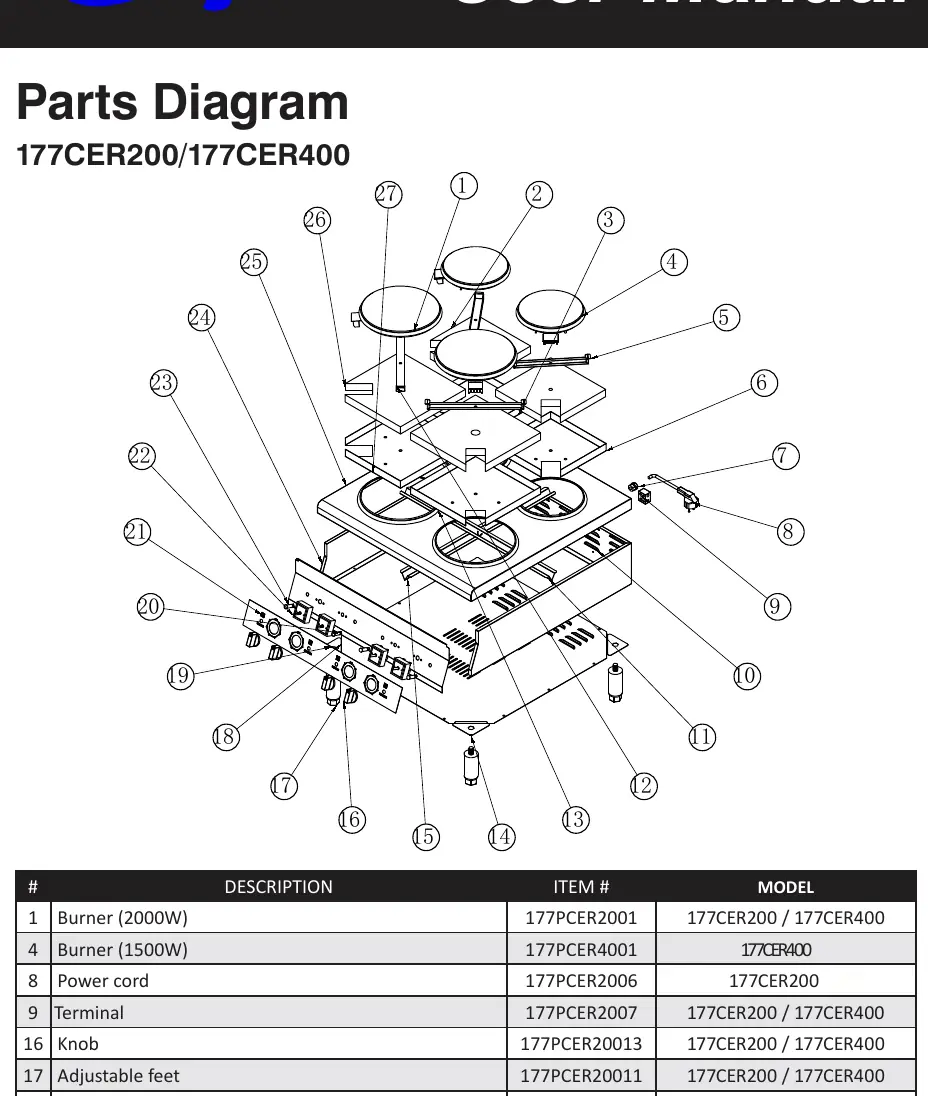
Parts Diagram
The manual includes an exploded parts diagram on page 7, identifying components such as burners, knobs, power cords, and switches. Refer to this diagram if replacement parts are needed.
Technical Specifications
The ranges operate on 208/240V power. The 177CER200 features two burners (2000W each) with a NEMA 6-20P plug. The 177CER400 features four burners (two 2000W, two 1500W) with a NEMA 6-30P plug.
Manufacturer information
Avantco Equipment
Practical help
Common problems
Indicator light does not come on
Check if the unit is plugged in. If plugged in, the pilot light or selector switch may be faulty.
Unit does not heat
If the indicator light is on, the selector switch or heating element may be faulty and require replacement.
Before use
- Remove all packaging materials.
- Install the 4 legs into the threaded inserts.
- Place on a flat, well-ventilated surface.
- Remove protective plastic sheeting.
- Perform a 10-15 minute burn-in at maximum temperature.
Images and diagrams
- The parts diagram on page 7 identifies 27 components, including burners, knobs, and electrical terminals.
Model compatibility
- For commercial use only.
- Must be installed in a non-combustible location.
- Requires a properly grounded three-prong receptacle.

Manual page author
David Miller
Documentation analyst
Organizes user manual content into clear summaries, with attention to model details, product context, and everyday usability.