Home Appliances / Commercial Kitchen Equipment
User Manual for Avantco Heater/Proofer Cabinets
Comprehensive user guide for Avantco Heater/Proofer Cabinets. Includes installation, operating instructions for heating and proofing modes, maintenance, troubleshooting, and parts diagrams.
Quick answers from the manual
Quick answer
- These cabinets are designed to hold hot food at a constant temperature and/or supply humidity for proofing. They are not cooking appliances and should not be used to cook or re-thermalize food. p. 3
Key actions
- To operate in Heating/Holding mode, set the switch to HEAT, pre-heat on setting 9, then adjust to desired temperature. p. 5
- To operate in Proofing mode, fill the water pan, set the switch to PROOF, set temperature to 2, and humidity to 9. p. 5
First start
- Plug into a dedicated 120V outlet and run the unit for at least 1 hour at maximum setting 9 to burn in the elements. p. 4
Problems and fixes
Unit fails to start
Check power cord, circuit breaker, and inspect drawer for loose wires or burnt components.
p. 20Maintenance and reset
- Clean the interior/exterior with mild detergent; clean the door panel with polycarbonate-safe cleaner. p. 4
Technical specifications
| Parameter | Value | Meaning | Pages |
|---|---|---|---|
| Voltage | 120V | Electrical requirement | p. 3 |
| Wattage | 1440W | Power consumption | p. 3 |
Where to find it in the PDF
- Operating Instructions p. 5
- Troubleshooting p. 20
Table of contents
Manual images
Click an image to enlargeQuick Guide from the Manual
This manual covers the operation and maintenance of Avantco Heater/Proofer Cabinets. These units are designed for hot food holding and proofing applications only and are not cooking appliances. Always pre-heat the cabinet before placing food inside.
Installation
Upon delivery, inspect the unit for shipping damage. Place the cabinet on stable ground and lock the casters. Remove all packaging and protective film from the unit. Plug the cabinet into a dedicated, grounded 120V 15 or 20 Amp outlet. Before first use, run the unit for at least 1 hour at maximum setting (9) to burn in the elements and remove manufacturing odors.
Operating Instructions
Heating/Holding Mode:
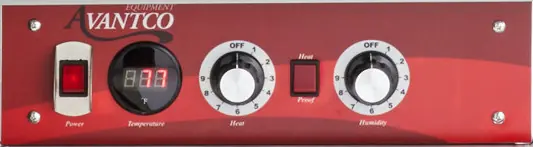
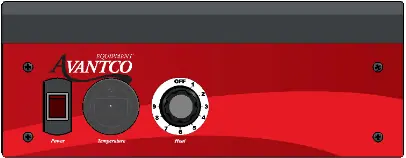
- Set the HEAT/PROOF switch to HEAT.
- Turn the power switch to ON.
- Set the TEMPERATURE control to 9 to pre-heat.
- Typical heat-up time to 160°F is approximately 45 minutes.
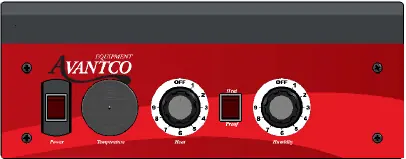
- Adjust the TEMPERATURE control as needed (setting 6-8 is typical for 150°F-160°F).
- Adjust HUMIDITY control to the desired level if moisture is required.
Proofing Mode:
- Fill the water pan to 1/2 from the top with clean HOT tap water.
- Set the HEAT/PROOF switch to PROOF.
- Turn the power switch to ON.
- Set the TEMPERATURE control to 2.
- Set the HUMIDITY control to 9.
- Pre-heat until the desired temperature and humidity are reached (approx. 30 minutes).
Care & Maintenance
Cleaning:
- Always unplug the unit and allow it to cool completely before cleaning.
- Do not use water jets or high-pressure water.
- Remove the heated control drawer module by lifting the front to clear the detent and pulling it away.
- Wipe interior and exterior surfaces with a mild detergent and clean cloth.
- Clean the polycarbonate door panel with a cleaner recommended for polycarbonate plastics; avoid synthetic cloths that may scratch the surface.
Troubleshooting
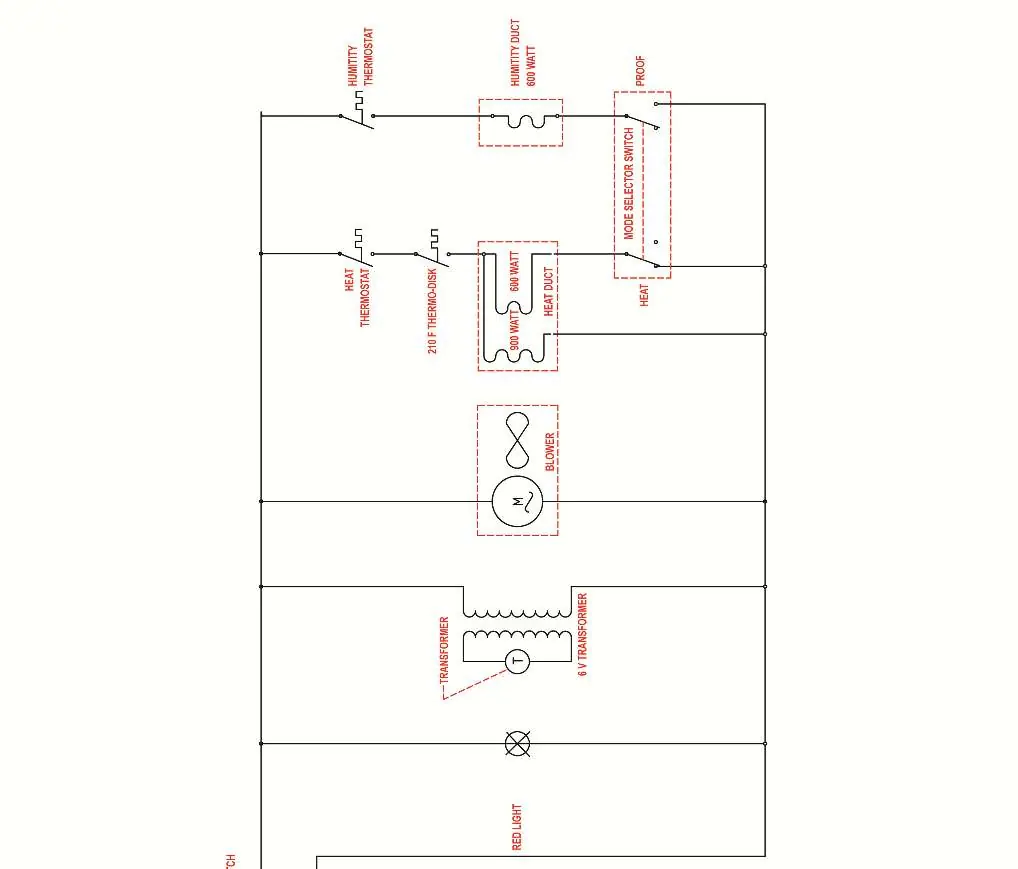
If the unit fails to start, check the power cord connection and the wall outlet circuit breaker. If the unit still does not operate, inspect the heat drawer for loose or disconnected wires, burnt marks on components, or loose heating elements. If the LED thermometer does not read a constant temperature, it must be replaced along with the power supply transformer.
Manufacturer information
Avantco Equipment
Practical help
Common problems
Unit fails to start
Check power cord connection and wall outlet circuit breaker. Inspect drawer for loose wires or burnt components.
Temperature not constant on LED display
Replace the LED thermometer and the power supply transformer.
Heating element loose or broken
If the element is loose or broken from mounting tabs, it must be replaced along with the main power switch.
Before use
- Check for shipping damage upon delivery.
- Place on stable ground and lock casters.
- Remove all tape, packing material, and protective film.
- Plug into a dedicated, grounded 120V 15 or 20 Amp outlet.
- Run the unit for at least 1 hour at maximum setting to burn in elements.
Specs in practice
- Temperature Range
- 80-185°F (Dial settings 1-9 are not calibrated to specific temperatures).
- Humidity Range
- 30-100% (Dial settings 1-9 are not calibrated to specific percentages).
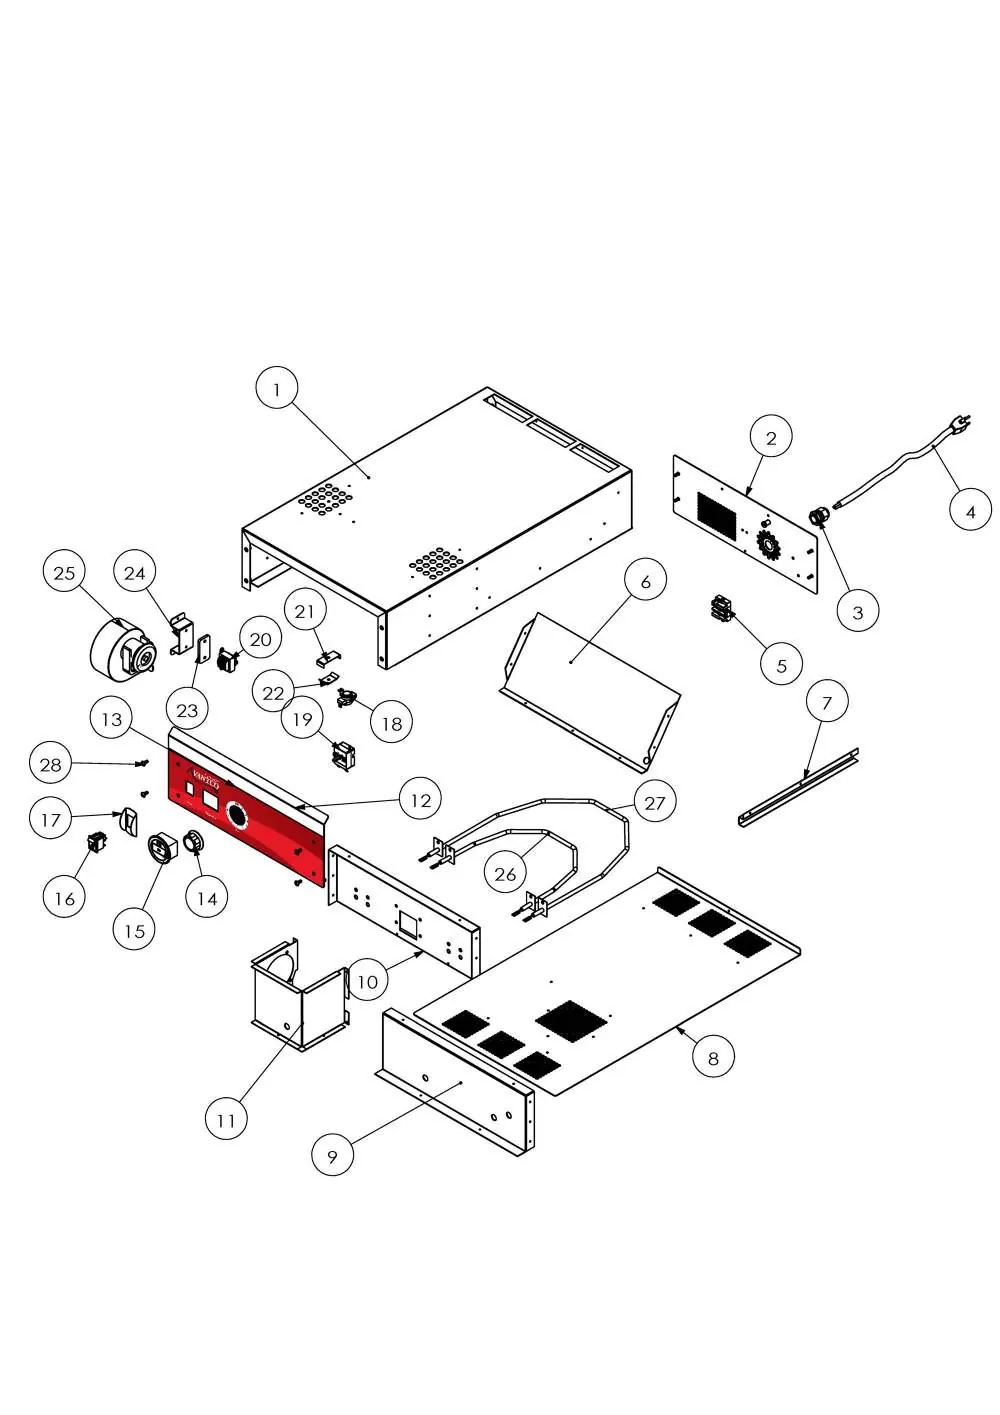
Images and diagrams
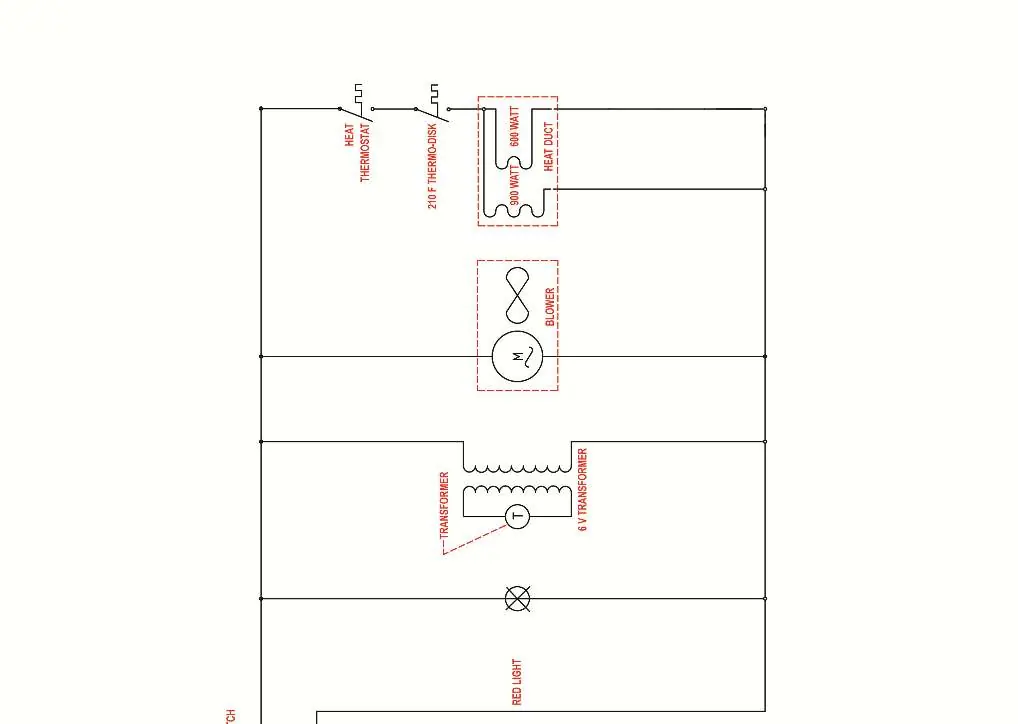
- Drawer assembly diagrams show the location of electrical components like the thermostat, heating elements, and switches.
- Cabinet assembly diagrams illustrate the structural components, including panels, hinges, and casters.
Model compatibility
- Indoor use only.
- Not a cooking appliance; do not use for re-thermalizing food.
- Use only cleaning agents approved for aluminum.

Manual page author
Emily Carter
User documentation editor
Prepares concise manual descriptions and highlights the most useful setup, operation, and maintenance information for readers.