Home Appliances / Coffee Equipment
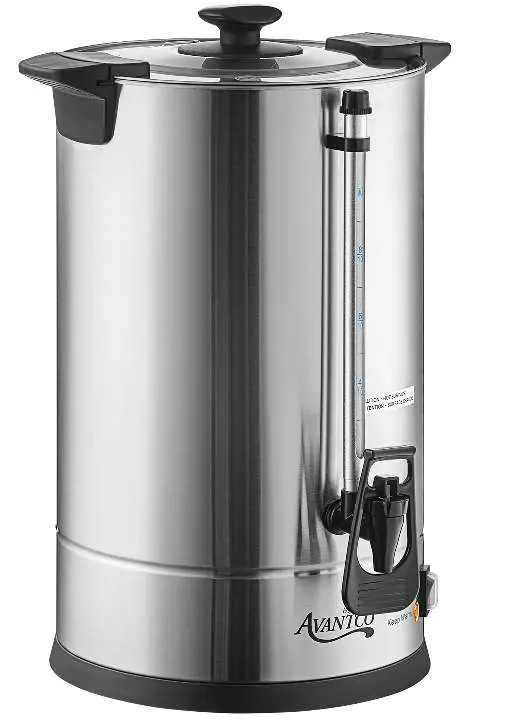
User Manual for Avantco Stainless Steel Coffee Urns 177CU45ETL, 177CU65ETL, 177CU100ETL
Quick guide for Avantco Stainless Steel Coffee Urns. Includes setup, coffee measuring, cleaning, maintenance, and safety instructions for models 177CU45ETL, 177CU65ETL, and 177CU100ETL.
Quick answers from the manual
Quick answer
- The Avantco coffee urn is designed for brewing coffee. Always use a grounded 120V outlet, ensure water is between MIN and MAX levels, and never operate without at least 3 cups of water. p. 3, 5
Key actions
- Boil and discard water before first use. p. 5
- Ensure water level is between MIN and MAX. p. 5
First start
- Remove packaging, fill with water, boil, and discard. p. 5
Problems and fixes
Coffee basket floods
Use medium coarse grind; avoid soft water and fine/drip grind.
p. 5Maintenance and reset
- The unit has an auto-reset thermal limiter. If it shuts off due to low water, allow it to cool for up to 8 minutes. p. 6
Technical specifications
| Parameter | Value | Meaning | Pages |
|---|---|---|---|
| 177CU45ETL Power | 950W | Power consumption | p. 4 |
| 177CU65ETL Power | 1500W | Power consumption | p. 4 |
| 177CU100ETL Power | 1500W | Power consumption | p. 4 |
Where to find it in the PDF
- Safety Information p. 3
- Specifications p. 4
- How to Use p. 5
- Cleaning and Maintenance p. 6
Table of contents
Manual images
Click an image to enlargeQuick guide from the manual
This document provides essential operating and maintenance instructions for Avantco Stainless Steel Coffee Urns. Before first use, remove all packaging, fill the urn with water, boil, and discard the water to clear any residue. Always operate on a flat, stable surface and ensure the unit is plugged into a grounded 120V AC socket. Never operate the machine without at least 3 cups of water in the tank.
Specifications
- 177CU45ETL: 950W, 120V/60Hz, 45 cups (225 oz.) capacity.
- 177CU65ETL: 1500W, 120V/60Hz, 65 cups (325 oz.) capacity.
- 177CU100ETL: 1500W, 120V/60Hz, 100 cups (500 oz.) capacity.
Coffee Measuring Guide
For best results, use regular electric perk grind coffee. Avoid drip or finely ground coffee as it may cause the basket to flood. Grind beans to a medium coarseness.
- 12-15 cups: 3/4 cup grounds
- 20-25 cups: 1 1/2 cups grounds
- 30-36 cups: 2 cups grounds
- 40-45 cups: 2 1/2 cups grounds
- 50-55 cups: 3 1/4 cups grounds
- 60-65 cups: 3 3/4 cups grounds
- 80-85 cups: 5 1/2 cups grounds
- 95-100 cups: 6 1/4 cups grounds
How to Use
- Place the urn on a flat, level surface.
- Turn the lid counter-clockwise to open.
- Pour in water, ensuring it is between the MIN and MAX indicators.
- Secure the lid by turning it clockwise.
- Plug in the urn.
- For brewing, insert the percolator tube and filter basket, then add coffee grounds to the basket.
- Switch the unit ON. The HEATING light will indicate the process has begun.
- Tilt the faucet lever to dispense coffee.
Cleaning and Maintenance
Always unplug the unit and allow it to cool before cleaning. Never immerse the urn in water.
- Interior: Add hot water, brush interior sides, and rinse until the water from the faucet runs clear.
- Components: Clean the filter unit and lid with a non-abrasive detergent.
- Faucet: Clean with a bottle brush and wash with warm, soapy water.
- Exterior: Wipe with a soft cloth. Do not use benzene, thinners, or harsh abrasives.
- De-scaling: If scale builds up, use a commercial de-scaling agent or a natural approach: boil water with lemon slices for 1 hour, then scrub with a nylon brush.
Boil Dry Protection
The appliance features a thermal limiter with an auto-reset function. If the water level is too low, the unit will turn off automatically. It may take up to 8 minutes to reset after cooling. To prevent damage, always turn the appliance off when not in use.
Manufacturer information
Avantco Equipment
Practical help
Common problems
Coffee basket floods
Do not use soft water, drip coffee, or finely ground coffee. Use medium coarse grind.
Urn stops heating
The boil dry protection may have triggered. Allow the unit to cool for up to 8 minutes to reset.
Before use
- Remove all packaging from inside and outside.
- Fill with water, boil, and discard to clear residue.
- Ensure the surface is flat and stable.
- Verify the power source is a grounded 120V AC socket.
- Ensure water level is between MIN and MAX indicators.
Images and diagrams
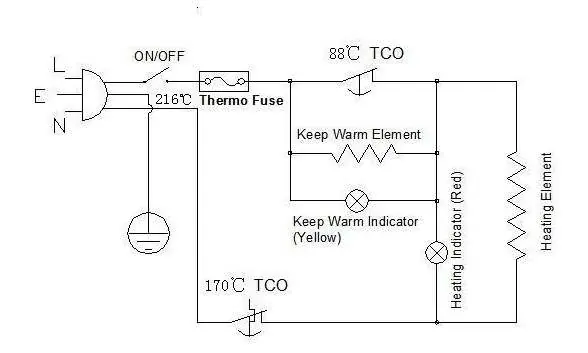
- The electrical circuit diagram illustrates the thermal fuse, thermal cut-offs (TCO), heating element, and indicator lights.
Model compatibility
- Indoor use only.
- Requires grounded 120V AC socket.

Manual page author
David Miller
Documentation analyst
Organizes user manual content into clear summaries, with attention to model details, product context, and everyday usability.