Electronics / Video Transmission
Quick Start Guide for AVPro Edge MXNet 10G SDVoE Ecosystem
A comprehensive quick start guide for the AVPro Edge MXNet 10G SDVoE ecosystem. This manual covers transceiver mode selection, cabling configurations, network switch connections, CBOX setup, and accessing the Mentor web interface for...
Table of contents
Manual images
Click an image to enlargeQuick Start Guide
The MXNet 10G SDVoE Ecosystem is an AV-over-IP platform designed for ultra-low latency 4K 60Hz 4:4:4 video, multichannel audio, and control signal distribution over 10G Ethernet infrastructure. This guide provides the essential steps to configure and connect your system components, including transceivers, network switches, and the CBOX control box.
Transceiver Setup
The transceiver units function as either an encoder (transmitter) or a decoder (receiver). You must configure the mode before installation.
- Mode Selection: Use the ENC/DEC SELECT toggle switch on the front panel. A blue LED indicates the status: LED on = Encoder mode; LED off = Decoder mode.
- Port Type Selection: Configure the ports based on your cabling infrastructure.
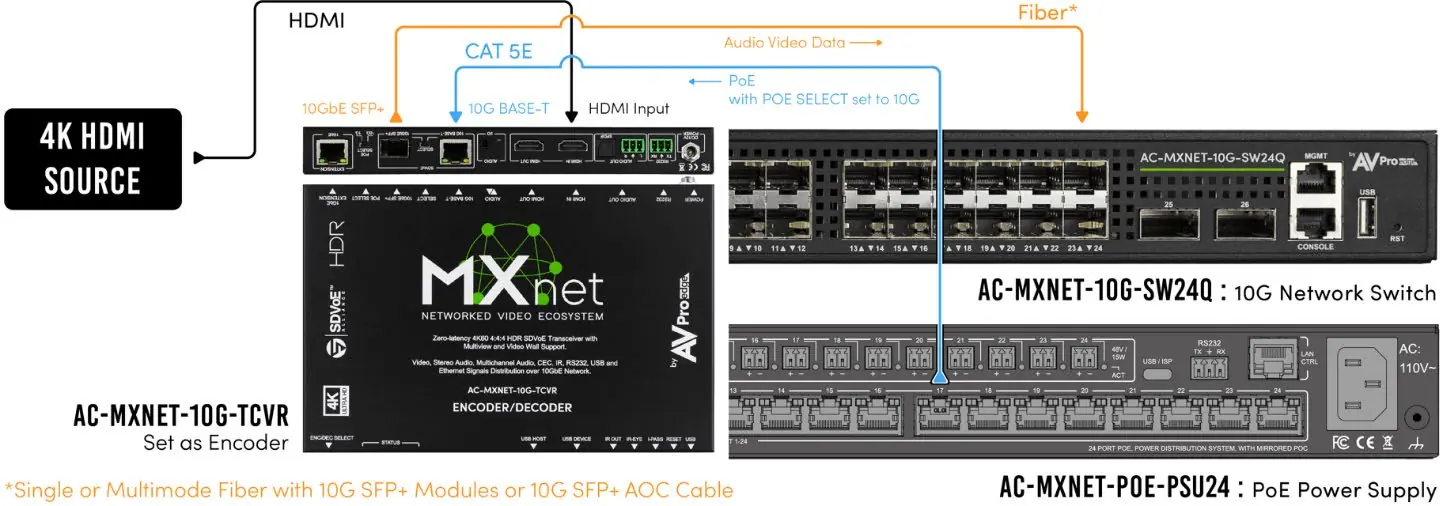
- Category Cable Connections: Set the SDVoE SELECT switch to 10G BASE-T and the POE SELECT switch to 10G.
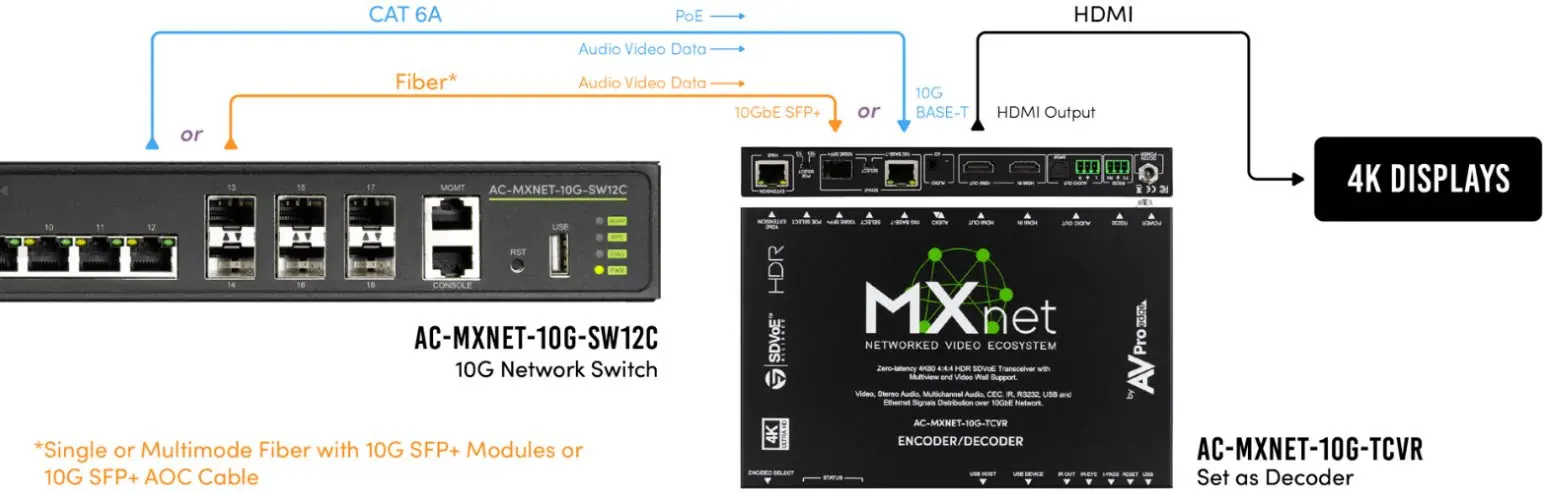
- Optical Fiber Connections: Set the SDVoE SELECT switch to 10GbE SFP+ and the POE SELECT switch to 1G.
System Connections
Proper connection is critical for system stability.
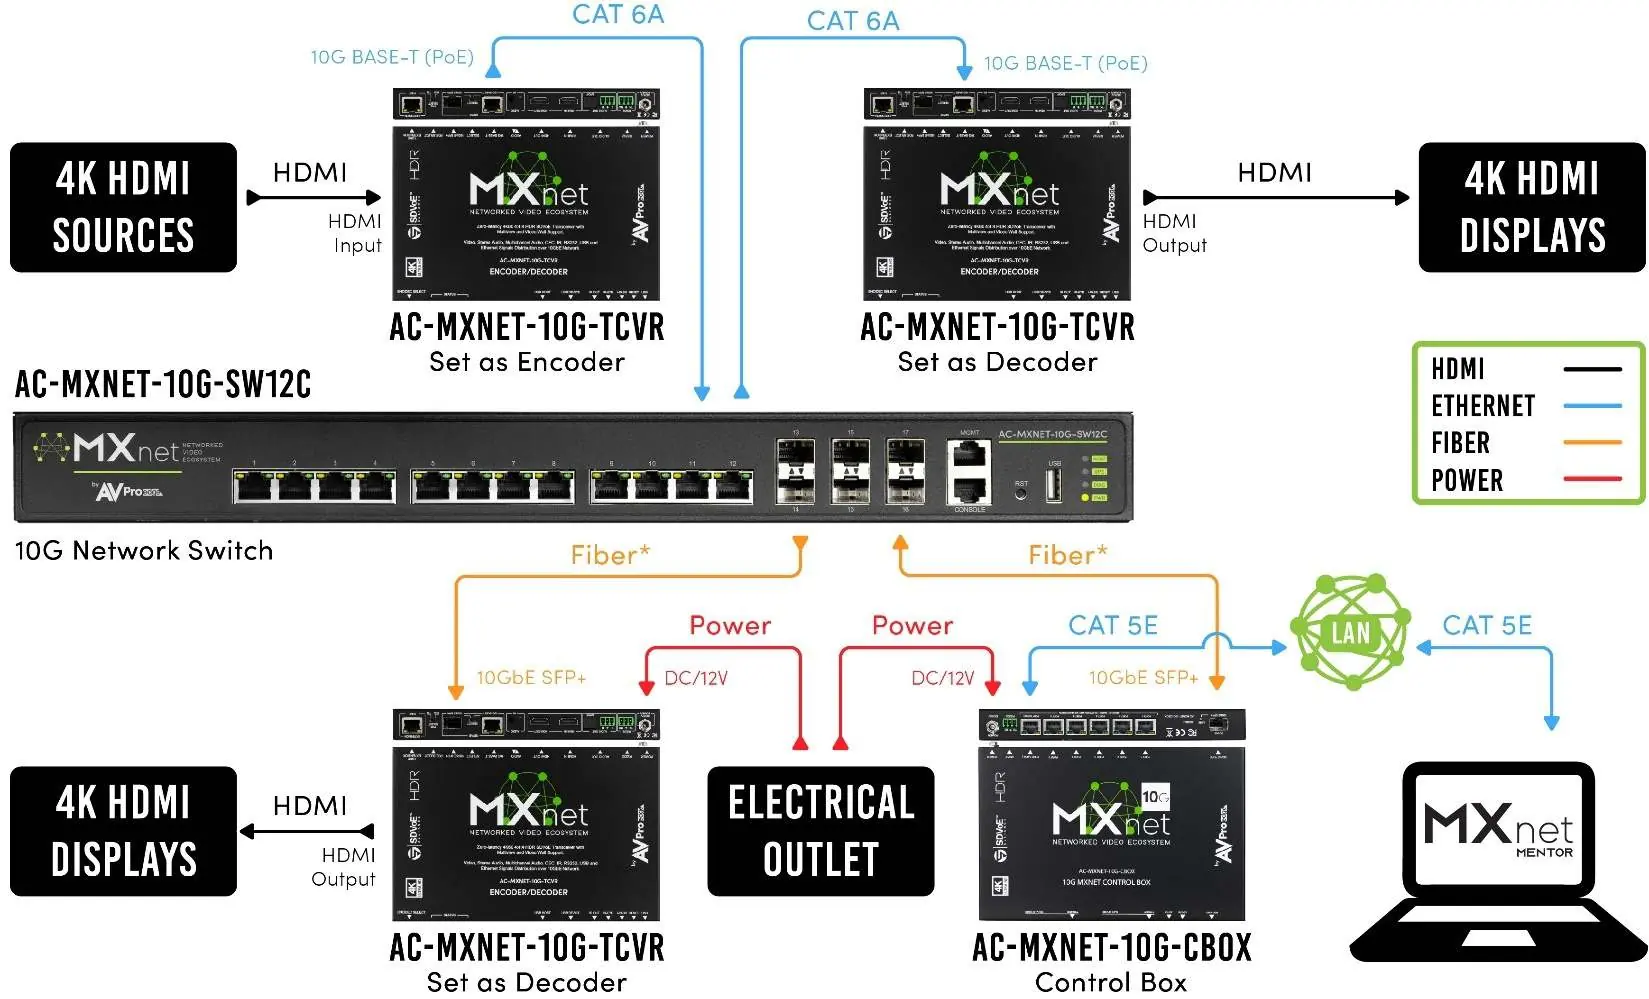
- Network Switch: Connect the transceiver's SDVoE port to a 10G Copper PoE port or 10G SFP+ port on the network switch.
- HDMI Devices: Connect HDMI sources to the HDMI IN port on encoders. Connect HDMI displays to the HDMI OUT port on decoders. Note: When in encoder mode, the HDMI OUT port functions as an HDMI Loop Out.
- CBOX Connection: Connect the CBOX SDVoE port to a 10G SFP+ port on the switch. Connect the PORT 6 (PoE) to your LAN for power and Mentor interface access. If PoE is unavailable, use the DC/12V power inlet.
Accessing the Mentor Web UI
Mentor is the proprietary HTML5-based web interface for system setup and monitoring.
- Power on all devices.
- Press the SCROLL PAGE button on the CBOX front panel to view its IP address (default is DHCP).
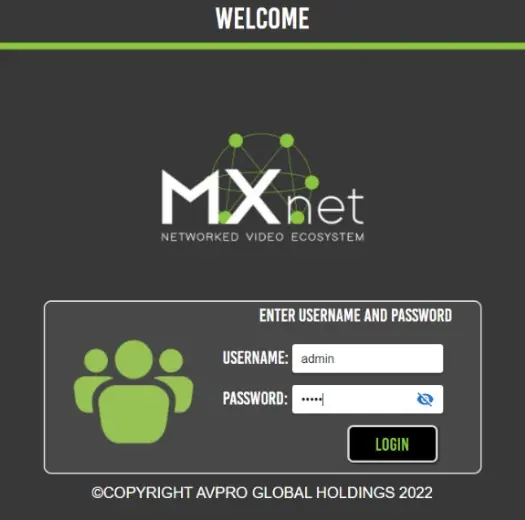
- Open a web browser and enter the CBOX IP address.
- Log in using the default credentials: Username: admin, Password: admin (all lowercase).
System Configuration
Once logged into the Mentor interface, you can manage the system:
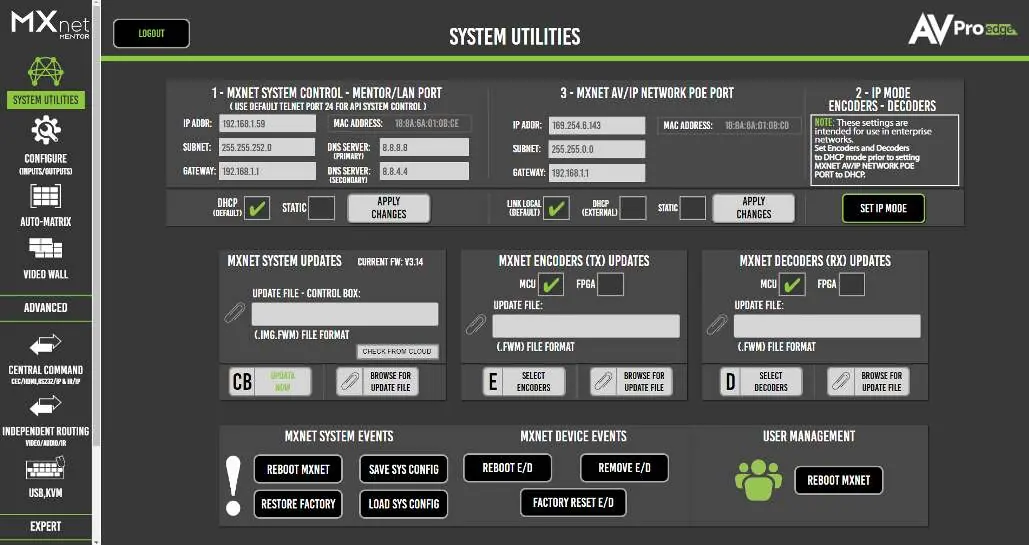
- System Utilities: View IP addresses, update firmware, reboot devices, or perform factory resets.
- Configure (Inputs & Outputs): Assign custom names, set EDID management, adjust output resolution scaling, and check signal diagnostics.
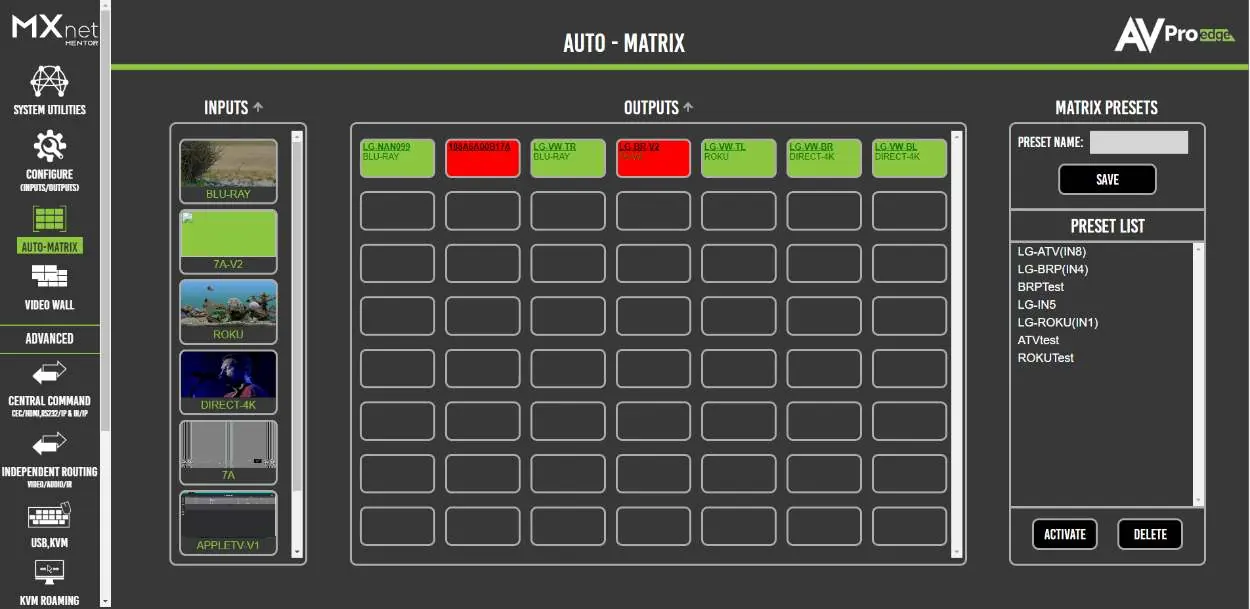
- Auto-Matrix: Switch between sources and displays, similar to an HDMI matrix switcher. You can also save and recall matrix presets.
Troubleshooting
If you encounter issues, follow these steps:
- Power Issues: Verify power connections on the network switch and check LED indicators.
- Connection Issues: Ensure cables are not tightly bundled or exceeding bend radius. For category cabling, use standard RJ-45 connectors (avoid push-through/EZ ends). For fiber, ensure SFP+ modules are 10Gb/s rated and properly seated.
- Mentor Visibility: If the device does not appear on Mentor, check the mini-OLED screen for the IP address. It should be a link-local address (169.254.x.x).
- Resolution Issues: If 4K signals fail but 1080p works, adjust the output resolution scaling on the decoder to match the display capabilities.
Practical help
Common problems
Transceiver or CBOX not powering on
Verify the power connection on the network switch and check the LED indicator lights for each device.
Video signal dropouts or poor connection
Check that all cables are properly connected and not tightly bundled. Re-terminate category cables with standard RJ-45 connectors or re-terminate fiber ends.
Encoder/Decoder not showing on Mentor
Check the mini-OLED screen on the transceiver front panel to verify the IP address. It should be a link-local address (169.254.x.x).
4K signals failing while 1080p works
Adjust the output resolution scaling on the decoder to a lower resolution (e.g., 1080p) to match the display's capabilities.
Before use
- Ensure the network switch is 10G capable.
- Verify all cables (Cat6a or fiber) are properly terminated.
- Confirm SFP+ modules are specifically designed for 10Gb/s.
- Set the transceiver mode (Encoder/Decoder) using the toggle switch.
- Configure the SDVoE and PoE toggle switches based on your cabling type.
Images and diagrams
- System Overview: Illustrates the connection path between 4K sources, encoders, the 10G network switch, decoders, and displays.
- Transceiver Rear Panel: Identifies the location of power, RS232, audio, HDMI, and network ports.
- Mentor Home Screen: Shows the System Utilities page for firmware updates and device management.
Model compatibility
- Cat6a or better is recommended for copper installations.
- If using a third-party network switch, verify IGMP settings, MTU size, PoE budget, and EEE functionality.

Manual page author
David Miller
Documentation analyst
Organizes user manual content into clear summaries, with attention to model details, product context, and everyday usability.