Lighting / Stage Lighting
User Manual for AVSL DuplexBar 151.614UK LED Wall Bar
Quick guide for the AVSL DuplexBar 151.614UK LED wall bar. Learn how to set up, configure DMX modes, adjust settings, and troubleshoot common issues.
Table of contents
Quick Guide
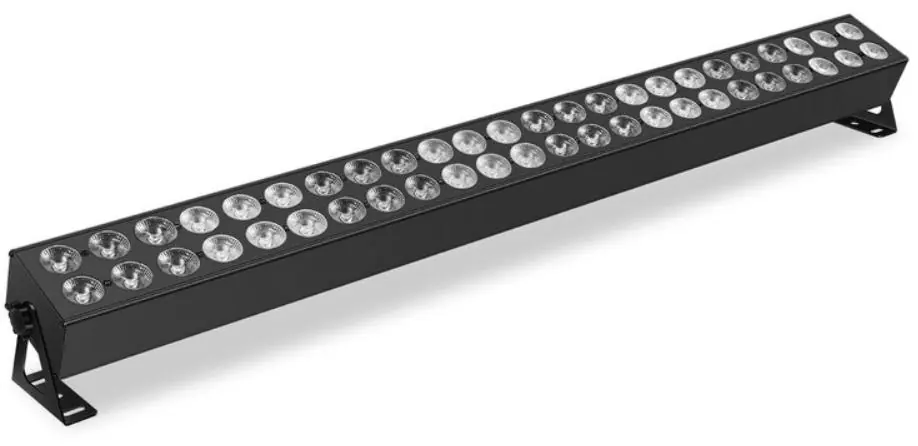
The AVSL DuplexBar is a 48 x 3W Double LED Wall Bar designed for colour washes and moving patterns. It features multiple control modes including Auto, Sound, Manual, and DMX. The unit is supplied with tilt-adjustable brackets for wall or ceiling mounting.
In the box: 1 x main unit, 2 x fixing brackets with thumbscrews, 1 x UK mains lead, and 1 x user guide.
Placement and Safety
- Use the included mounting brackets to fix the unit to a stand or lighting truss.
- If mounting overhead, always use secondary safety fixings.
- Ensure adequate airflow around the fixture housings to prevent overheating.
- Keep the unit away from damp or dusty environments.
- Do not aim the LED output directly into the line of sight to avoid eye injury.
- Do not open the cover; the unit contains high voltage and is not user-serviceable.
Rear Panel Controls
The rear panel features the following components:
- Internal microphone
- Control panel (Menu, Up, Down, Enter buttons)
- LED display
- DMX input and output (3-pin XLR)
- Power input and output (IEC)
- Earth screw (do not remove)
Operation and Menu
Use the MENU button to enter the settings menu, UP and DOWN to navigate, and ENTER to confirm selections.
Operating Modes
- Auto Mode: Features adjustable speed (Sp 1-10) and strobe (St 0-9).
- DMX Mode: Allows control via DMX console. Select A001 and confirm the start address. The unit supports 4, 6, 9, 32, or 36 channel modes.
- Show Mode: Runs preset programs (Sh 1-54) with adjustable speed and strobe.
- Sound Mode: Features 2 sound control modes with adjustable sensitivity (Sen 1-9).
- Slave Mode: Automatically identifies the master unit.
- Static Colours: Select from 41 static colours (CL01-CL41).
DMX Operation
To control via DMX, connect the signal source to the DMX input using a balanced XLR lead. You can daisy-chain extra fixtures using the DMX output. When the unit receives a DMX signal, the 'A' on the LED display will flash. Ensure the correct start address and channel mode are selected.
Maintenance and Troubleshooting
Clean the casing as required using a soft cloth and a neutral detergent. Do not use strong solvents.
Troubleshooting:
- No power: Check that the mains voltage is correct, the outlet is switched on, and the IEC power lead is connected properly.
- No light output: Check control panel mode settings and DMX controller settings (dimmer levels, blackout).
- Unresponsive to DMX: Ensure the unit is in DMX mode, the 'A' on the display is flashing, the controller is not set to blackout, the correct fixture/page is selected, and the master dimmer is up. Check DMX connections and leads.
- Overheating/Cutting out: Ensure adequate ventilation and that the unit is not placed too close to a heat source.
Practical help
Common problems
No power
Check mains voltage, ensure outlet is switched on, and verify the IEC power lead is connected properly.
No light output
Check control panel mode settings and verify DMX controller settings (dimmer levels, blackout).
Unresponsive to DMX
Ensure unit is in DMX mode, 'A' on display is flashing, controller is not in blackout, correct fixture/page is selected, and DMX cables are secure.
Overheating/Cutting out
Ensure adequate ventilation around the unit and move away from heat sources.
Before use
- Verify contents: 1 main unit, 2 brackets with thumbscrews, 1 UK mains lead.
- Ensure adequate airflow around the fixture.
- Use secondary safety fixings if mounting overhead.
- Do not expose to rain or damp environments.
- Do not aim LED output directly into eyes.
Specs in practice
- Power supply
- 110-240Vac, 50/60Hz
- Power consumption
- 120W
- DMX channels
- 4, 6, 9, 32, or 36 channels
Images and diagrams
- Rear panel includes: 1. Internal microphone, 2. Control panel, 3. LED display, 4. DMX input, 5. DMX output, 6. Power input (IEC), 7. Earth screw, 8. Power output (IEC).
Model compatibility
- Compatible with DMX512 controllers.
- Supports Master/Slave operation.

Manual page author
David Miller
Documentation analyst
Organizes user manual content into clear summaries, with attention to model details, product context, and everyday usability.