Computers / Cooling Systems
User Manual for AZZA Forest ATX Mid Tower Case
Quick guide for the AZZA Forest (CSAZ-370) ATX mid-tower case. Includes installation steps for HDD/SSD, cooling systems, fans, and RGB lighting control.
Quick answers from the manual
Quick answer
- The AZZA Forest (CSAZ-370) is an ATX mid-tower case. It supports up to 360mm front radiators, 160mm CPU coolers, and 330mm video cards. p. 3
Key actions
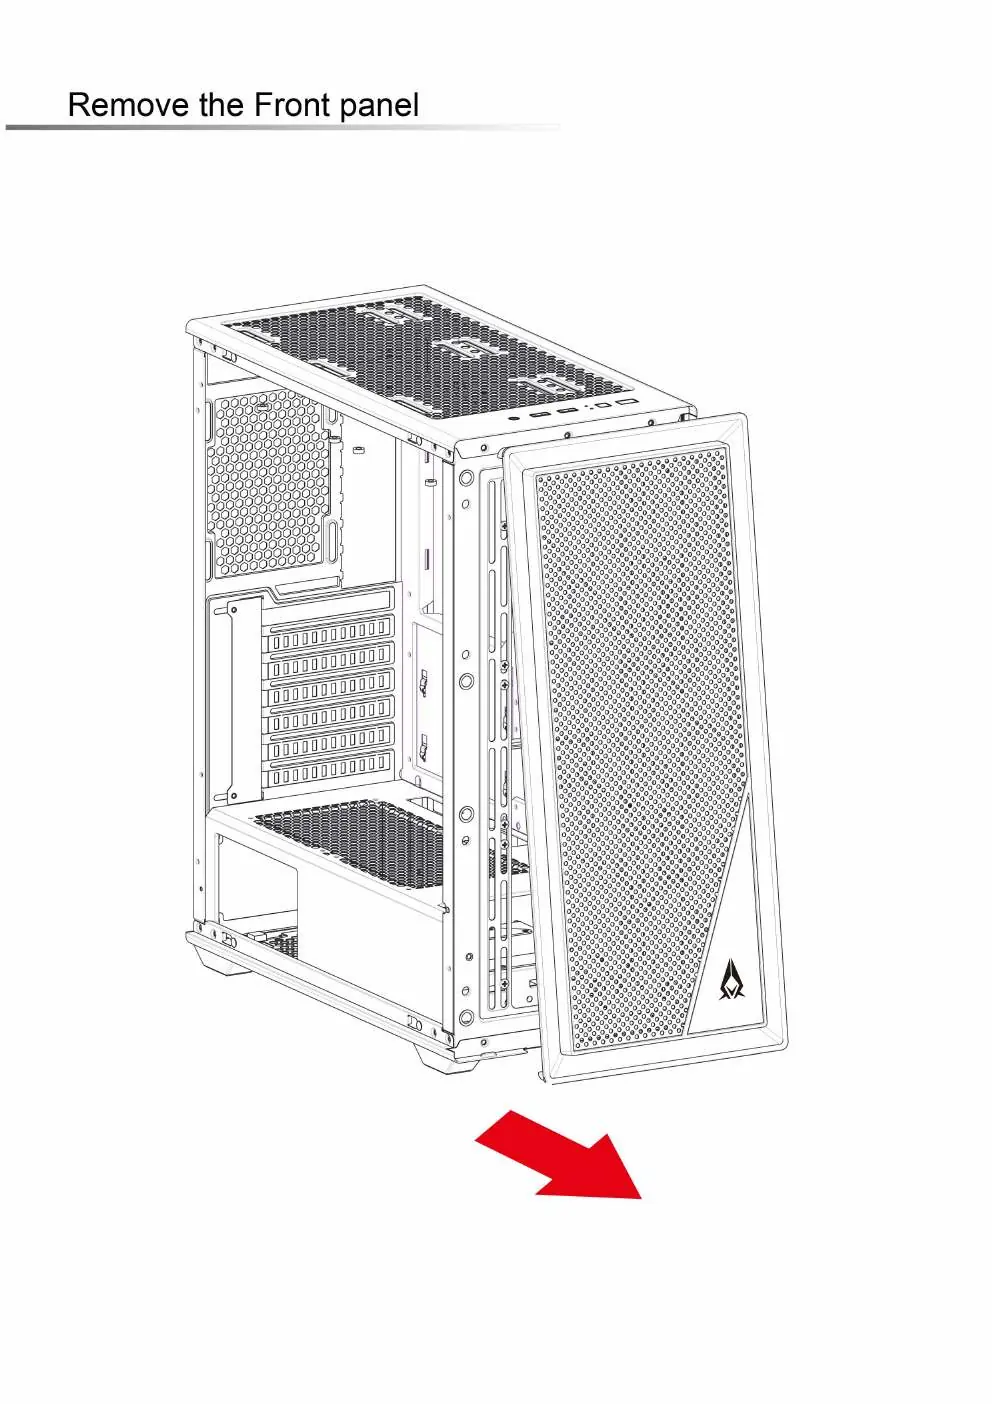
- Remove front panel p. 7
- Switch RGB modes p. 13, 14
Problems and fixes
RGB lighting control
Press LED button to cycle modes; hold 2 seconds to sync with motherboard; hold 6 seconds to turn off.
p. 14Show 2 more answers Show less
Technical specifications
| Parameter | Value | Meaning | Pages |
|---|---|---|---|
| Max CPU Cooler Height | 160mm | Maximum height for CPU air coolers. | p. 3 |
| Max Video Card Length | 330mm | Maximum length for GPU. | p. 3 |
Where to find it in the PDF
- Specifications p. 3
- Installation p. 6, 7, 8, 9
Table of contents
Manual images
Click an image to enlargeQuick guide from the manual
The AZZA Forest (CSAZ-370) is an ATX mid-tower computer case. This manual provides instructions for installing storage drives, cooling systems, and configuring the integrated RGB lighting. Ensure your components fit within the specified dimensions (Max CPU Cooler Height: 160mm, Max Video Card Length: 330mm) before beginning assembly.
Specifications
- Type: ATX Mid Tower
- Motherboard Compatibility: ATX, Micro ATX, ITX
- Max CPU Cooler Height: 160mm
- Max Video Card Length: 330mm
- Drive Bays: Up to 4 x 2.5" SSD, Up to 2 x 3.5" HDD
- Expansion Slots: 7
- Top Ports: Power button, LED button, Combo HD Audio, USB 3.0 x 2
Chassis Parts
The chassis includes the following main components:
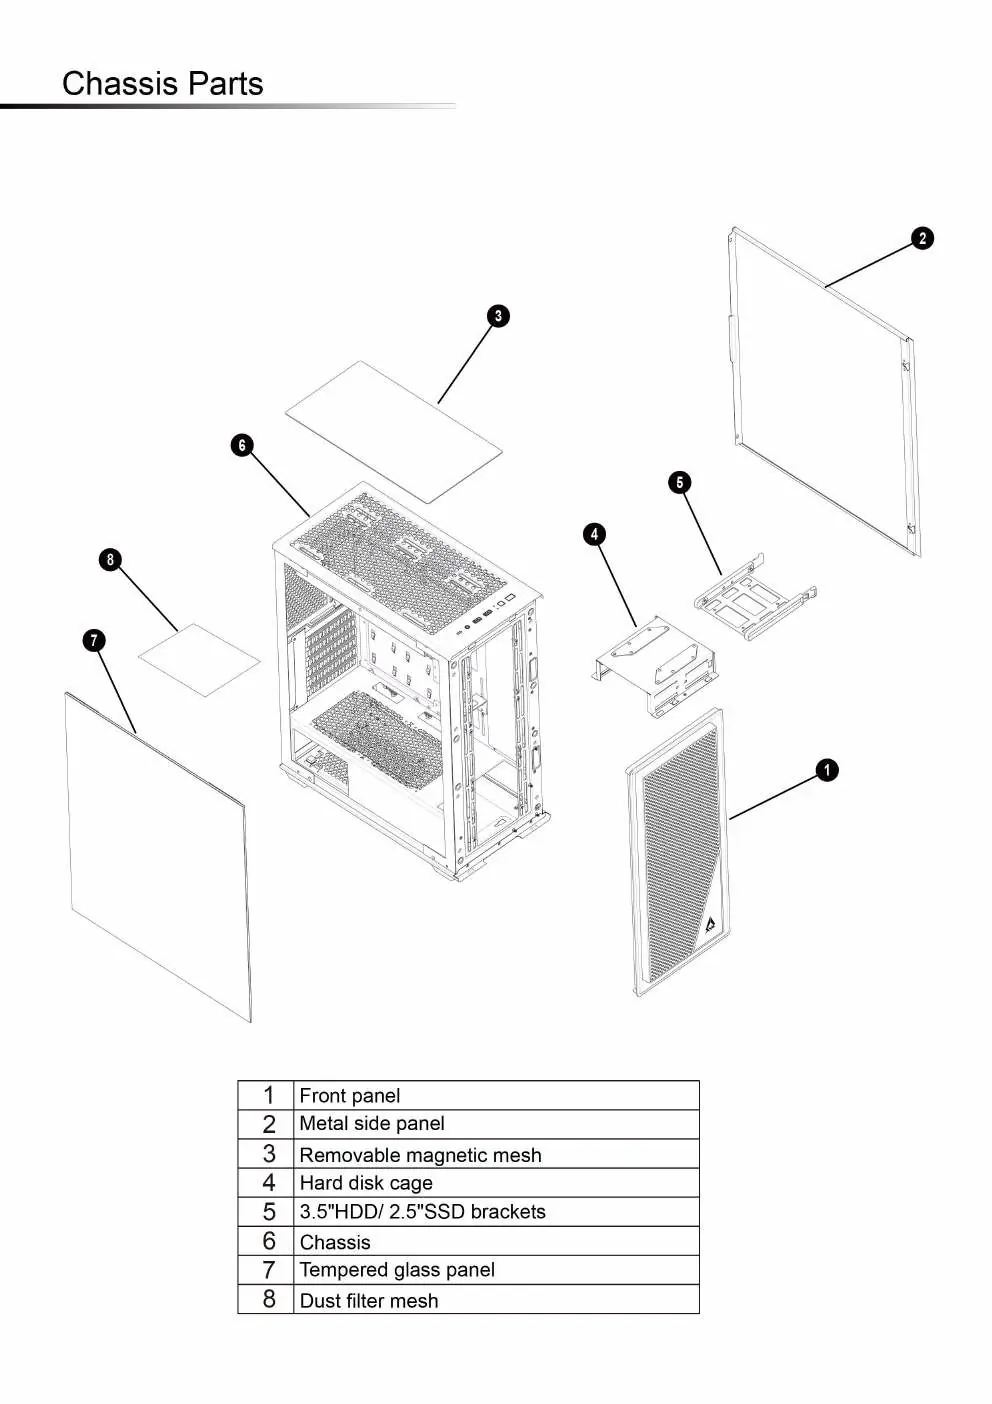
- Front panel
- Metal side panel
- Removable magnetic mesh
- Hard disk cage
- 3.5" HDD/2.5" SSD brackets
- Chassis frame
- Tempered glass panel
- Dust filter mesh
Control Panel Functions
The top control panel features the following inputs and controls:
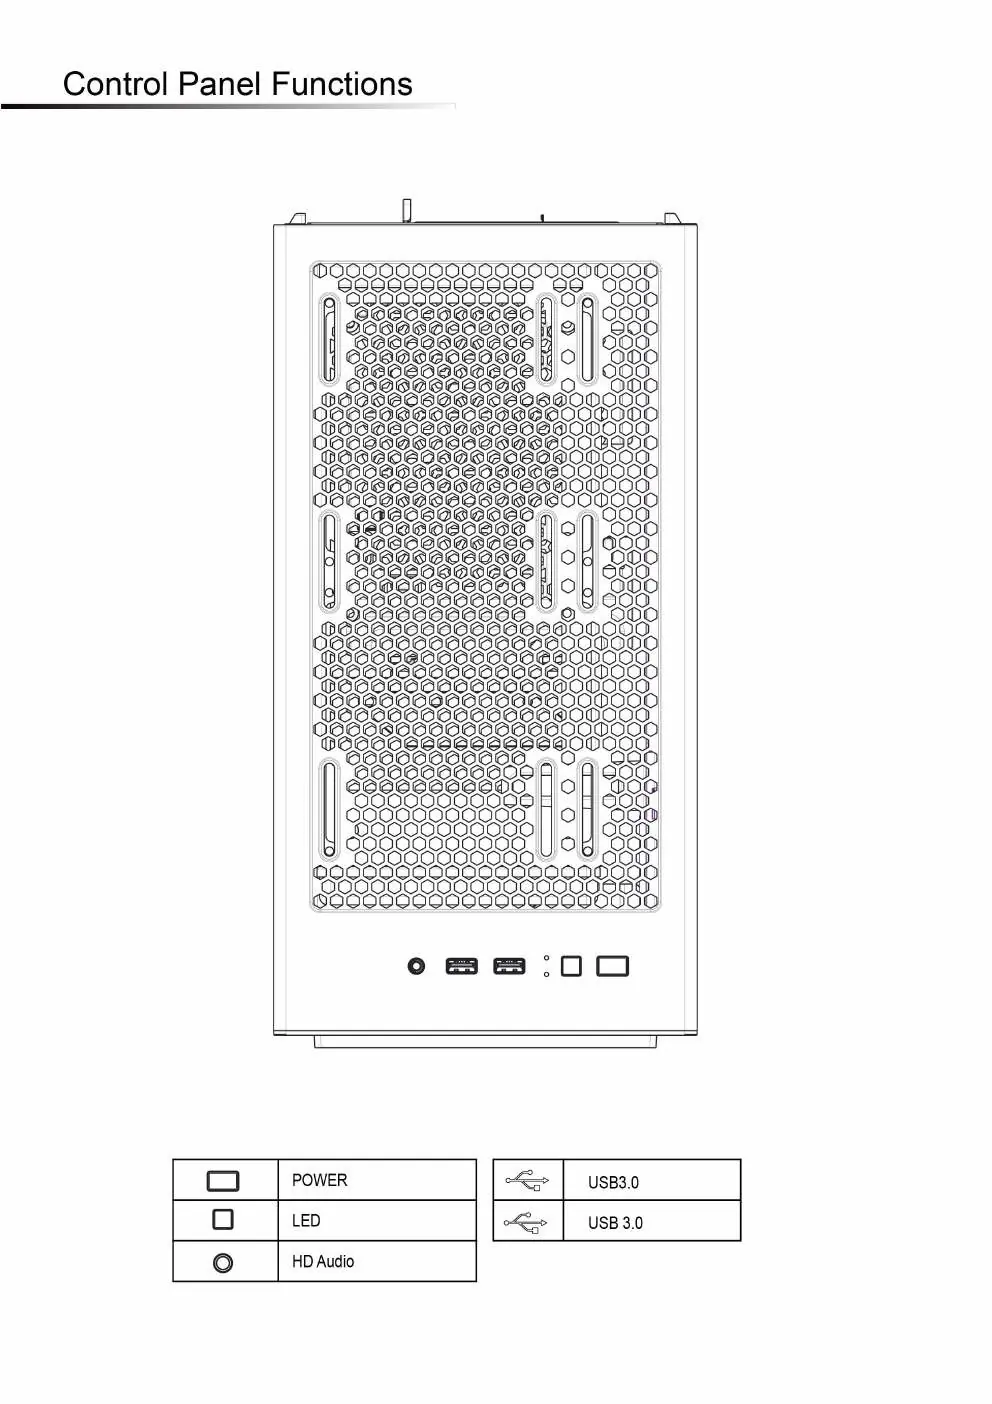
- Power Button: Turns the system on/off.
- LED Button: Cycles through RGB lighting modes.
- HD Audio: Headphone/Microphone jack.
- USB 3.0: Two ports for high-speed data transfer.
Installation
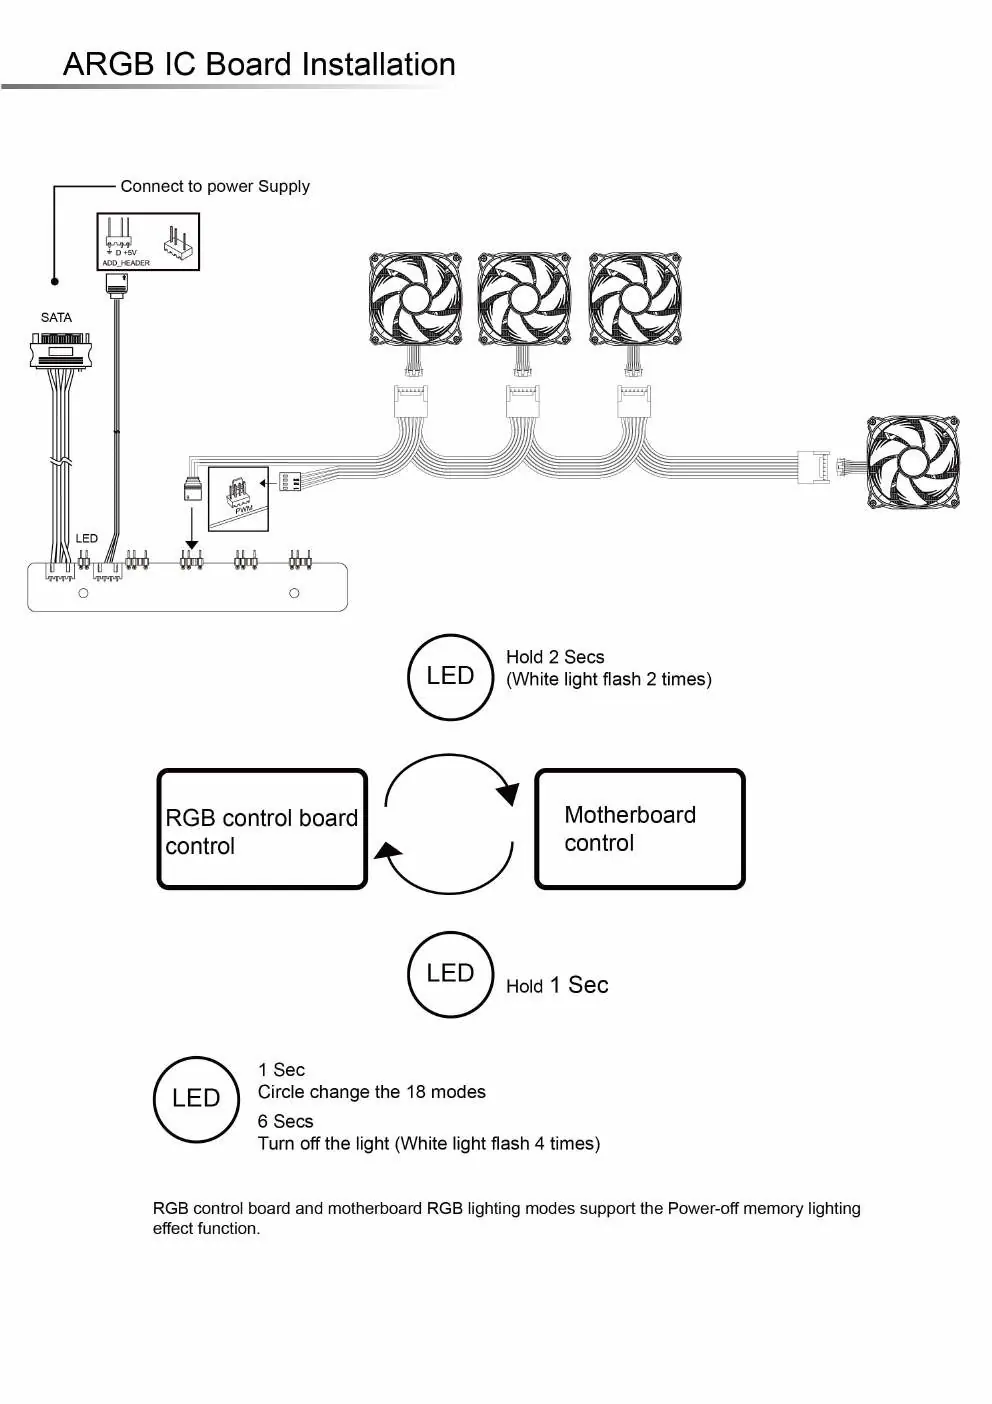
3.5"/2.5" HDD/SSD Installation
The case features a multifunctional hard disk bracket and cage. The bracket supports 1 x 3.5" HDD or 1 x 2.5" SSD. The hard disk cage also supports 1 x 3.5" HDD or 1 x 2.5" SSD. Additionally, there is a dedicated 2.5" SSD metal tray that supports 2 x 2.5" SSDs.
Remove the Front Panel
To access the front fan mounts or clean the dust filter, pull the front panel outward from the bottom of the chassis.
Cooling System Installation
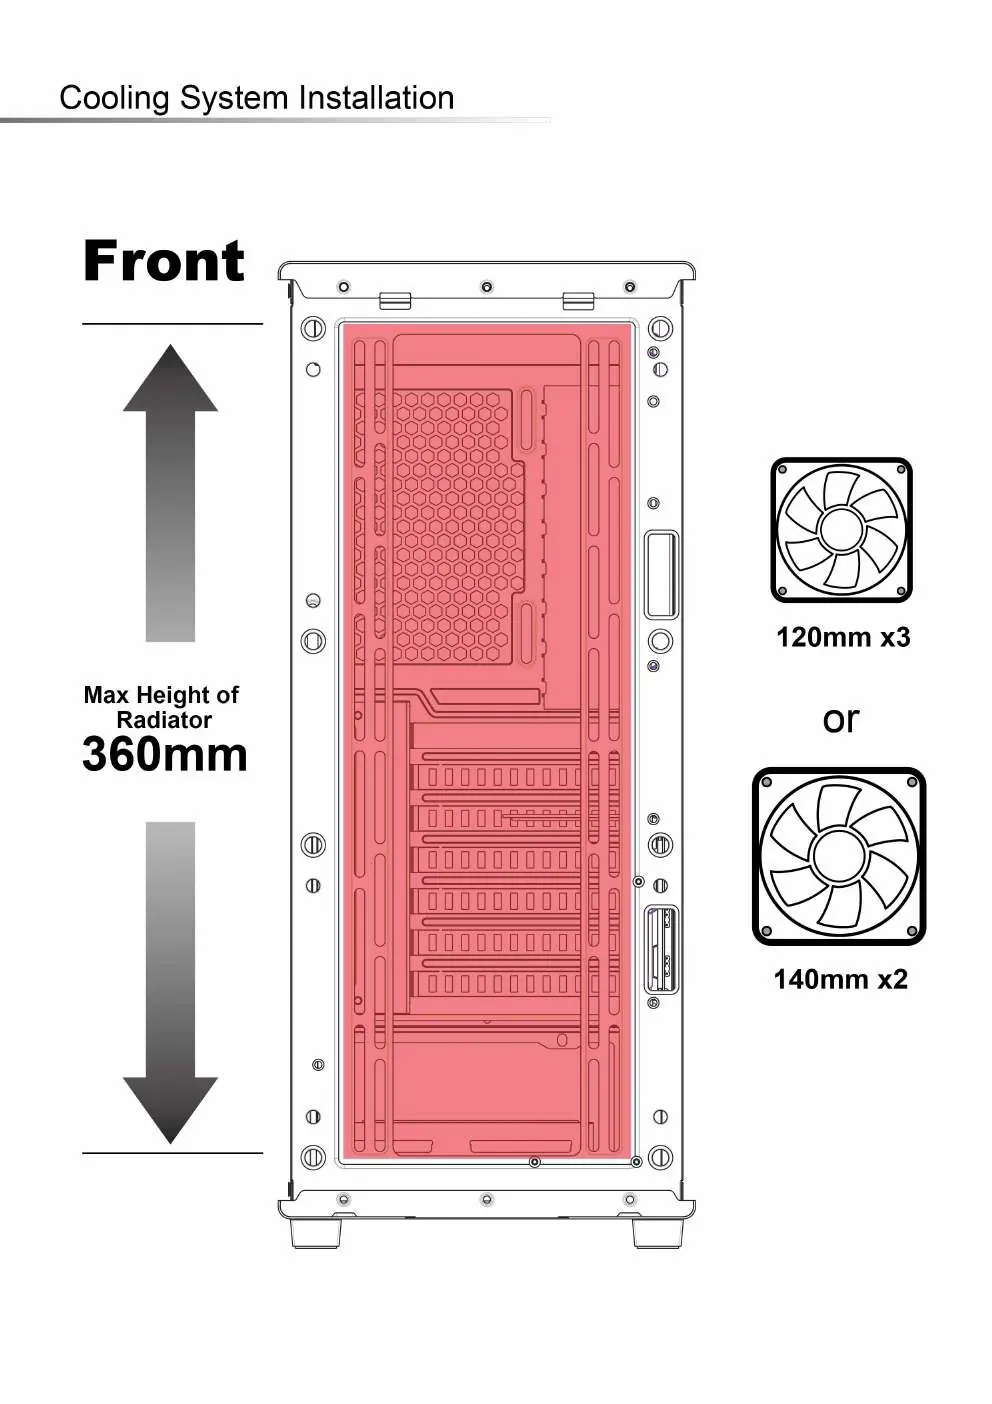
Front
Supports up to 3 x 120mm or 2 x 140mm fans. Radiator support up to 360mm.
Top
Supports up to 2 x 120mm or 2 x 140mm fans. Radiator support up to 240mm or 280mm.
Rear
Supports 1 x 120mm fan.
PSU Shroud
Supports 2 x 120mm fans on the power supply shroud.
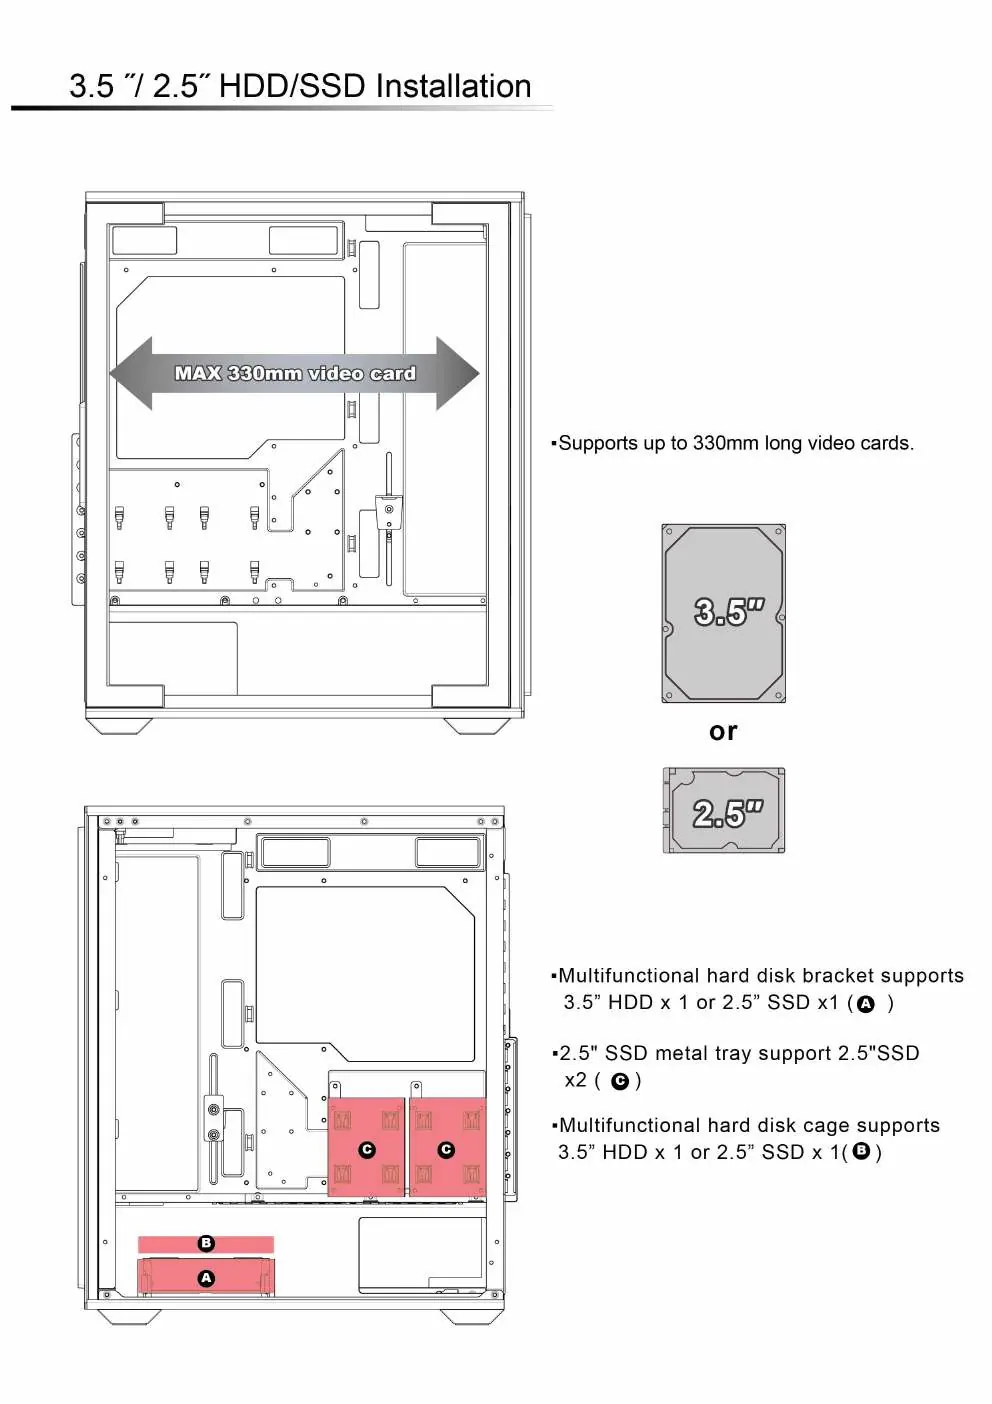
RGB Lighting Switching
The case includes an ARGB IC board. You can control the lighting using the LED button on the top panel or via motherboard software.
- Cycle Modes: Press the LED button.
- Sync with Motherboard: Hold the LED button for 2 seconds (white light will flash 2 times).
- Turn Off Light: Hold the LED button for 6 seconds (white light will flash 4 times).
The system supports power-off memory for lighting effects.
Practical help
Common problems
RGB lighting not changing or syncing
Ensure the ARGB IC board is correctly connected to the power supply (SATA) and the motherboard header. Hold the LED button for 2 seconds to switch between control modes.
Radiator does not fit
Verify the radiator size. The front supports up to 360mm, and the top supports up to 240mm or 280mm.
Before use
- Verify motherboard compatibility (ATX, Micro ATX, ITX).
- Ensure CPU cooler height is under 160mm.
- Check video card length is under 330mm.
- Confirm power supply is bottom-mounted ATX type.
Show more Show less
Specs in practice
- Max CPU Cooler Height
- Maximum vertical clearance for air coolers (160mm).
- Max Video Card Length
- Maximum horizontal clearance for graphics cards (330mm).
- Radiator Support
- Maximum size of liquid cooling radiators supported in specific locations.
Images and diagrams
- Front panel removal: Pull the panel outward from the bottom.
- RGB control: Press the LED button to cycle modes; hold for 2 seconds to sync with motherboard.
Model compatibility
- Supports ATX, Micro ATX, and ITX motherboards.
- Supports up to 360mm radiators in the front.
- Supports up to 280mm radiators on the top.

Manual page author
Michael Turner
Technical manual editor