Furniture / Storage Cabinets
Assembly and Care Guide for Belleze Hazel 5 Tier Wood Bookshelf 014-HG-44805
Complete assembly and maintenance guide for the Belleze Hazel 5 Tier Wood Bookshelf (014-HG-44805). Includes step-by-step installation, safety warnings, and care instructions.
Table of contents
Manual images
Jump to the sectionQuick guide from the manual
The Belleze Hazel 5 Tier Bookshelf requires approximately 30 minutes for assembly. It is essential to have two people for the assembly process to ensure safety and ease of construction. The unit has a weight limitation of 60 lbs per shelf. Always assemble the furniture on a flat surface, such as a carpet or rug, to prevent scratches. The unit must be permanently fixed to a wall stud using the included anti-tipping device to prevent serious injury.
Package contents
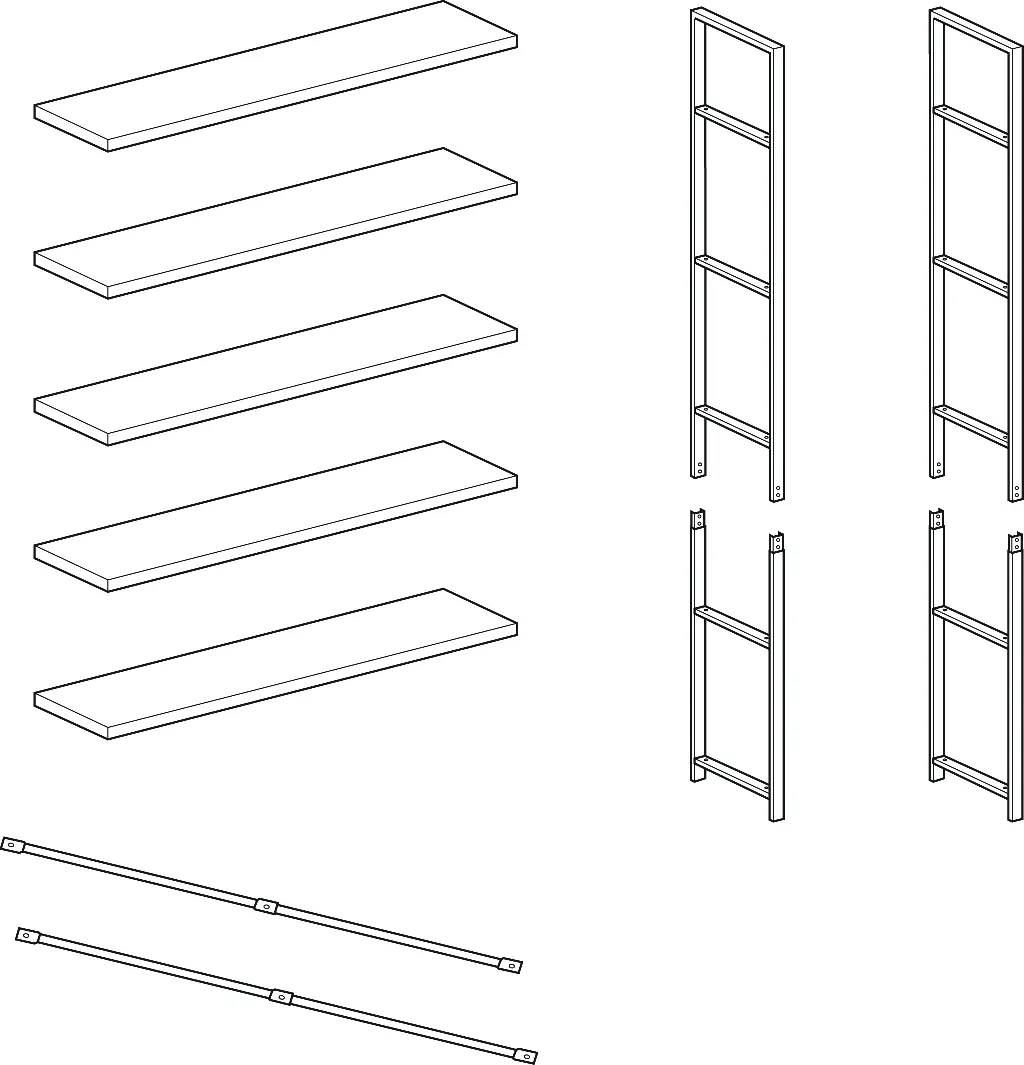
Before beginning assembly, ensure all components are present and undamaged:
- 5 Storage Panels
- 2 Upper Leg Frames
- 2 Lower Leg Frames
- 2 Crossbars
- Hardware kit including various bolts (M6x12, M6x15, M6x25), nuts, leg levelers, wall anchors, and anti-tipping straps.
Assembly instructions
Follow these steps to assemble your bookshelf:
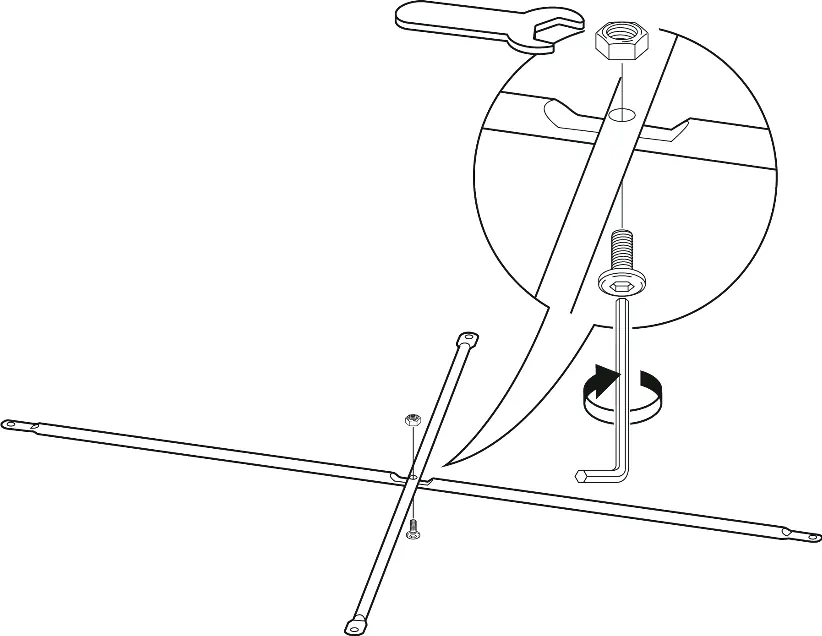
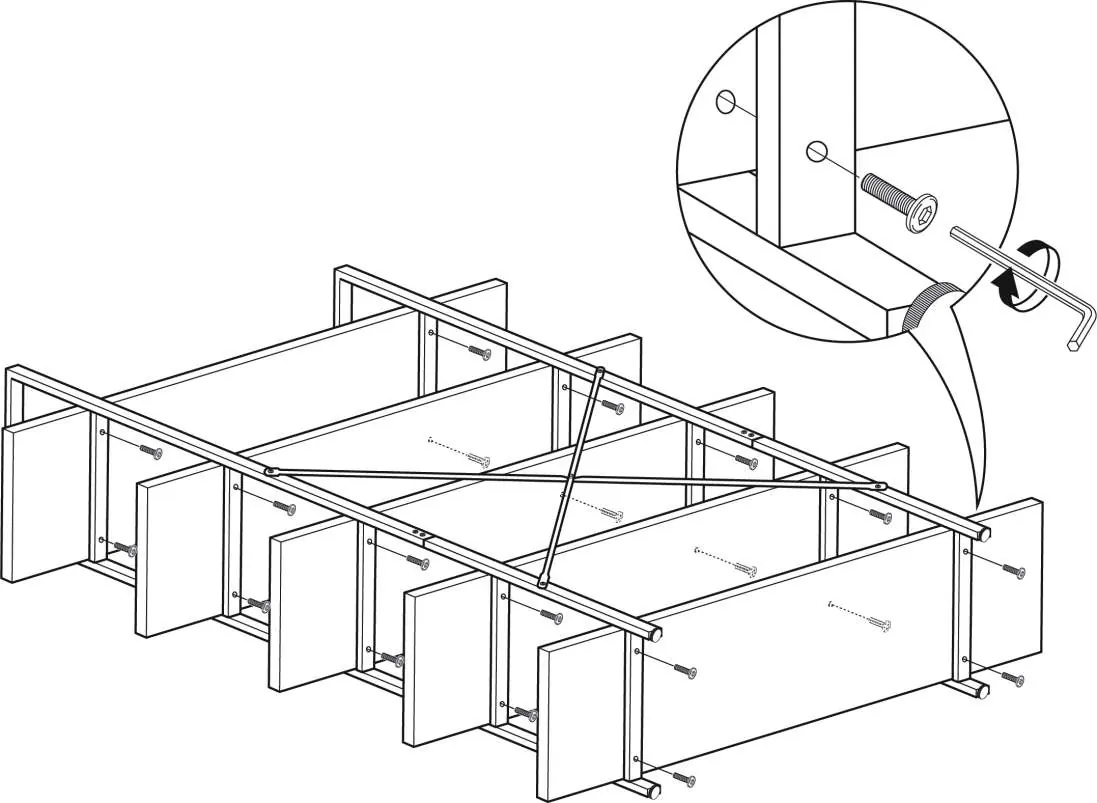
- Assemble the crossbars: Connect the two crossbars (4) into an X-shape using bolt (B) and nut (D).
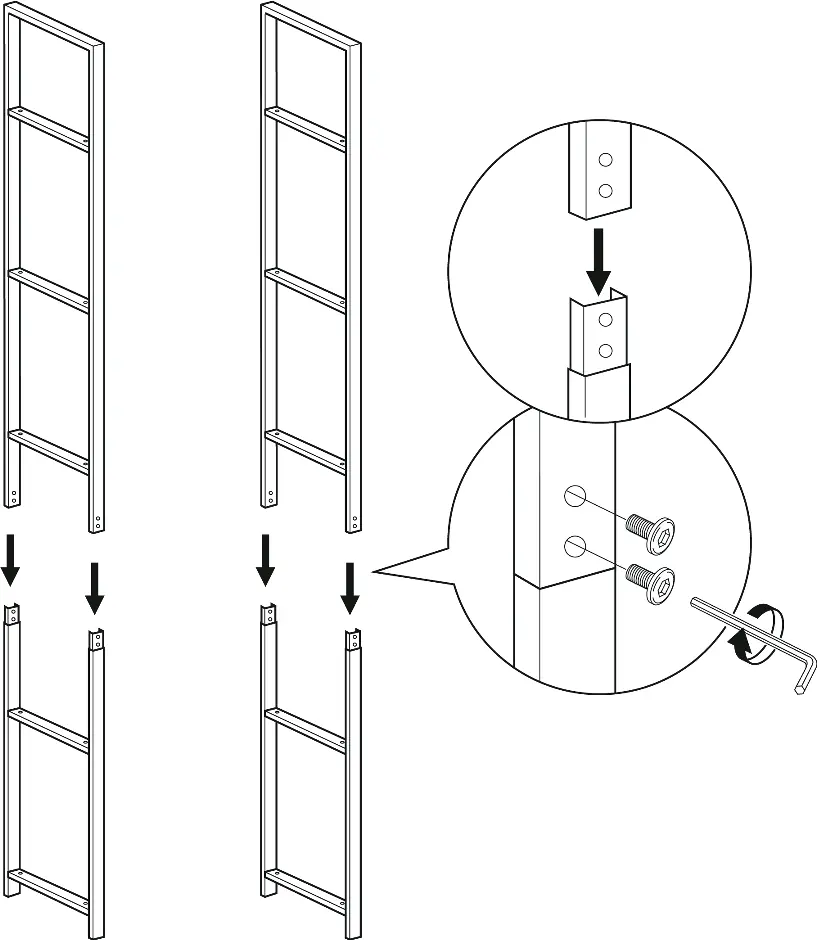
- Assemble leg frames: Connect the upper leg frames (2) and lower leg frames (3) using bolts (A).
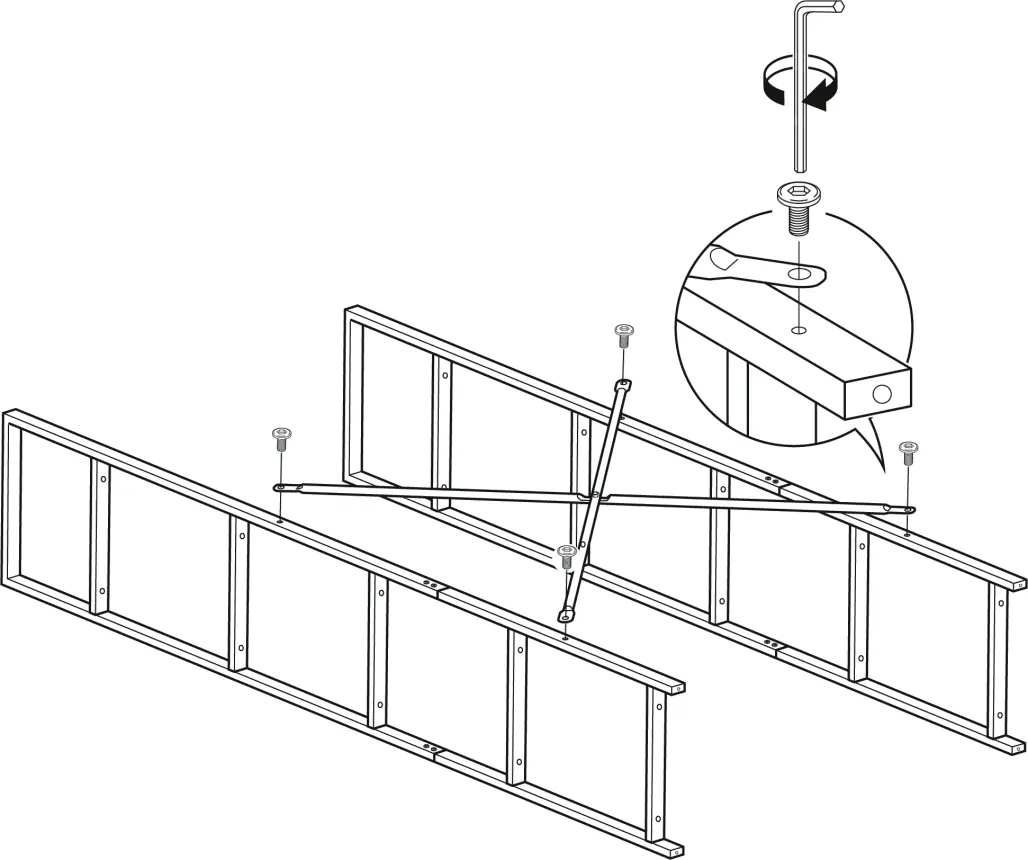
- Attach crossbars: Secure the assembled crossbars (4) across the upper and lower leg frames (2, 3) using bolts (A).
- Attach leg levelers: Screw the leg levelers (E) into the bottom of the leg frames.
- Assemble storage panels: Attach the storage panels (1) to the leg frame slots using bolts (C).
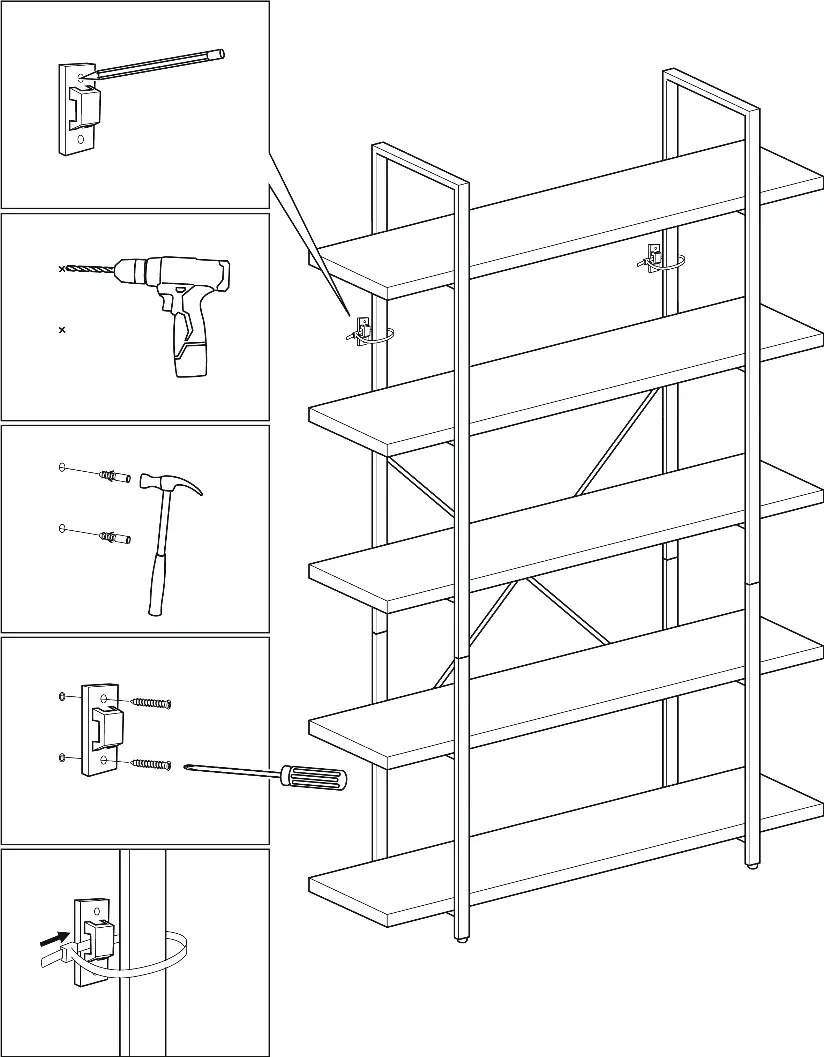
- Wall mounting: Mark the drill position on the wall, drill a hole, insert the wall anchor (F), and fix the anti-tipping strap (I) to the wall using screws (G) and bracket (H).
- Final leveling: Place the shelf on the ground and adjust the leg levelers if necessary to ensure stability.
Safety and maintenance
To ensure the longevity of your furniture and maintain safety:
- Maintenance: Tighten all bolts and screws within the first 2 weeks of assembly. Check the tightness of all bolts every 2 months and tighten if necessary.
- Cleaning: Clean the surface of the MDF with a lightly dampened cloth. A small amount of mild soap may be used if necessary. Dry the surface immediately after cleaning.
- Warnings: Do not use bleach or alcohol to clean the surface. Do not apply wood treatment to MDF parts. Keep small components, plastic bags, and packaging film away from children and pets to avoid choking or suffocation hazards. Do not climb or step on the product.
Manufacturer information
Belleze Furniture
Practical help
Common problems
Missing parts or hardware
Contact support at 1-800-682-6376 or email [email protected] for replacements.
Furniture instability or tipping
The unit must be permanently fixed to a wall stud using the included anti-tipping device. Ensure leg levelers are adjusted correctly.
Surface damage during cleaning
Do not use bleach or alcohol. Use only a lightly dampened cloth with mild soap and dry immediately.
Before use
- Assemble on a flat surface, such as a carpet or rug, to prevent scratches.
- Ensure 2 people are available for the assembly process.
- Verify all components and hardware are present before starting.
- Hand-tighten hardware initially and be careful not to over-tighten to avoid damaging the product.
- Ensure the product is fully assembled before use.
Specs in practice
- Weight Limit
- 60 lbs maximum load per shelf.
- Assembly Time
- Approximately 30 minutes.
Images and diagrams
- The manual uses numbered codes (1-4) for structural parts and lettered codes (A-J) for hardware.
- Step 6 provides a detailed visual guide for installing the anti-tipping device into a wall stud.
Model compatibility
- Requires wall studs for the anti-tipping device installation.
- Different wall materials may require different types of wall anchors or screws; consult a local hardware store if unsure.

Manual page author
Emily Carter
User documentation editor
Prepares concise manual descriptions and highlights the most useful setup, operation, and maintenance information for readers.